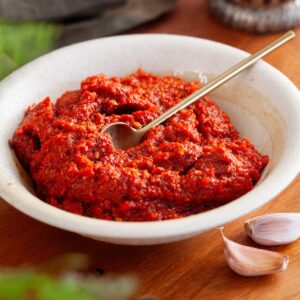
Spicy Garlic Chutney Recipe (With Red Chilies)
Bold, spicy and tangy, this multi-purpose garlic chutney with red chilies is a savory condiment perfect to serve with just about anything!
Ingredients
- ⅓ cup avocado oil divided, use any neutral oil
- 10-12 whole dried chilies
- 1.5 tablespoon whole coriander seeds
- 1 tablespoon cumin seeds
- 25 raw garlic pods from 2-3 small garlic bulbs
- 1 tablespoon kashmiri chili powder
- 3-4 tablespoon vinegar adjust quantity to taste
- 1.5 teaspoon salt adjust quantity to taste
- ¼ teaspoon sugar
Instructions
- To a heavy, skillet (I use my 10 inch cast iron wok shaped pot) add 2 tablespoon of oil and let heat up on low. We don't want the oil to be hot else the spices and chilies will burn rightaway.
- To the warm oil, add the coriander seeds, dried chilies and cumin seeds. Toast for 2-3 minutes until the chilies start to feel a bit crisp.
- Add in the garlic cloves. Continue to roast the garlic with chillies and whole spices on low heat for 7-10 minutes stirring regularly until you start seeing brown spots on the garlic.
- We don't want to brown the garlic a lot else the taste of chutney will change. Once you see few brown spots on garlic pods, take out everything in a bowl and let cool down.
- Transfer the cooled garlic and spices to a blender jar along with kashmiri chili powder, salt, sugar, vinegar and oil. Blend until smooth. Add oil as needed while grinding. Do not add water. You could grind smooth or keep in a little coarse as desired. After grinding, garlic tends to become sticky but the oil will take care of the texture of chutney so do not skimp.
- Storage - Store the garlic chutney in a clean air tight glass container and use a clean spoon to serve it. I recommend using a glass jar since plastic jars absorb the garlic smell and practically become unusable. During winter months, you can store the chutney at room temperature but refrigerate during summer months.
Notes
-
- Refer to ingredient section in blog post for substitutes and notes.
- In the homemade version, you can adjust the spices and chilies as per your liking. I suggest adding few chilies at first and then more if needed.
- Depending on how you plan to use your garlic chutney, adjust the texture during grinding. A coarser grind works well for spreading the chutney on sandwiches or using as a side dish, while a smoother & runny consistency (add extra oil while grinding) is ideal for making dips or if you are adding it over chaat.
- If you love an oily chutney, add more oil- ½ cup or so while grinding.
Tried this recipe?Let us know how it was!