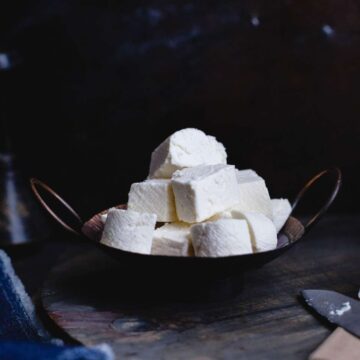
How To Make Paneer
Learn how to make soft and delicious paneer at home every single time.
Equipment
- Cheesecloth or Muslin Cloth
- 2 bowls
- 2 Large dinner plates
- Large heavy Pot
- Stirring Spoon preferably wooden
- Heavy Object like can of beans or cast iron pot to weigh down the curds
- Colander or Soup Strainer
Ingredients
- ½ gallon full fat milk
- ¼ cup heavy cream
- ¼ cup vinegar or lemon juice or sour curd
Instructions
Prep
- Line the strainer with double layer of cheesecloth/muslin. Set it over a large bowl to catch the whey such that there is gap between the bottom of strainer and the bowl. Keep rubber bands or string nearby. I recommend setting this up near your sink so that once you have strained the curds you can hang the cheesecloth on the tap.
Boil Milk & Make Curds
- Rinse the pot you will be boiling milk in with water. Without wiping, add milk to the pot. Set on a low medium stove and let the milk warm up for about 5-6 minutes. Once the milk is warm, add the heavy cream.
- Bring the whole mixture to a rolling boil. This will take 12-15 minutes on medium heat, you will need to intermittently stir the mixture to avoid formation of skin. Keep a close eye.
- Once the milk has boiled, switch off the stove. Wait for 2 minutes. Add ¼ cup of vinegar (or lemon or sour curd) to the boiled milk.Stir gently. Immediately you will see that the milk will starts to coagulate.
- It will take 40-45 seconds or so for you to start seeing greenish liquid separating (this is whey). This green liquid will be clear, if it's still whitish, you might need to add more vinegar( 1-2 teaspoon). Add 1 teaspoon at a time till you see clear green liquid. Tip:- If for some reason you dont see a green whey, switch on the stove and help the milk curdle.
- Once the milk has curdled completely, carefully lift the pot and pour the curdled milk over the strainer lined with cheesecloth. The whey will collect in the bowl.
- Carefully gather the ends of the cheesecloth and fasten with the help of rubber tie/ kitchen string. The whey will continue to strain.
- You dont need to wash the curds if you are using vinegar or sour curd. If you used lemme juice wash the tied curds under running water a few times.
- Hang the tied curds for 5 minutes so that the liquid drains away. Stop as soon as the water stops dripping in a continuous string. Just an idea :- You can set a bowl in your kitchen sink and hand from the kitchen faucet.
Weigh Down the Curds to Make Paneer block
- Place the cheesecloth on a plate and keep another plate on top of it to flatten down to a block. Next keep a heavy weight on top of it. I place a few can of beans in my cast iron skillet and use it to weigh down. Keep the curds weighed down for 30 minutes at room temperature.
- After 30-40 minutes the paneer will be set. There will be some whey in the plate from weighing down. Collect it if you wish. See posts on ideas how to use it.
- Once weighed down, place the paneer clock still wrapped in cheesecloth in the fridge for an hour. I find it much better to wait for 4-6 hours before cutting it.
- Wrap the paneer block and using a sharp knife cut as desired.
- Store in the fridge for 3-4 days. Use as needed.
Notes
- Milk :- Use full fat milk. You can use any high quality milk. I usually go for organic milk. Paneer is all about fat content in the milk. I bump the milk with some heavy cream for a softer paneer but its optional to add cream.
- Temperature :- In the entire process of making paneer, the temperature is very important. Adding the curdling agent when the milk is boiling or super hot will make a rubbery paneer. Please follow the instructions in recipe card.
- Do not let too much water drain from the curdled milk once you have tied it up in the cheese cloth else paneer will be dry and the curds will never pull together to form a block.
- It is better to cut paneer when the block is cold. Use a sharp knife.
- I recommend storing the paneer block in little bit of water (like we store fresh mozzarella) in the refrigerator. Cut out pieces as you need. However if you are freezing it, don't freeze in water.
- Add some ground pepper to the milk for black pepper flavored paneer.
- You can also add ½ teaspoon turmeric to milk before curdling it for a yellow stained paneer to use it in savory recipes.
Nutrition
Calories: 169kcalCarbohydrates: 11gProtein: 8gFat: 10gSaturated Fat: 6gPolyunsaturated Fat: 1gMonounsaturated Fat: 2gCholesterol: 37mgSodium: 92mgPotassium: 362mgSugar: 12gVitamin A: 493IUVitamin C: 1mgCalcium: 296mgIron: 1mg
Tried this recipe?Let us know how it was!