

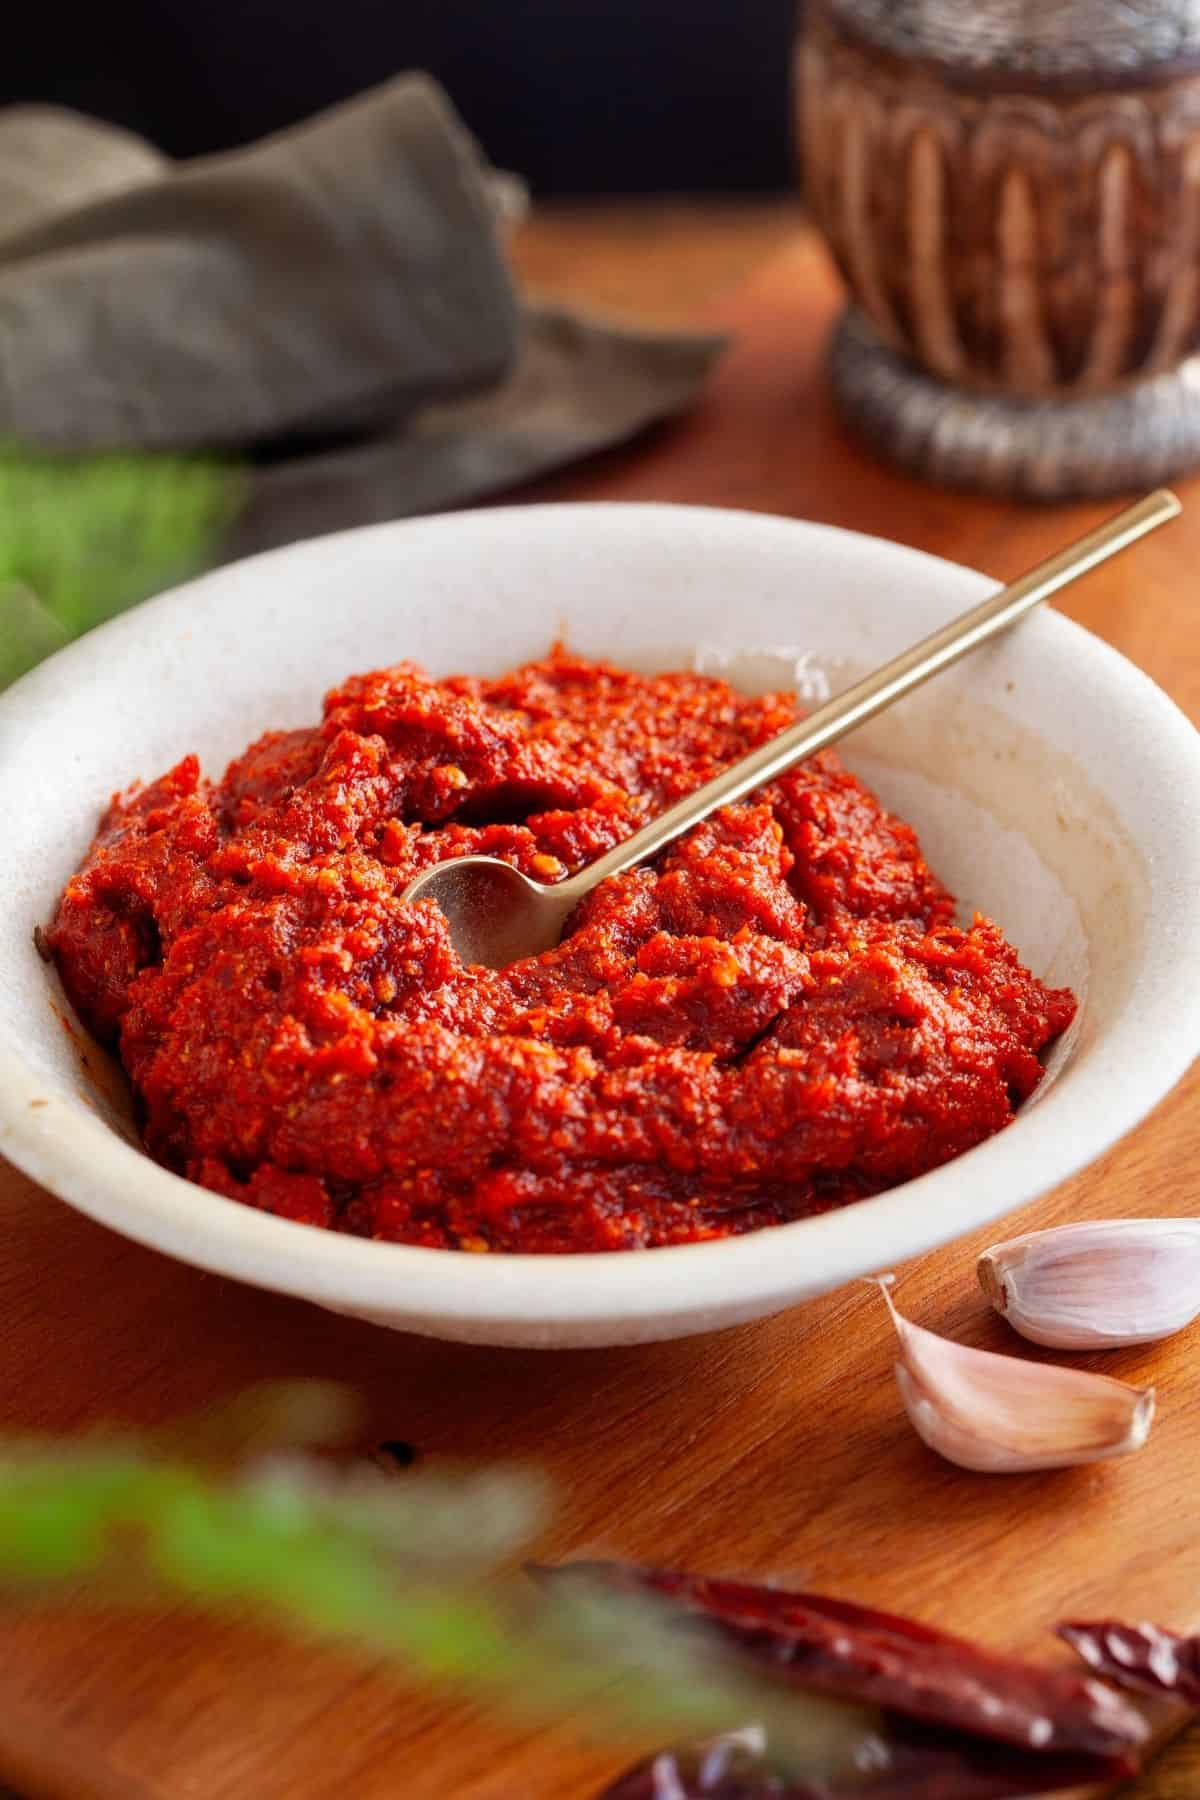
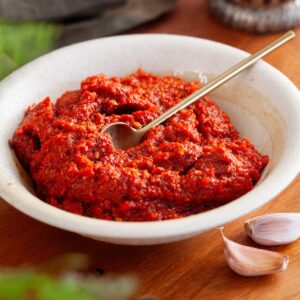
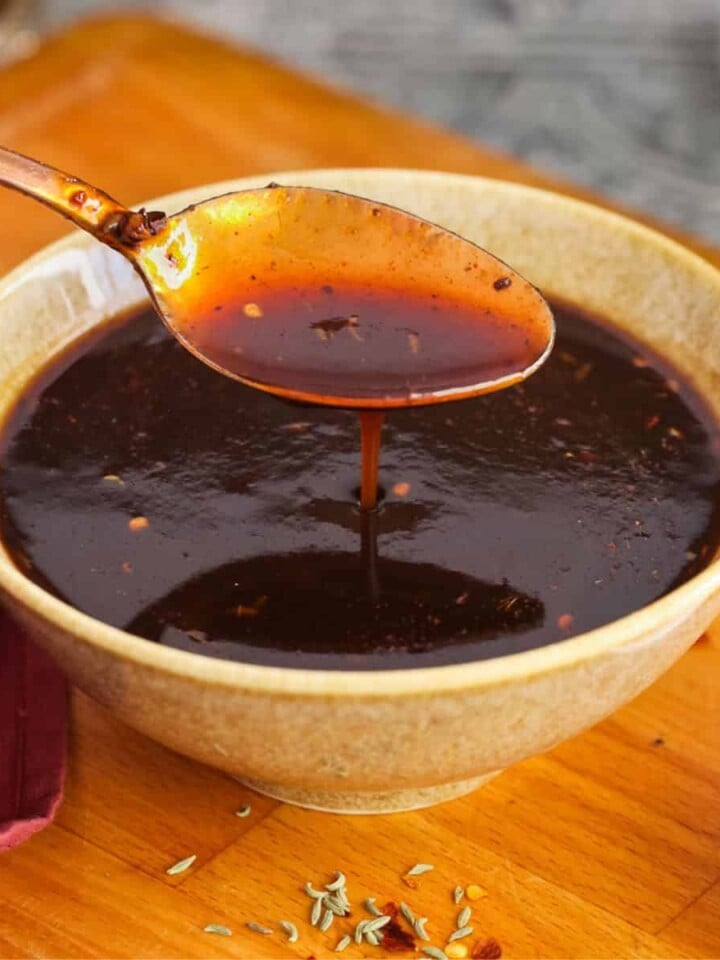
Bold, spicy and tangy, this multi-purpose garlic chutney with red chilies is perfect side with not just indian meals, but just about anything! You could serve it alongside snacks, chaat and sandwiches or use it to add punch to your marinades and sauces. It keeps fresh in the fridge for weeks and is really simple to make!
Garlic lovers, unite! Who can resist the pungent punch of fresh garlic? In our house, we practically live on the stuff. Whenever I bring it home, a giant bag of peeled garlic from Costco magically disappears into a variety of garlicky delights.
First up, I always make and freeze a batch of homemade garlic paste - a staple for everyday cooking. Then, the leftover cloves get transformed into something even more special - either of a jar of spicy garlic achaar (pickle) or this vibrant garlic chutney.
What's Garlic Chutney
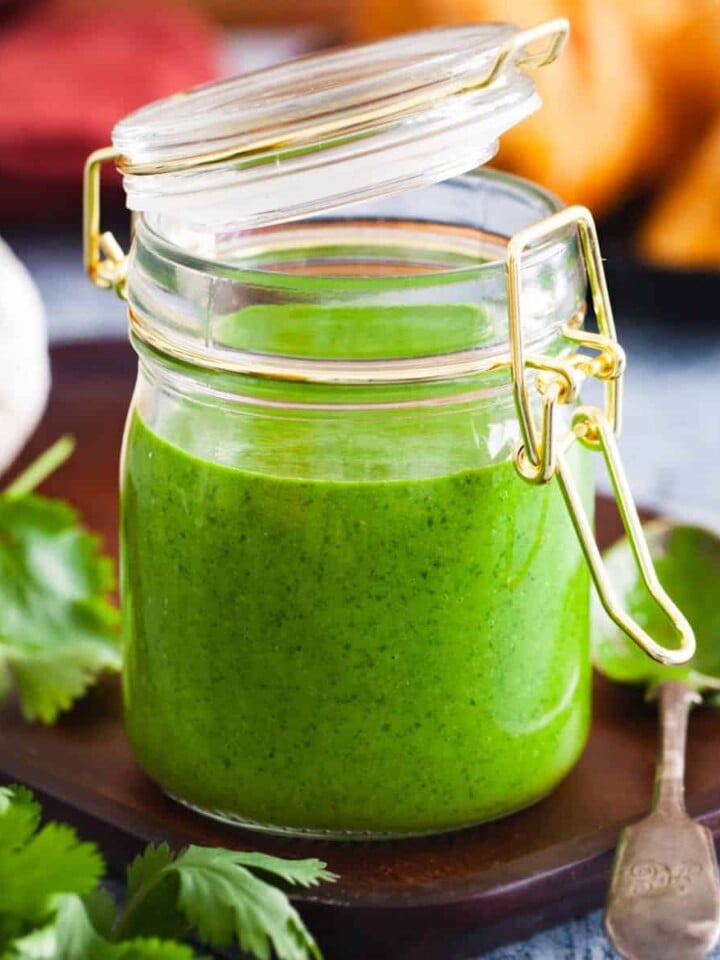
For us South Asians, chutneys and pickles are essential condiments. Indian pickles, also called achar, are whole fruits or vegetables preserved in oil, salt and spices. Chutneys, on the other hand, are made by either slow-cooking or grinding fruits or vegetables into a coarse or smooth paste.I almost always have a jar of sweet tamarind chutney and green chutney in my fridge.
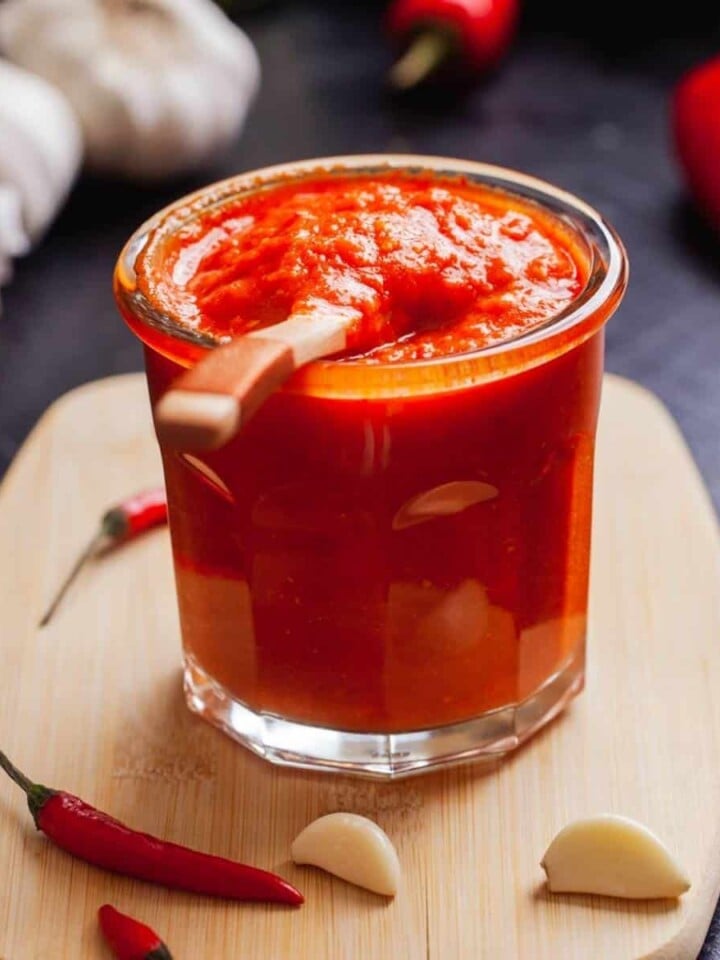
Also known as lahsun ki chutney, garlic chutney is a savory condiment made with garlic, vinegar, oil and spices. Across India, you'll find countless variations on this flavor bomb. There's the fiery, saucy red garlic chutney that adds a kick to chaat, the zesty rajasthani lasun chutney served alongside meals, or even a dry version that takes mumbai street food to the next level!
My Recipe
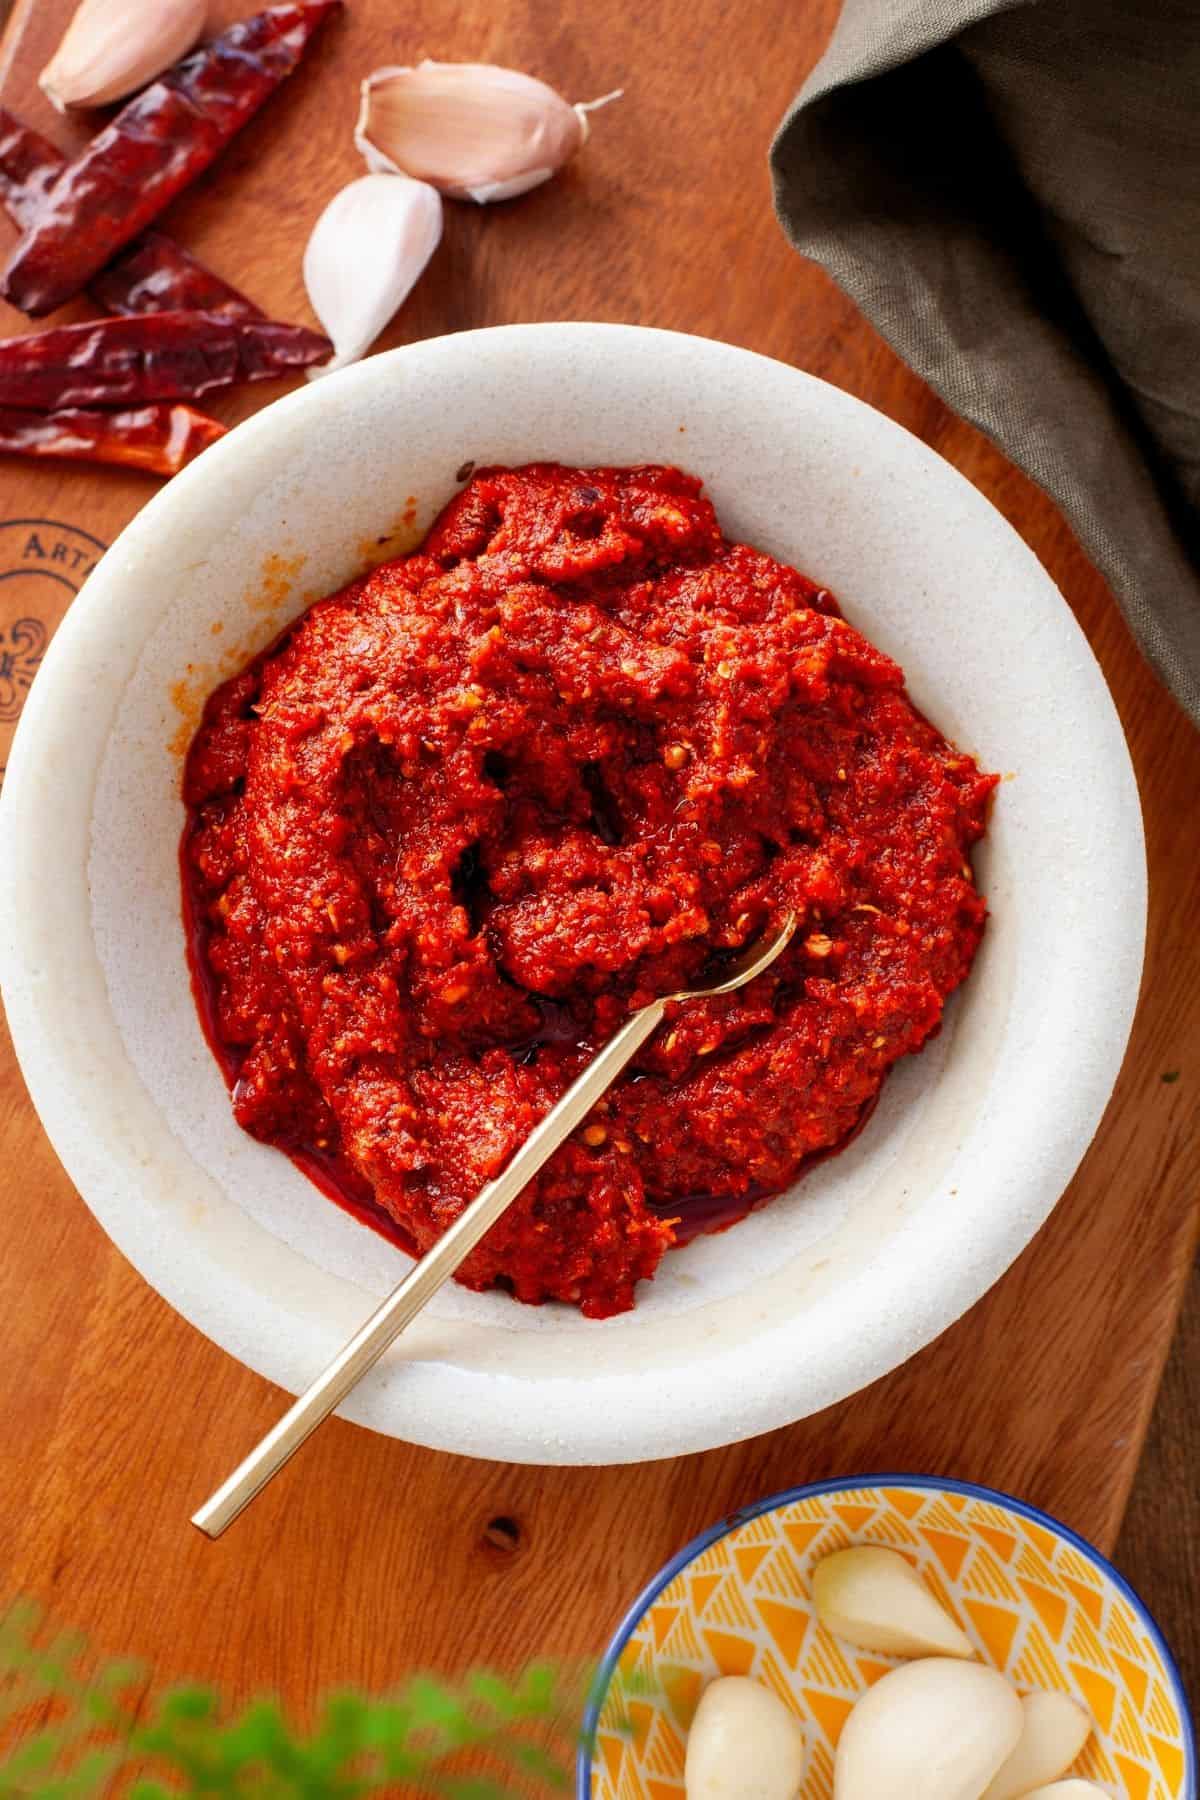
My garlic chutney recipe is pretty easy to make. It is similar to rajasthani style chutney. We'll be toasting a vibrant mix of dried red chilies, aromatic whole spices, and lots of garlic cloves. This fragrant blend gets ground with the smoky depth of Kashmiri red chili powder, a tangy touch of vinegar, and a sprinkle of sugar(don't worry its not a sweet chutney).
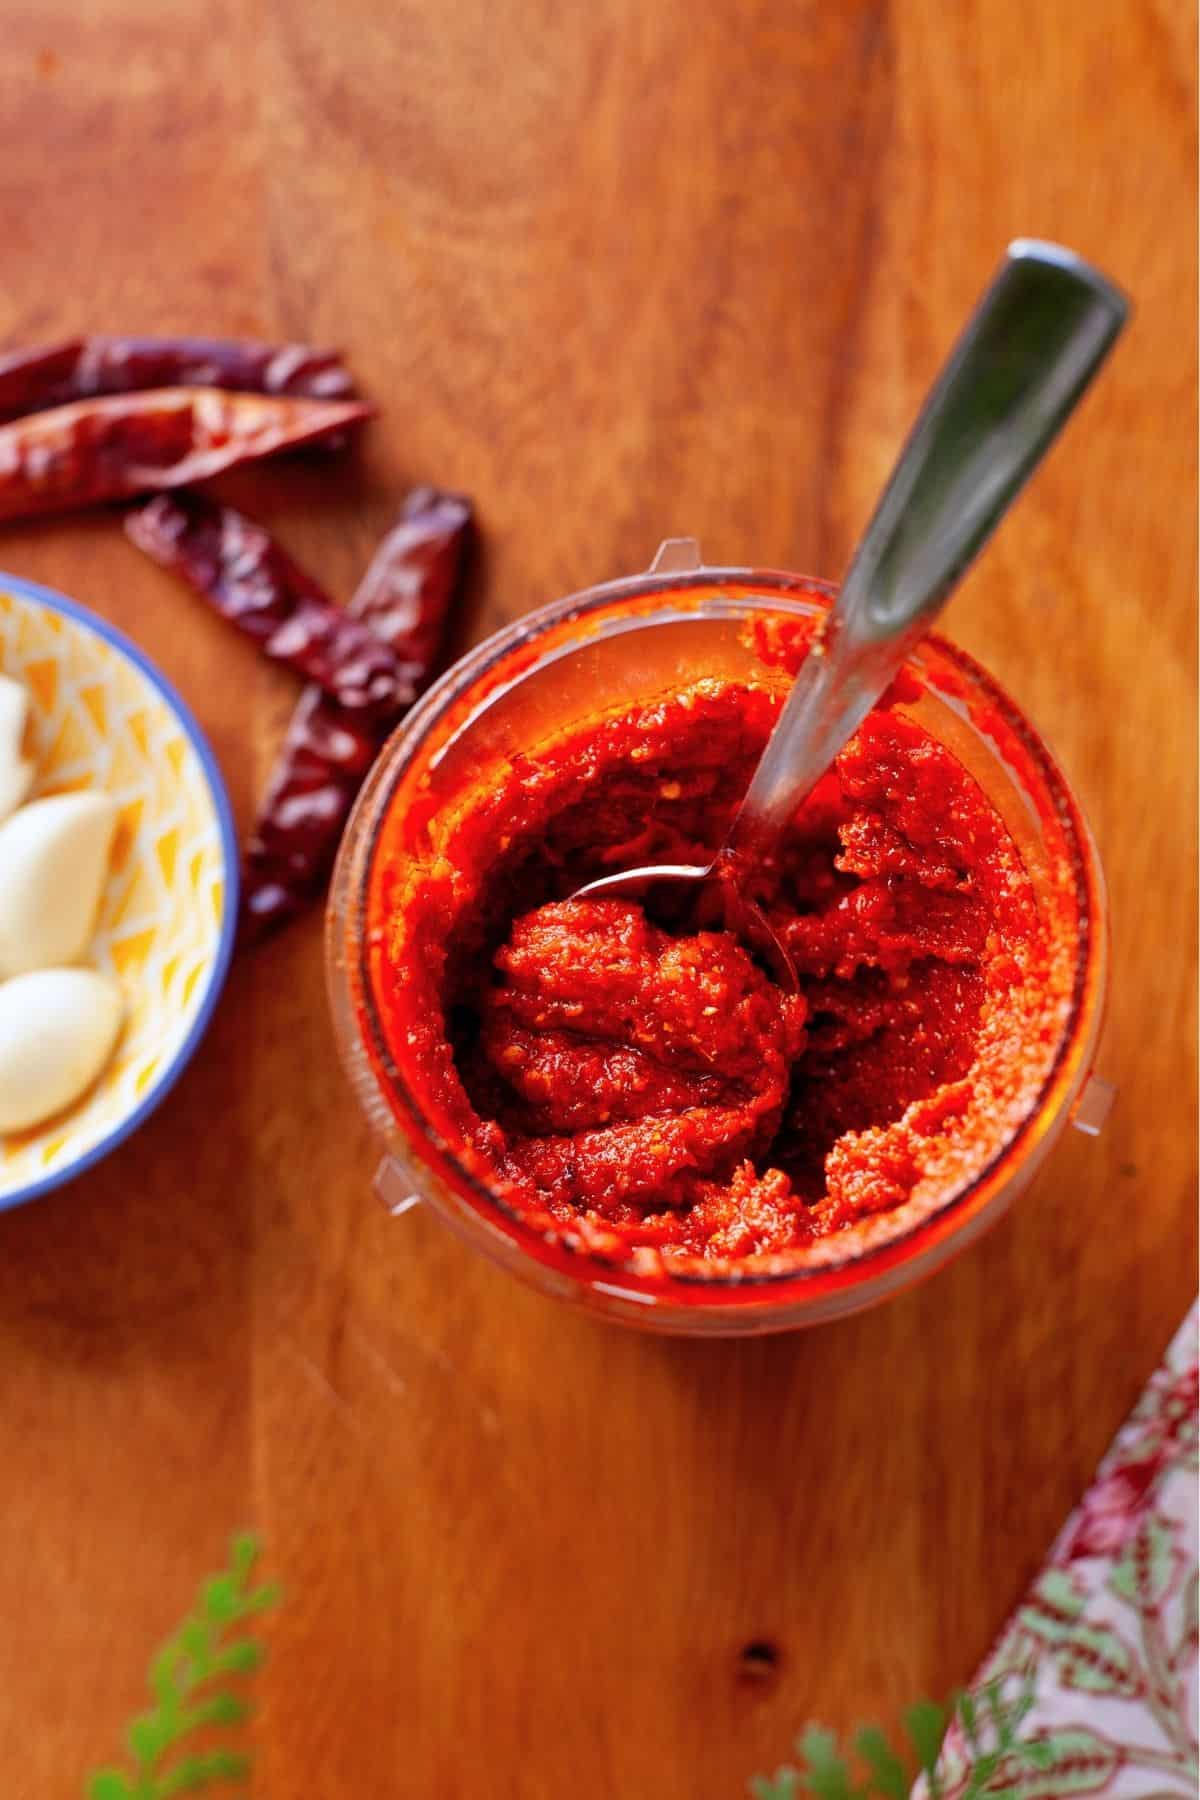
Here's the secret weapon: - A drizzle of oil during grinding. Not only does it help during grinding to achieve a smooth consistency, but it also acts as a natural preservative (versus water), keeping your chutney fresh for a whopping 3-4 weeks in the fridge. So, make a big batch and enjoy that garlicky goodness for weeks to come!
Ingredients You will Need
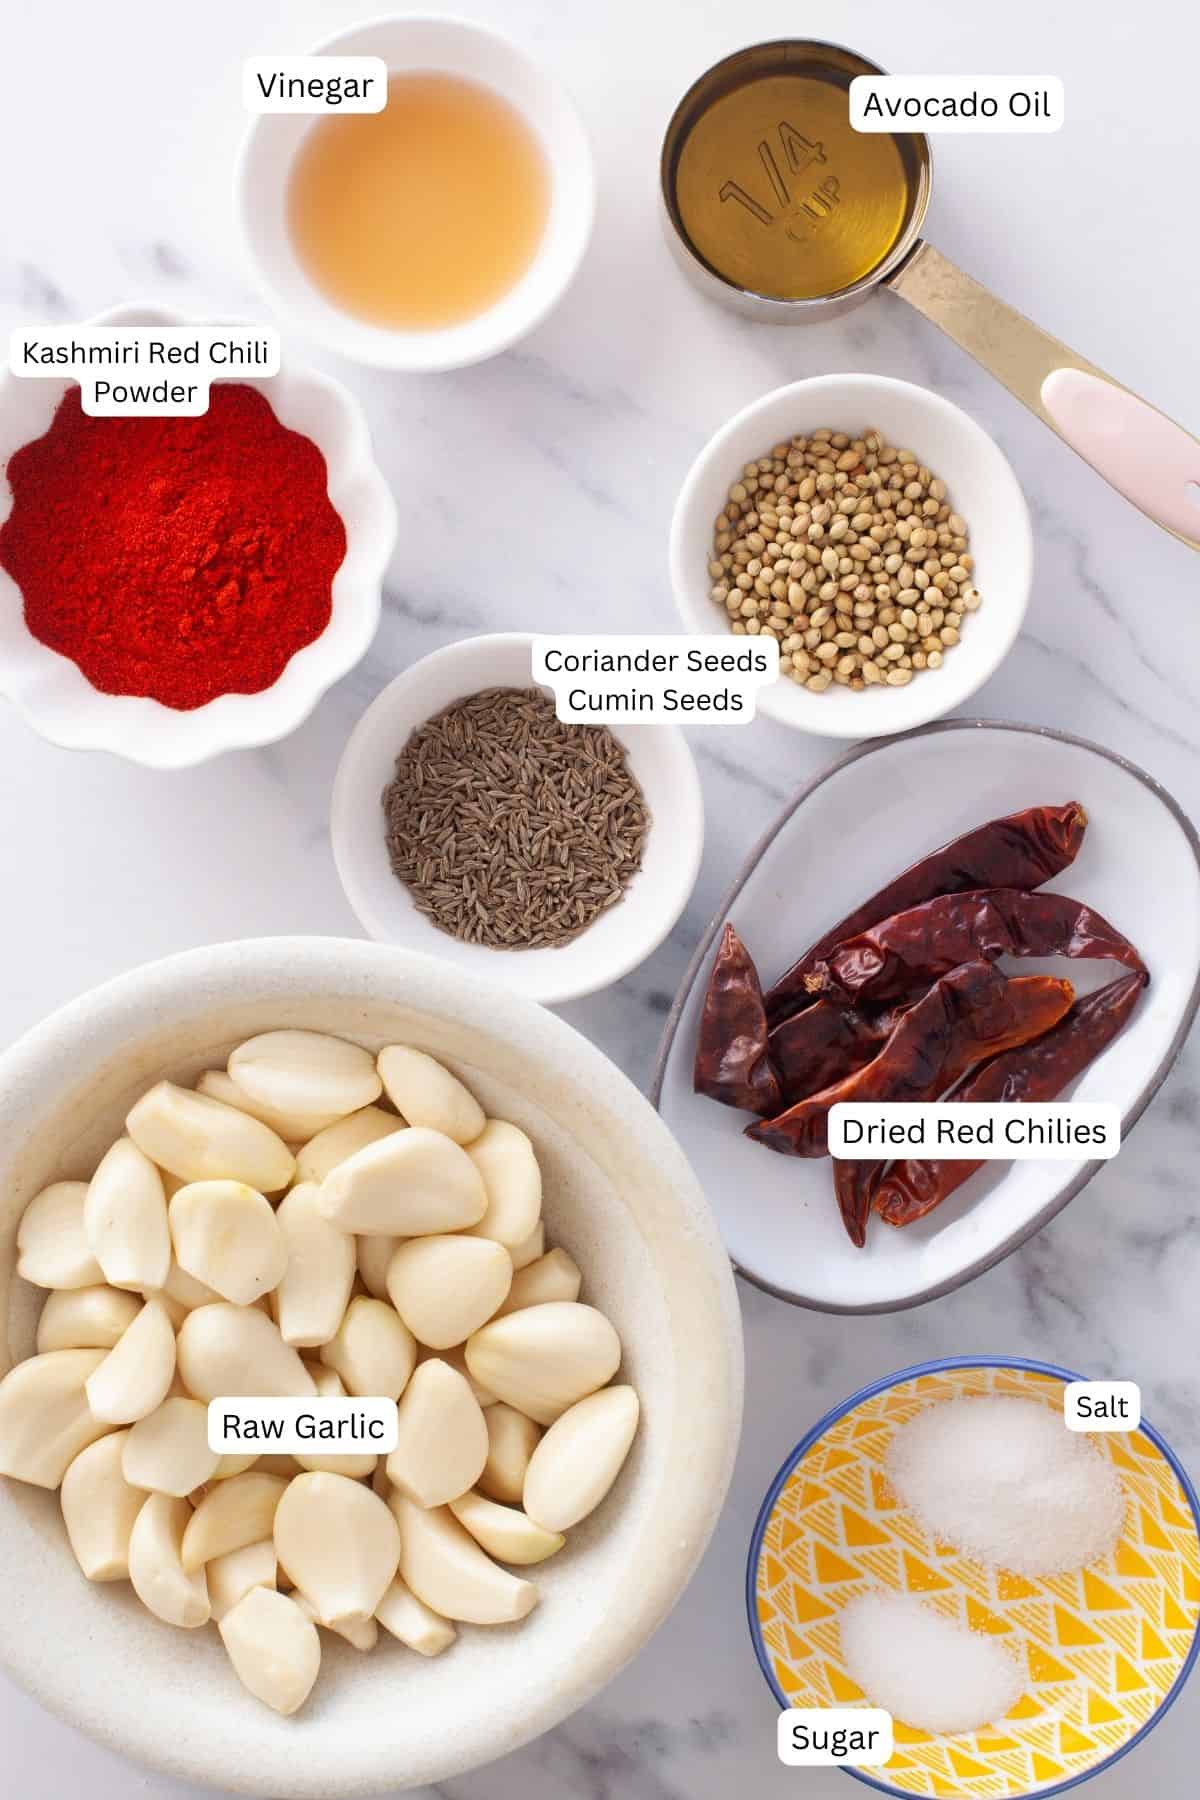
- Fresh Raw Garlic - The hero ingredient! You could use good quality pre peeled garlic from the store or peel garlic bulbs at home. Make sure that the peeled garlic pods have smooth skins and they aren't sprouting- that would change the taste of chutney.
- Dried Kashmiri Chilies - Whole dried kashmiri chilies seeds and all! Chilies ring in the heat in the chutney. You could de seed half the quantity of dried chilies if you wish. To do so, simply break the dried cap of the chili and shake it a few times, the dried seeds will fall out.
- Kashmiri Chili Powder - Combined with warm oil, it gives a beautiful red hue to the garlic chutney when blended.
- Apple Cider Vinegar - Gives the tang of chutney and also helps increase shelf life. You wont smell the vinegar in chutney. Use lemon juice or regular vinegar instead.
- Avocado Oil - Or any neutral oil will work. Avoid using any fruity oil because you will be kind of wasting it since garlic will overpower the taste.
- Sugar - Helps balance the savory flavors in chutney. You could use jaggery instead.
Instructions
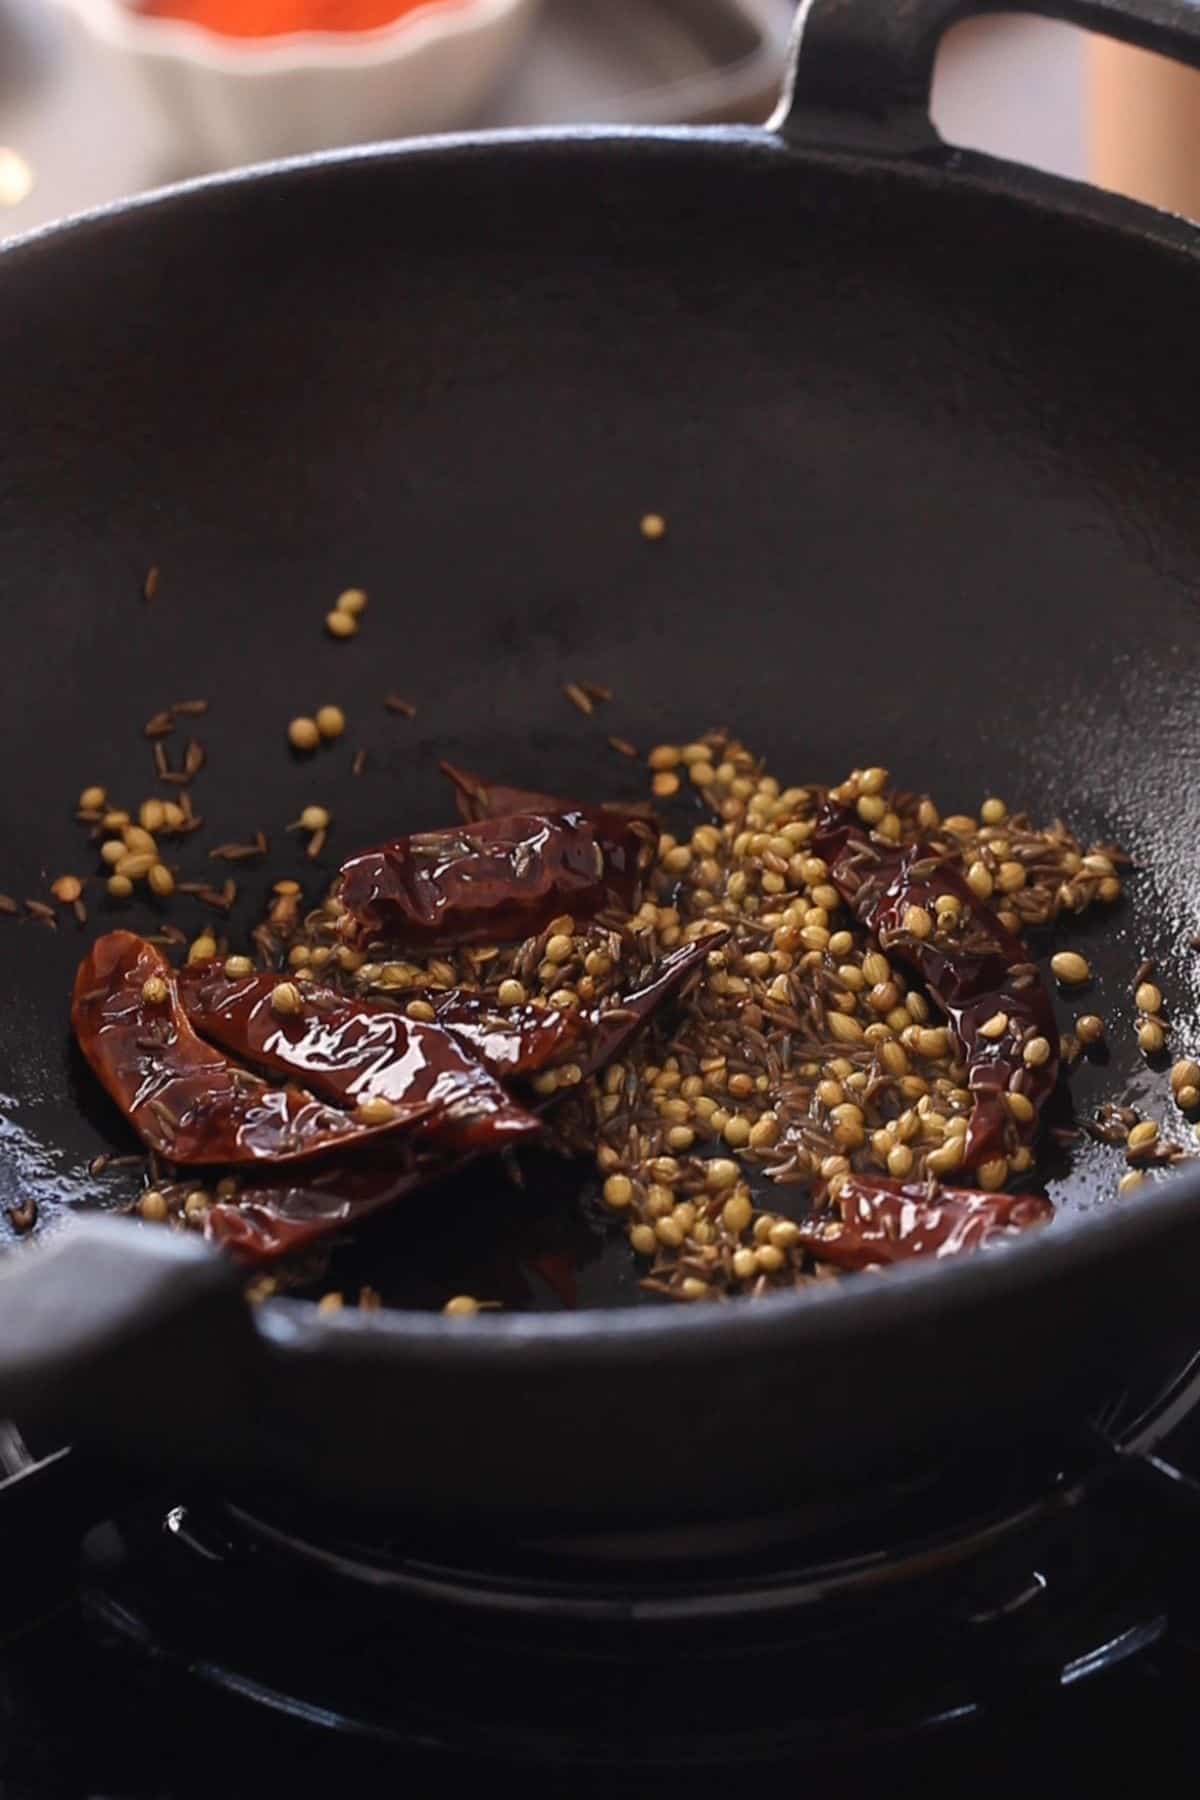
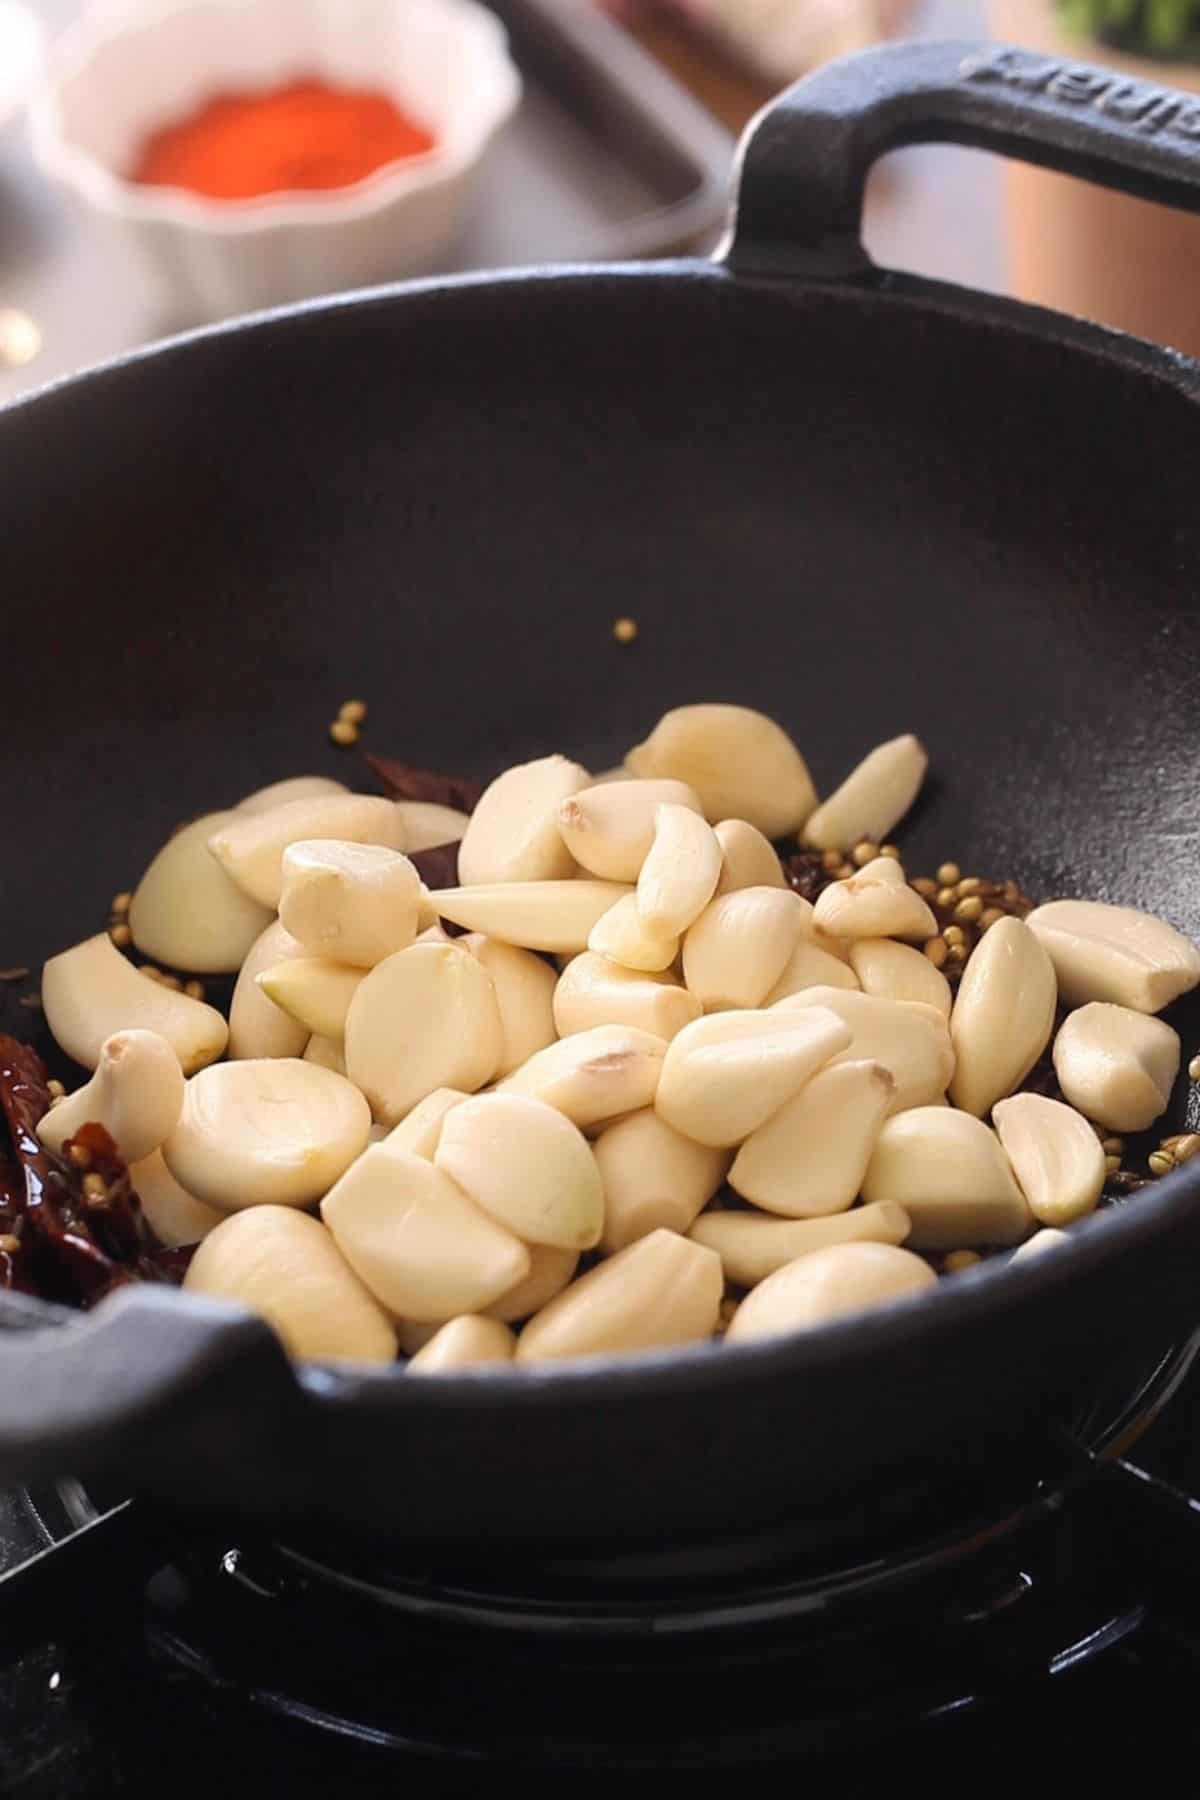
- To a heavy, skillet (I use my 10 inch cast iron balti pot) add 2 tablespoon of oil and let heat up on low. We don't want the oil to be hot else the spices and chilies will burn rightaway.
- To the warm oil, add the coriander seeds, dried chilies and cumin seeds. Toast for 2-3 minutes until the chilies feel a bit crisp.
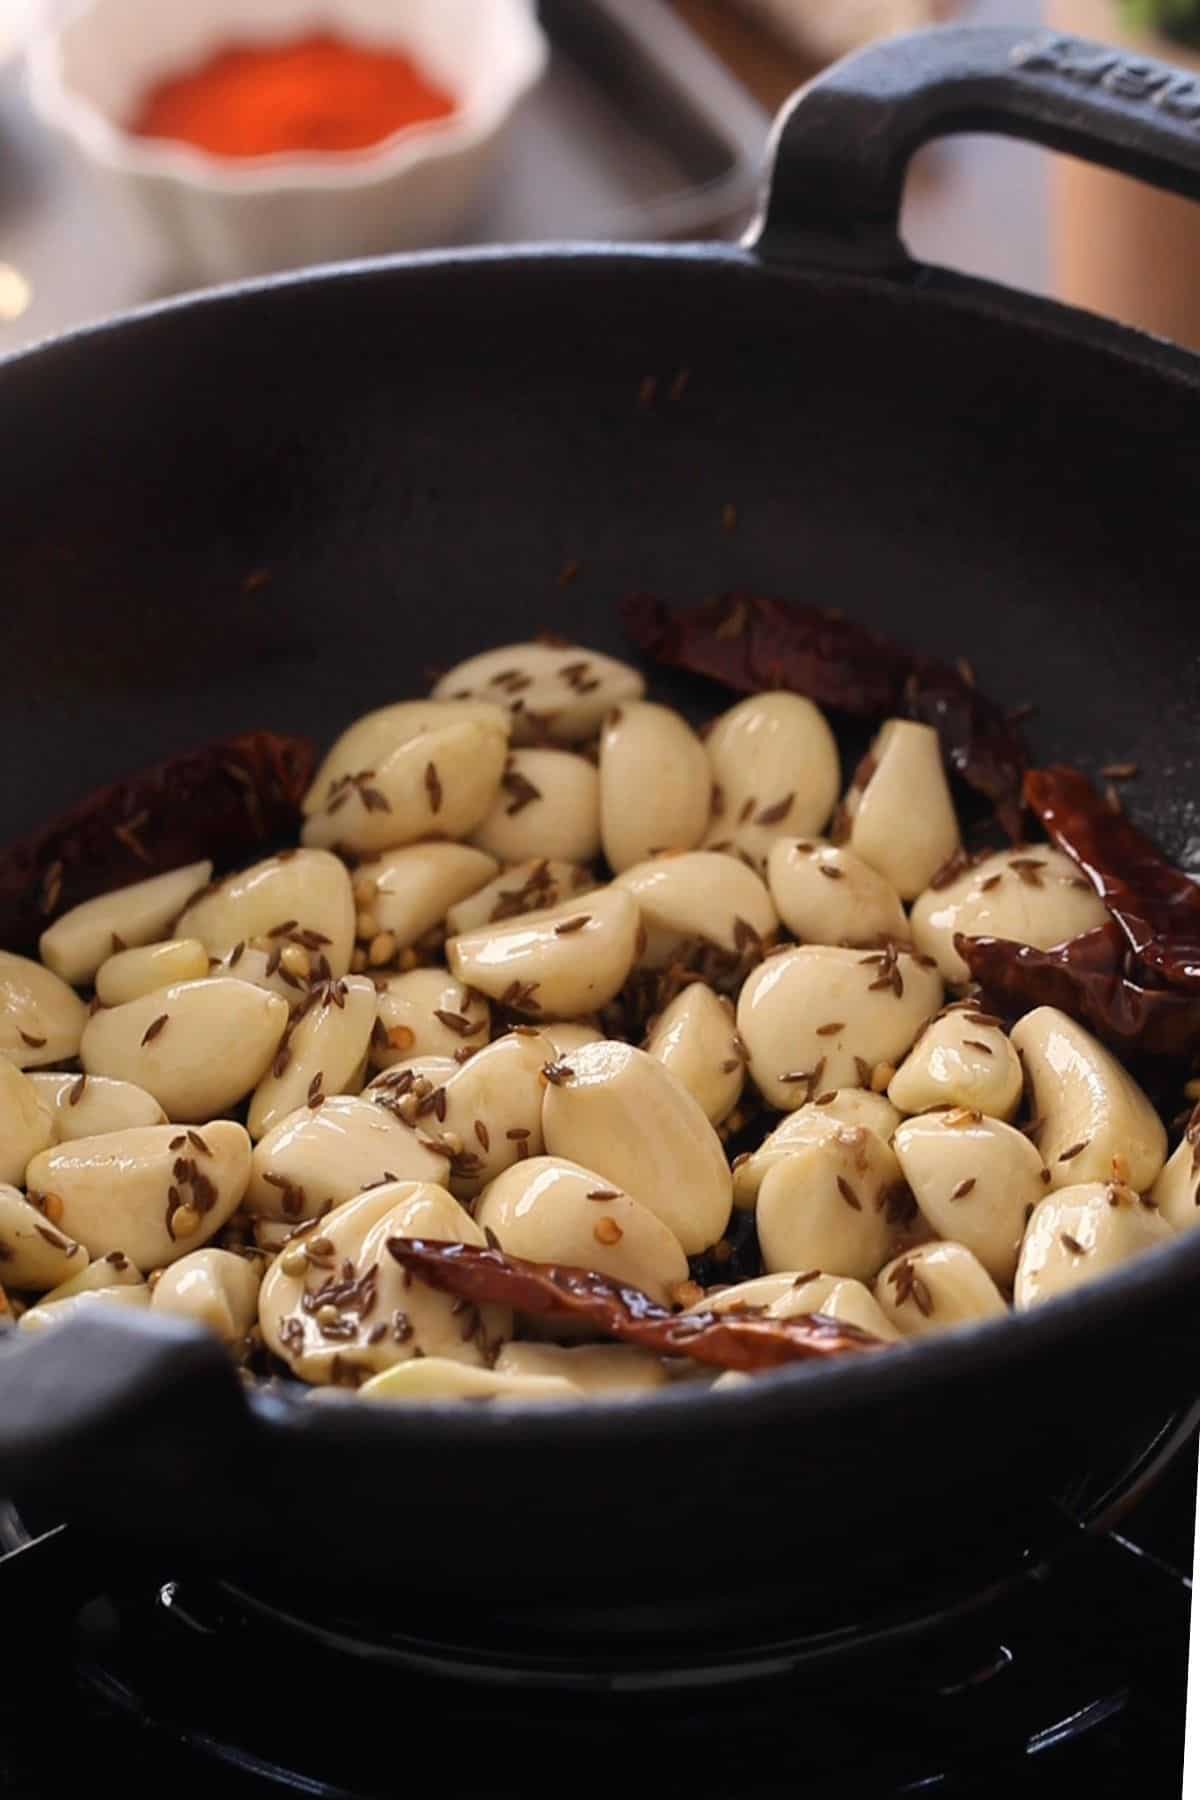
- Add in the garlic cloves. Continue to roast the garlic, chillies and whole spices on low heat for 7-10 minutes stirring regularly until you start seeing brown spots on the garlic.
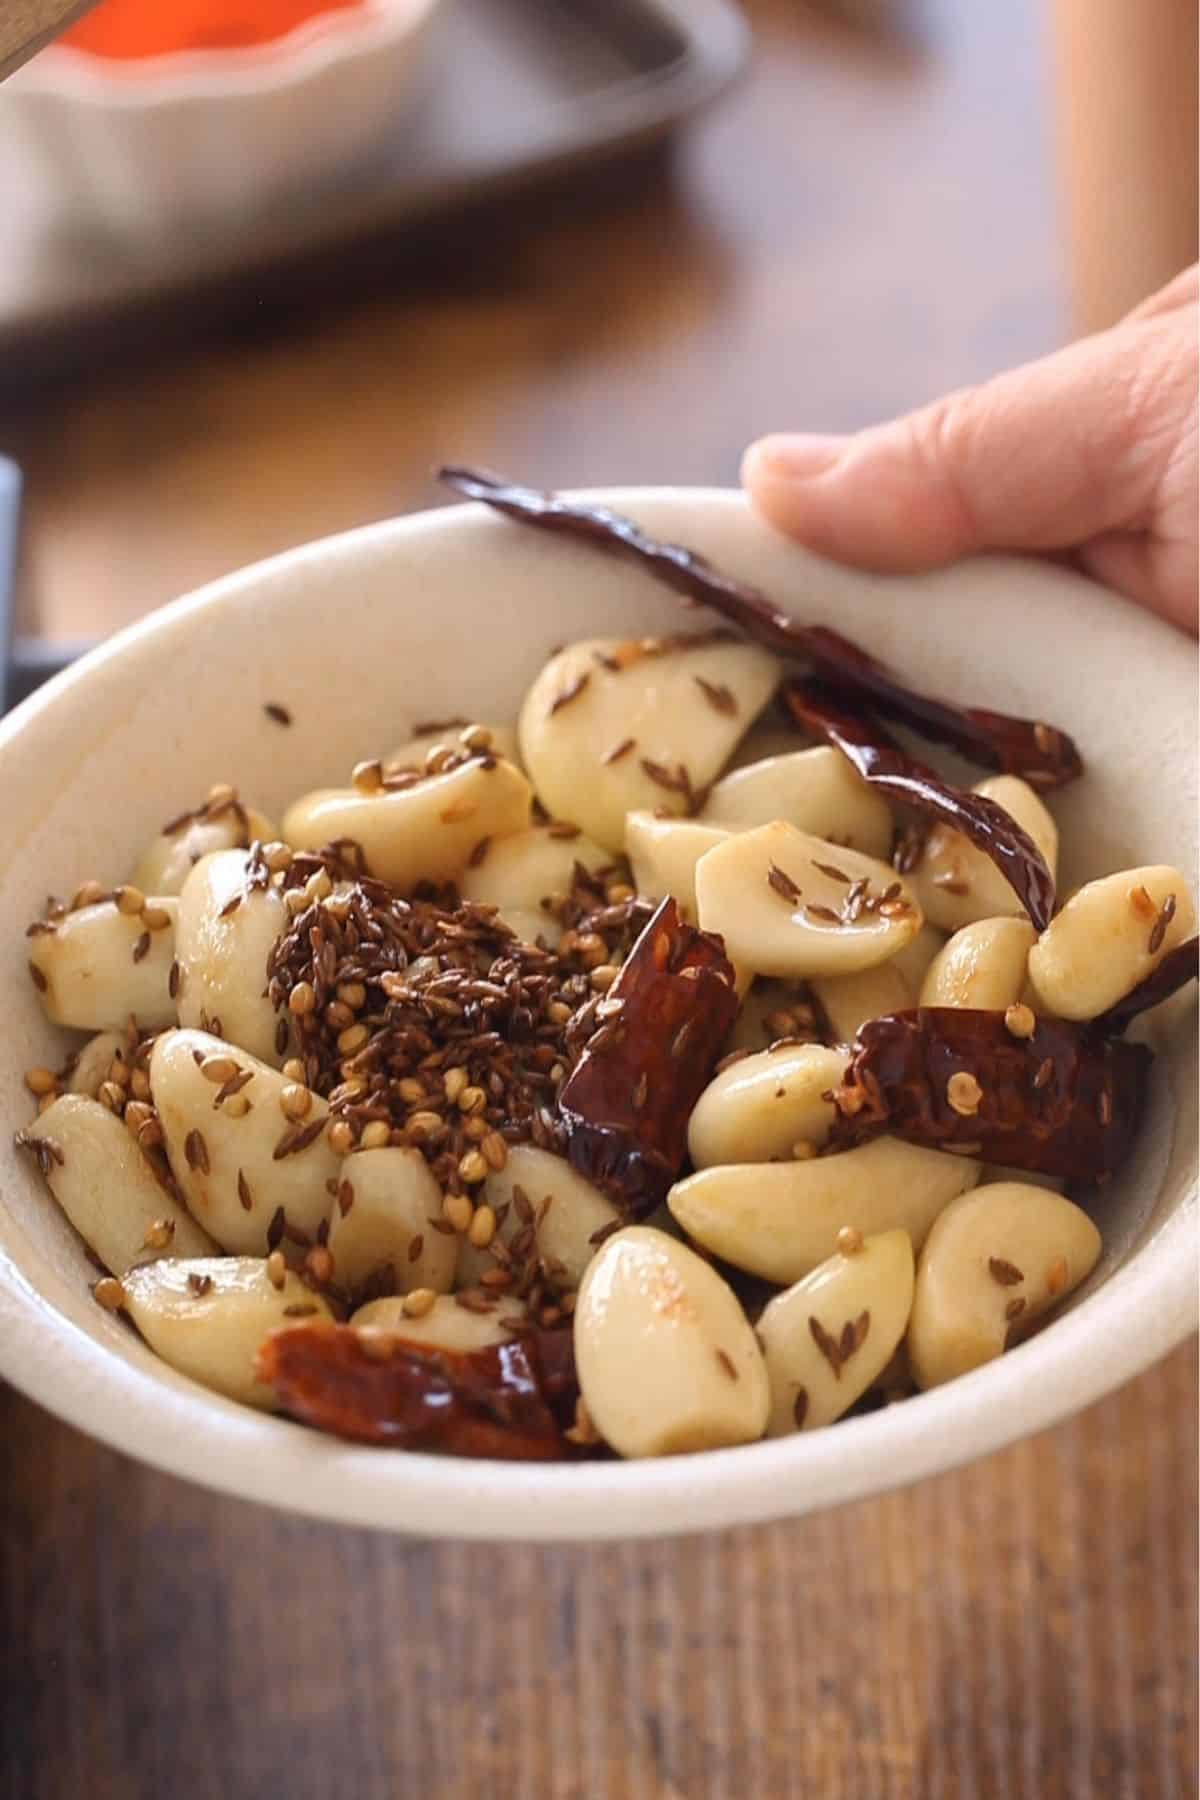
- We dont want to brown the garlic a lot else the taste of chutney will change. Once you see brown spots on few garlic, take out everything in a bowl and let cool down.
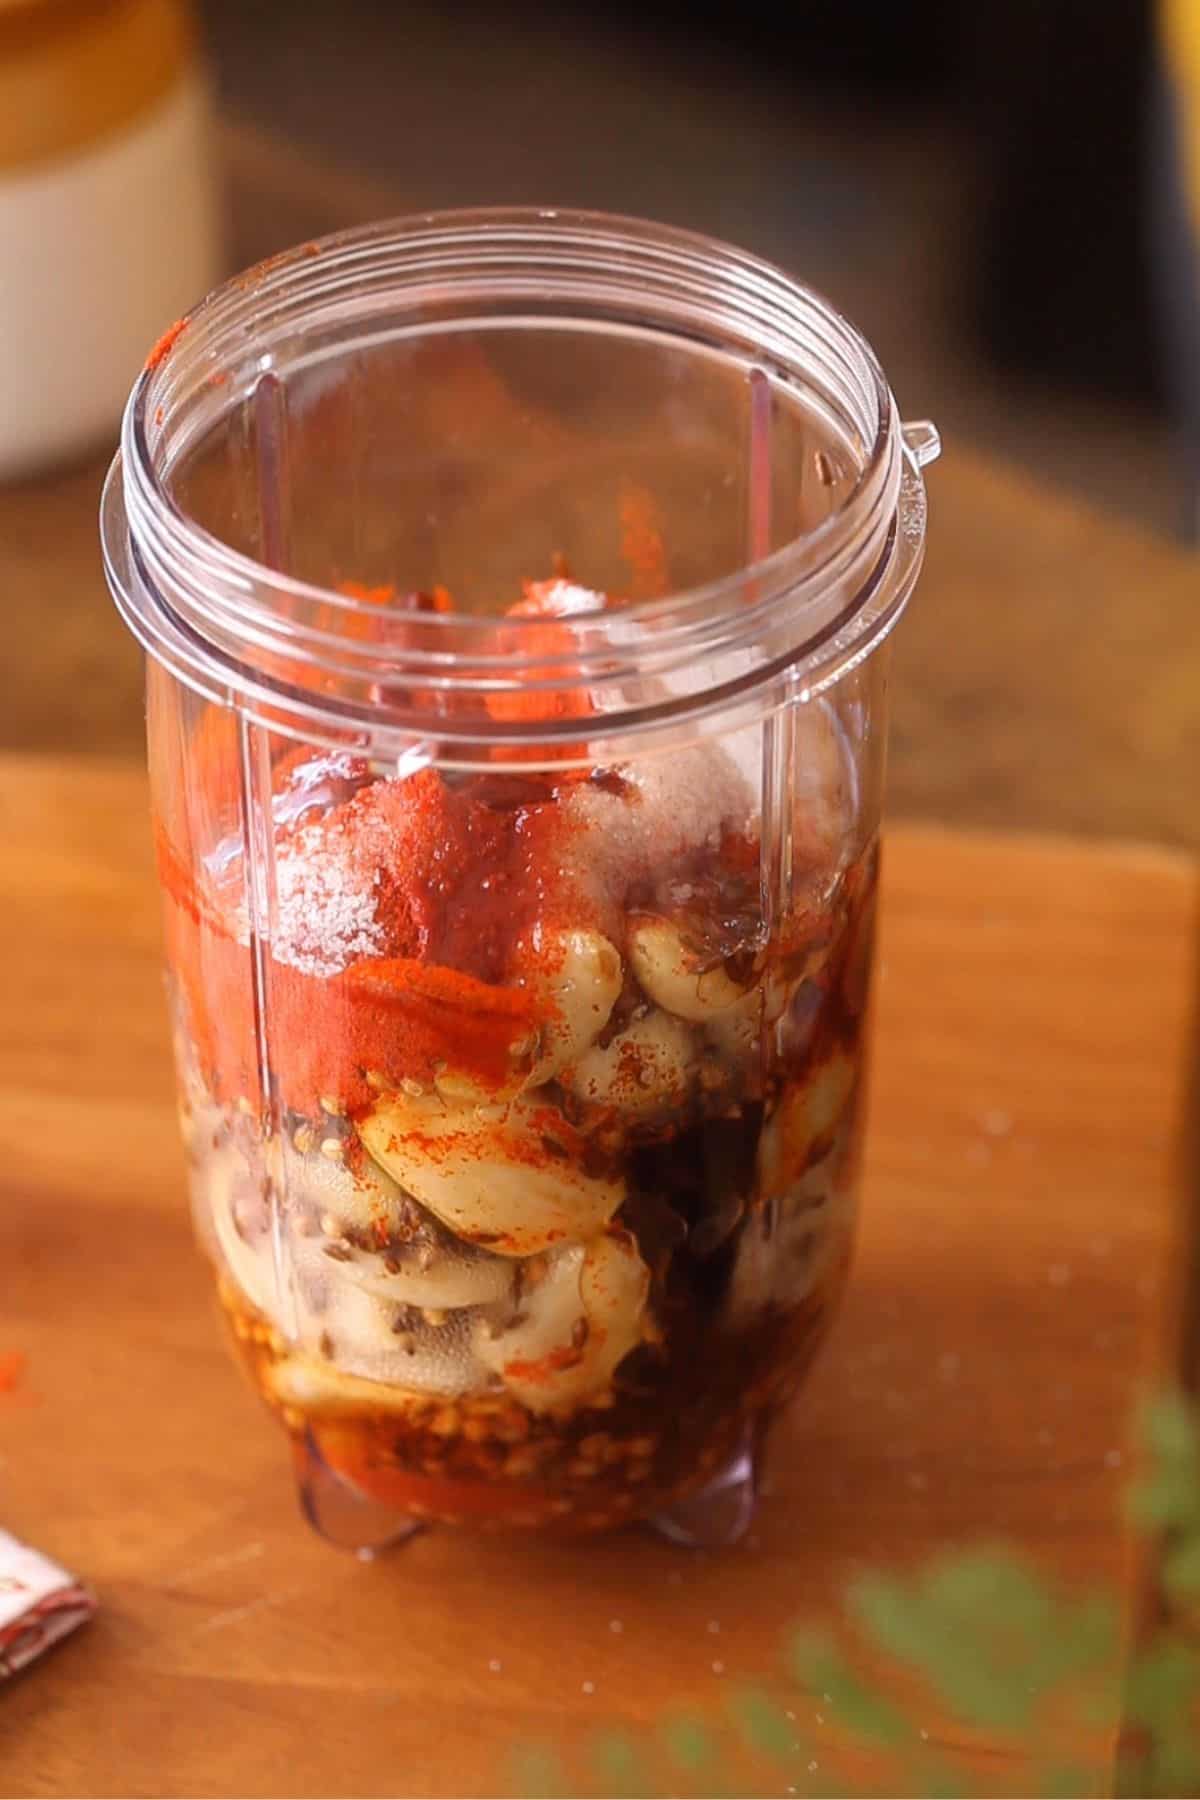
- Transfer the garlic and spices to a blender jar along with kashmiri chili powder, salt, sugar, vinegar and oil. Blend until smooth. Add oil as needed while grinding. Do not add water. You could grind smooth or keep in a little coarse as you wish. After grinding, garlic tends to become sticky but the oil will take care of the texture of chutney so do not skimp.
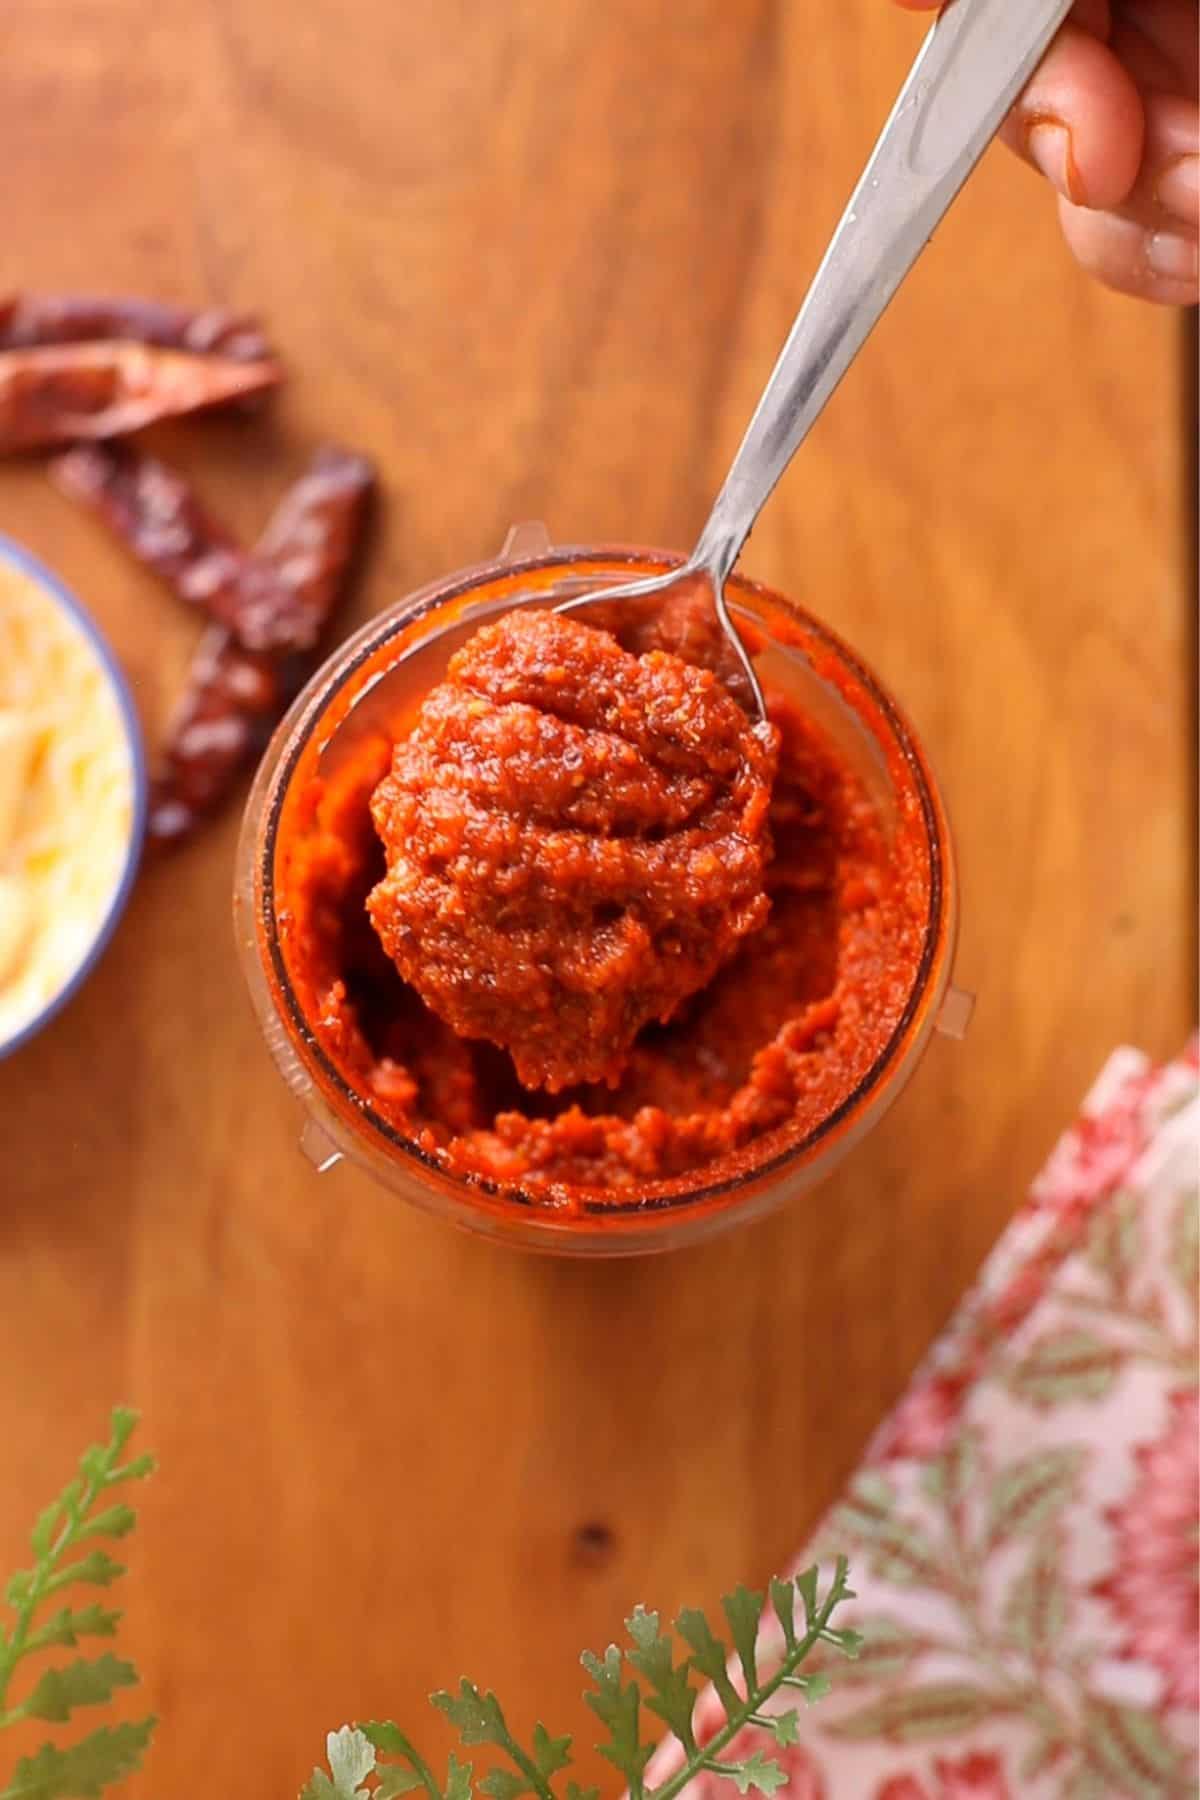
- Storage - Store the garlic chutney in a clean air tight glass container and use a clean spoon to serve it. I recommend using a glass jar since plastic jars absorb the garlic smell and practically become unusable. During winter months, you can store at room temperature but refrigerate during summer months.
Tanvi's Tips
- In the homemade version, you can adjust the spices and chilies as per your liking. I suggest adding few chilies at first and then more if needed.
- Depending on how you plan to use your garlic chutney, adjust the texture during grinding. A coarser grind works well for spreading the chutney on sandwiches or using as a side dish, while a smoother & runny consistency (add extra oil while grinding) is ideal for making dips or if you are adding it over chaat.
- If you love an oily chutney, add more oil- ½ cup or so while grinding.
Spicy Garlic Chutney Recipe (With Red Chilies)
Ingredients
- ⅓ cup avocado oil divided, use any neutral oil
- 10-12 whole dried chilies
- 1.5 tablespoon whole coriander seeds
- 1 tablespoon cumin seeds
- 25 raw garlic pods from 2-3 small garlic bulbs
- 1 tablespoon kashmiri chili powder
- 3-4 tablespoon vinegar adjust quantity to taste
- 1.5 teaspoon salt adjust quantity to taste
- ¼ teaspoon sugar
Instructions
- To a heavy, skillet (I use my 10 inch cast iron wok shaped pot) add 2 tablespoon of oil and let heat up on low. We don't want the oil to be hot else the spices and chilies will burn rightaway.
- To the warm oil, add the coriander seeds, dried chilies and cumin seeds. Toast for 2-3 minutes until the chilies start to feel a bit crisp.
- Add in the garlic cloves. Continue to roast the garlic with chillies and whole spices on low heat for 7-10 minutes stirring regularly until you start seeing brown spots on the garlic.
- We don't want to brown the garlic a lot else the taste of chutney will change. Once you see few brown spots on garlic pods, take out everything in a bowl and let cool down.
- Transfer the cooled garlic and spices to a blender jar along with kashmiri chili powder, salt, sugar, vinegar and oil. Blend until smooth. Add oil as needed while grinding. Do not add water. You could grind smooth or keep in a little coarse as desired. After grinding, garlic tends to become sticky but the oil will take care of the texture of chutney so do not skimp.
- Storage - Store the garlic chutney in a clean air tight glass container and use a clean spoon to serve it. I recommend using a glass jar since plastic jars absorb the garlic smell and practically become unusable. During winter months, you can store the chutney at room temperature but refrigerate during summer months.
Notes
-
- Refer to ingredient section in blog post for substitutes and notes.
- In the homemade version, you can adjust the spices and chilies as per your liking. I suggest adding few chilies at first and then more if needed.
- Depending on how you plan to use your garlic chutney, adjust the texture during grinding. A coarser grind works well for spreading the chutney on sandwiches or using as a side dish, while a smoother & runny consistency (add extra oil while grinding) is ideal for making dips or if you are adding it over chaat.
- If you love an oily chutney, add more oil- ½ cup or so while grinding.
I'd Love to Hear from You!