

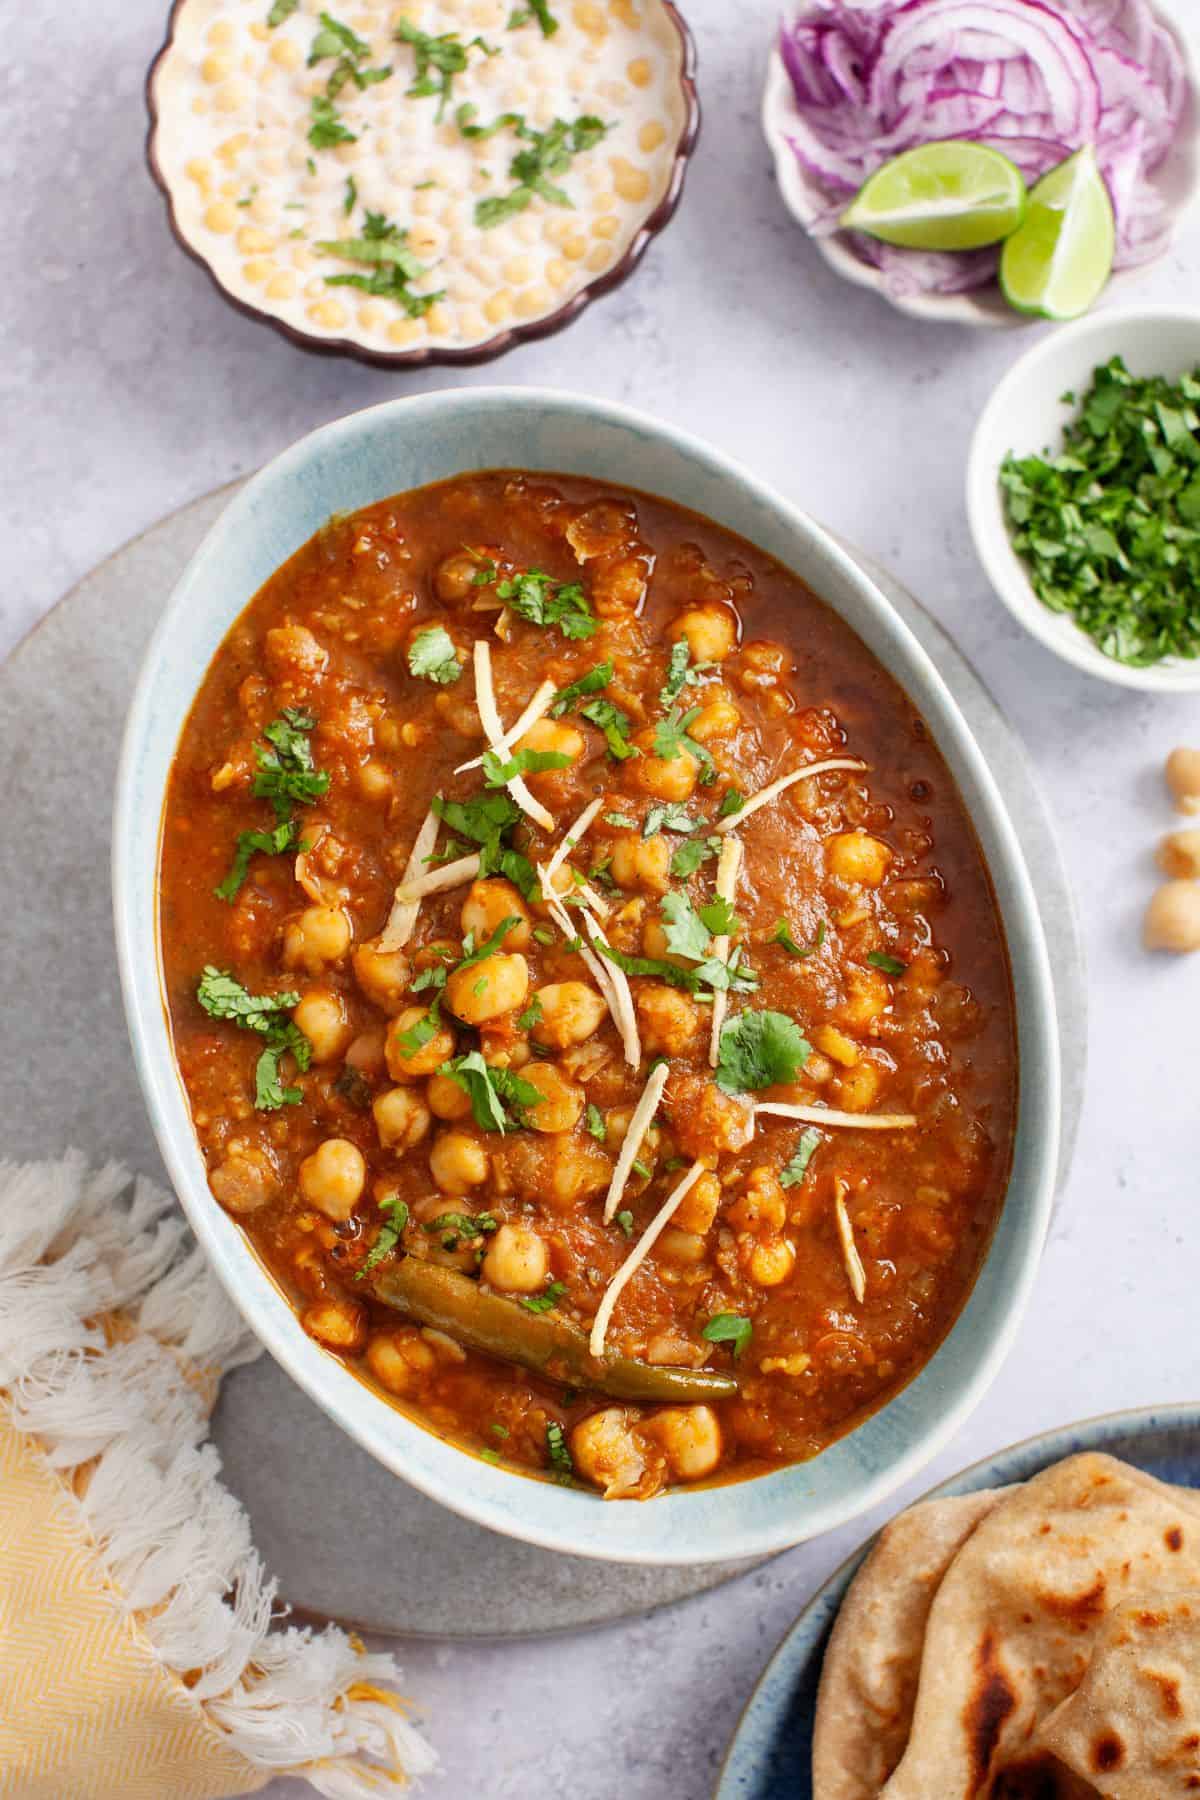
Here's my go-to Chana Masala recipe. It's a hearty, flavorful, restaurant style vegetarian curry made from scratch using dried chickpeas (kabuli chana). Comes together in about 40-45 minutes, and trust me, it's worth every minute. The tender chickpeas simmer away in a rich onion-tomato masala, layered with the flavors of fresh ginger, green chilies, and warming Indian spices.
What I love most? It just gets better with time. The leftovers are even more delicious 2-3 days later, so feel free to double the batch (future you will thank you!)
And if you're using canned chickpeas, don't worry. I've included my little secret for how to make them taste just as soft and flavorful.
About My Chickpea Masala Recipe
Chana recipes are a staple in North Indian kitchens, and there are countless ways we turn them into comforting meals. Growing up, Punjabi chole with bhature(puffy fried flatbreads) was a regular in my mom's kitchen. But now and then, she'd switch things up with a different & simpler chana masala, especially when we were having it with roti or rice.
One thing that always stood out about her recipe was that she didn't use chana masala powder, the intense spice blend typically added to Punjabi chole. Her version kept things simple with just basic pantry spices. No grinding whole spices, no pre-made blends. Just straightforward cooking with ingredients already on hand.
Another thing that set her version apart was the color. Instead of the deep brown shade you usually see in chole, her chana masala had a beautiful orange-red hue. And then there was the unique flavor that leaned more tangy than spicy, due to generous use of fresh tomatoes.
Texture matters a lot in chana masala. You don't want everything totally pureed, but you also don't want a masala that feels overly chunky. I finely chop the onions for a bit of body, and grind the fresh tomatoes to create the sauce base. Chopped ginger, slit green chillies and ginger julinnes bring in that bite while still keeping the masala cohesive and velvety.
Dried Chickpeas or Canned?
Canned chickpeas are convenient, but dried chickpeas win on flavor. Here's why.
But first, a confession! I didn't even know canned chickpeas existed until I moved to the United States. They are not a thing in India. In a traditional south asian kitchen, cooking with chickpeas always starts from scratch. It is a slow, intentional process that means planning a bit ahead by soaking the dried chickpeas overnight.
If you visit an Indian grocery store near you, you might notice a few different sizes of kabuli chana on the shelf. I was always taught that the smaller the chickpeas, the better they taste. So if you come across multiple varieties, now you know which one to reach for.
The next day, they're pressure-cooked until tender yet non mushy. But the real bonus? It is the pale, starchy, flavorful liquid they're cooked in, what I like to call "chickpea stock". It's liquid gold, and in my opinion, one of the most underrated part of the process.
Not gonna lie though, about three out of ten times, I reach for canned chickpeas too. And you absolutely should, especially on a busy weeknight. Go for low-sodium, preferably organic canned chickpeas if you can. They cut down on a tangible amount of steps in the recipe without compromising too much on flavor, and just like that, you're a few minutes away from a delicious chickpea curry.
Ingredients
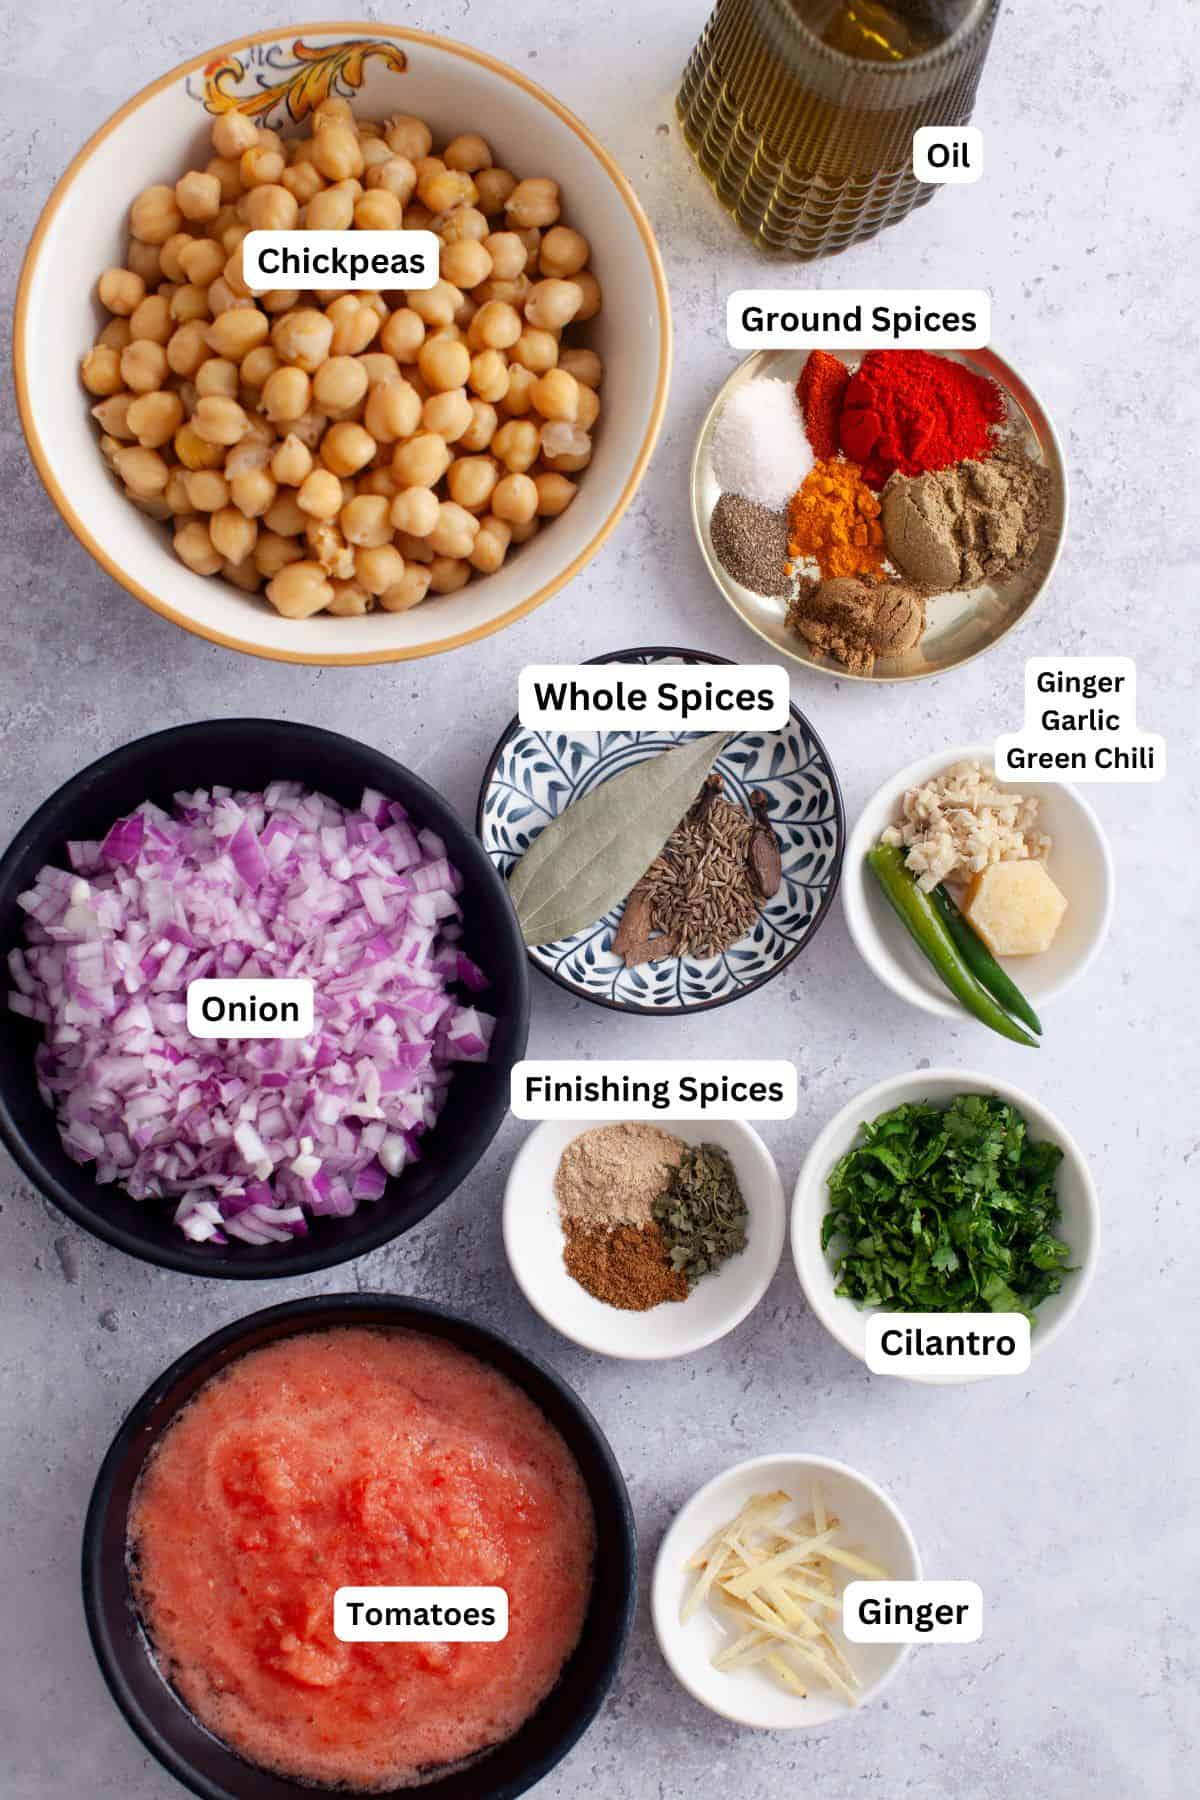
- Whole Spices - Whole spices are a must when it comes to chickpea curries. They add a depth of flavor that ground spices alone can't deliver. I reach for the classic woody Indian spices like cinnamon, cumin seeds, cloves, and black cardamom. If you don't have black cardamom, a few green cardamom pods can work in a pinch. I highly recommend not skipping the whole spices.
- Kasuri Methi - Is a dried herb made from specific type of fenugreek leaves that us extensively used in north indian dishes. It imparts a unique aroma and flavor to a dish. Sadly,there is no substitue. If you cannot find it, simply skip it.
See recipe card for other ingredient substitutions and quantities.
How To Make Chana Masala
Boil The Chickpeas (Skip if using Canned)
- Add the dried chickpeas to a large bowl (they swell quite a lot as they soak). Take the bowl under a running stream of water and wash the chickpeas 2-3 times.
- Cover the washed chickpeas in excess water(3-4 inches deep) and leave to soak at room temperature for at least 10 hours. During winters, it might take bit longer for the beans to fully soak. If you are interested, here how test- well soaked chickpeas can be chopped with a sharp knife without flying away. Get the idea?
- Discard all the water and add the drained chickpeas to a pressure cooker. Add 1 tablespon oil, ⅛ teaspoon baking soda, ½ teaspoon salt and 1-2 pinches of turmeric powder(optional). Pour water and close the lid.
- At first, place the cooker on high heat until you hear the first whistle. After first whistle, lower the heat to medium or low medium and let the chickpeas cook for at least 4-6 whistles.
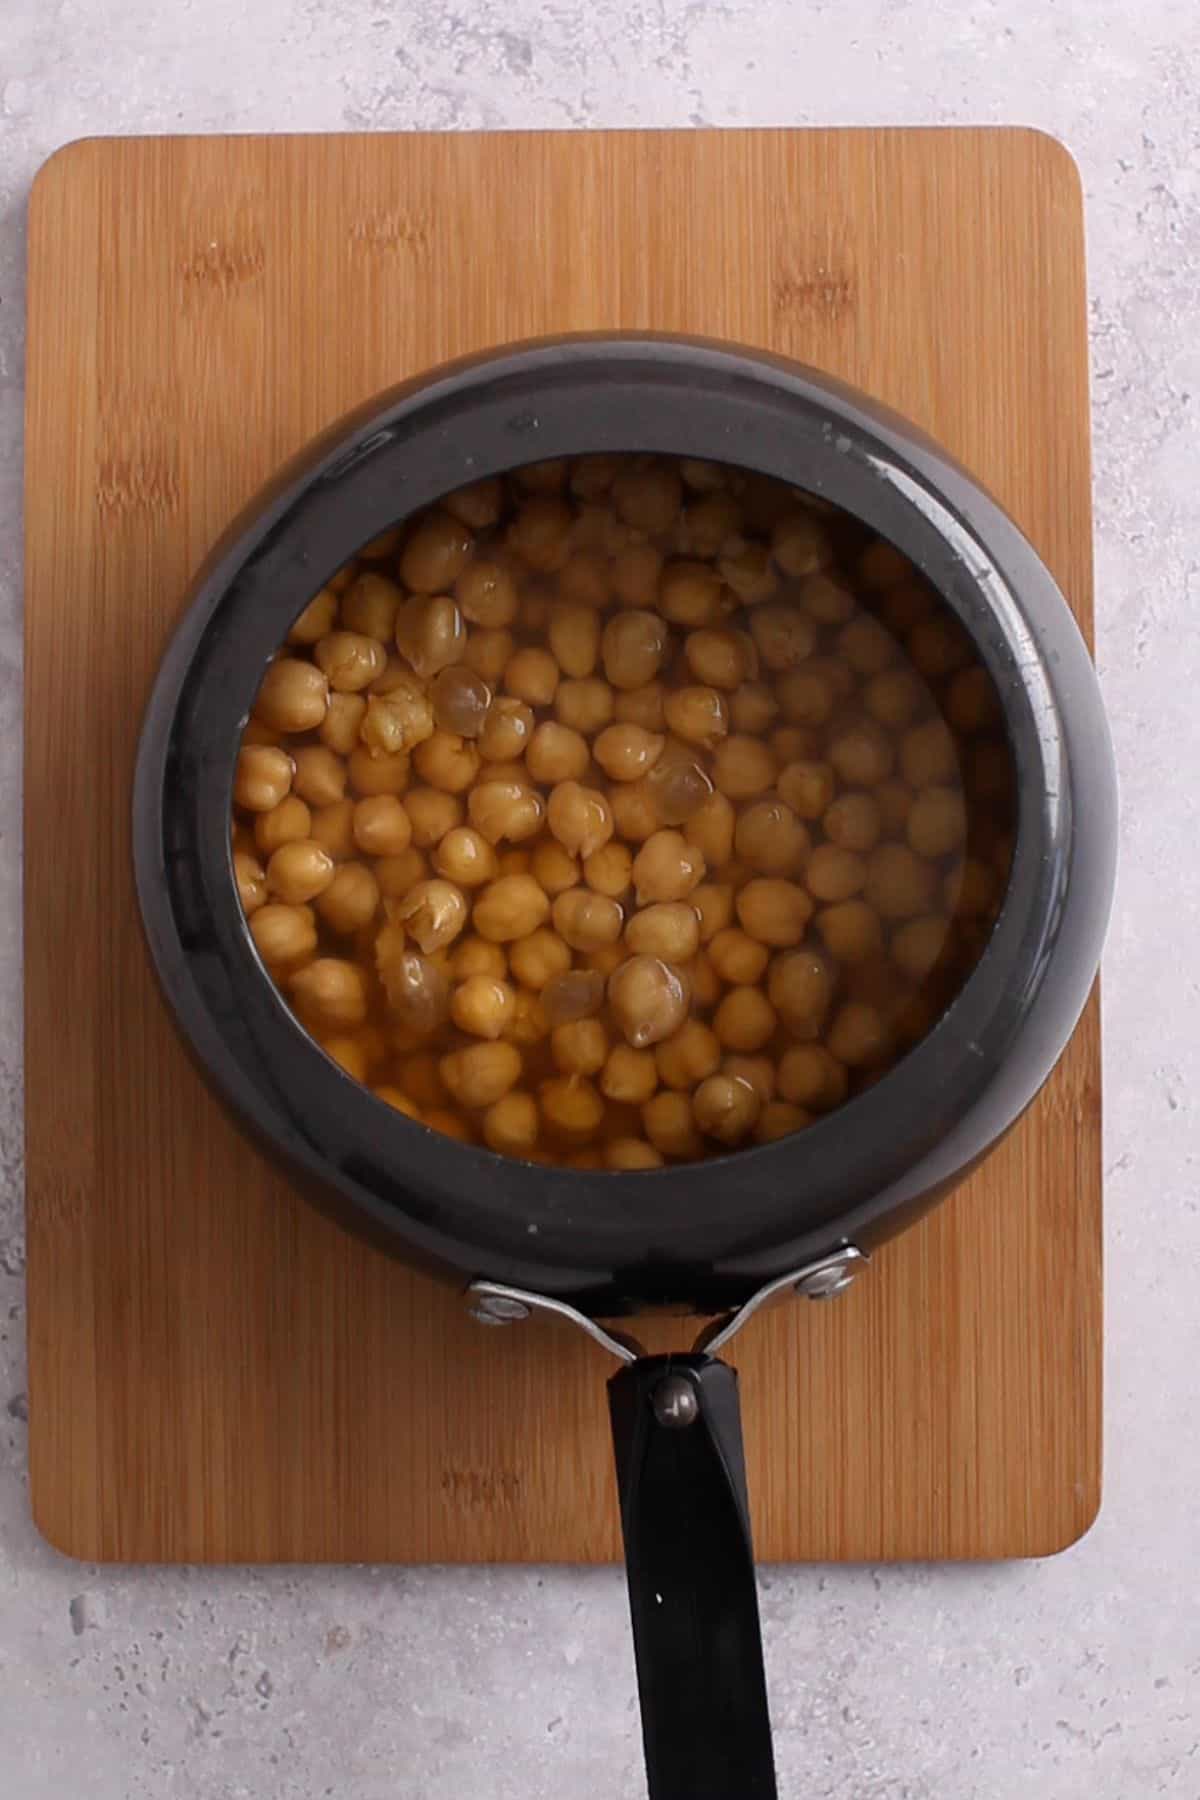
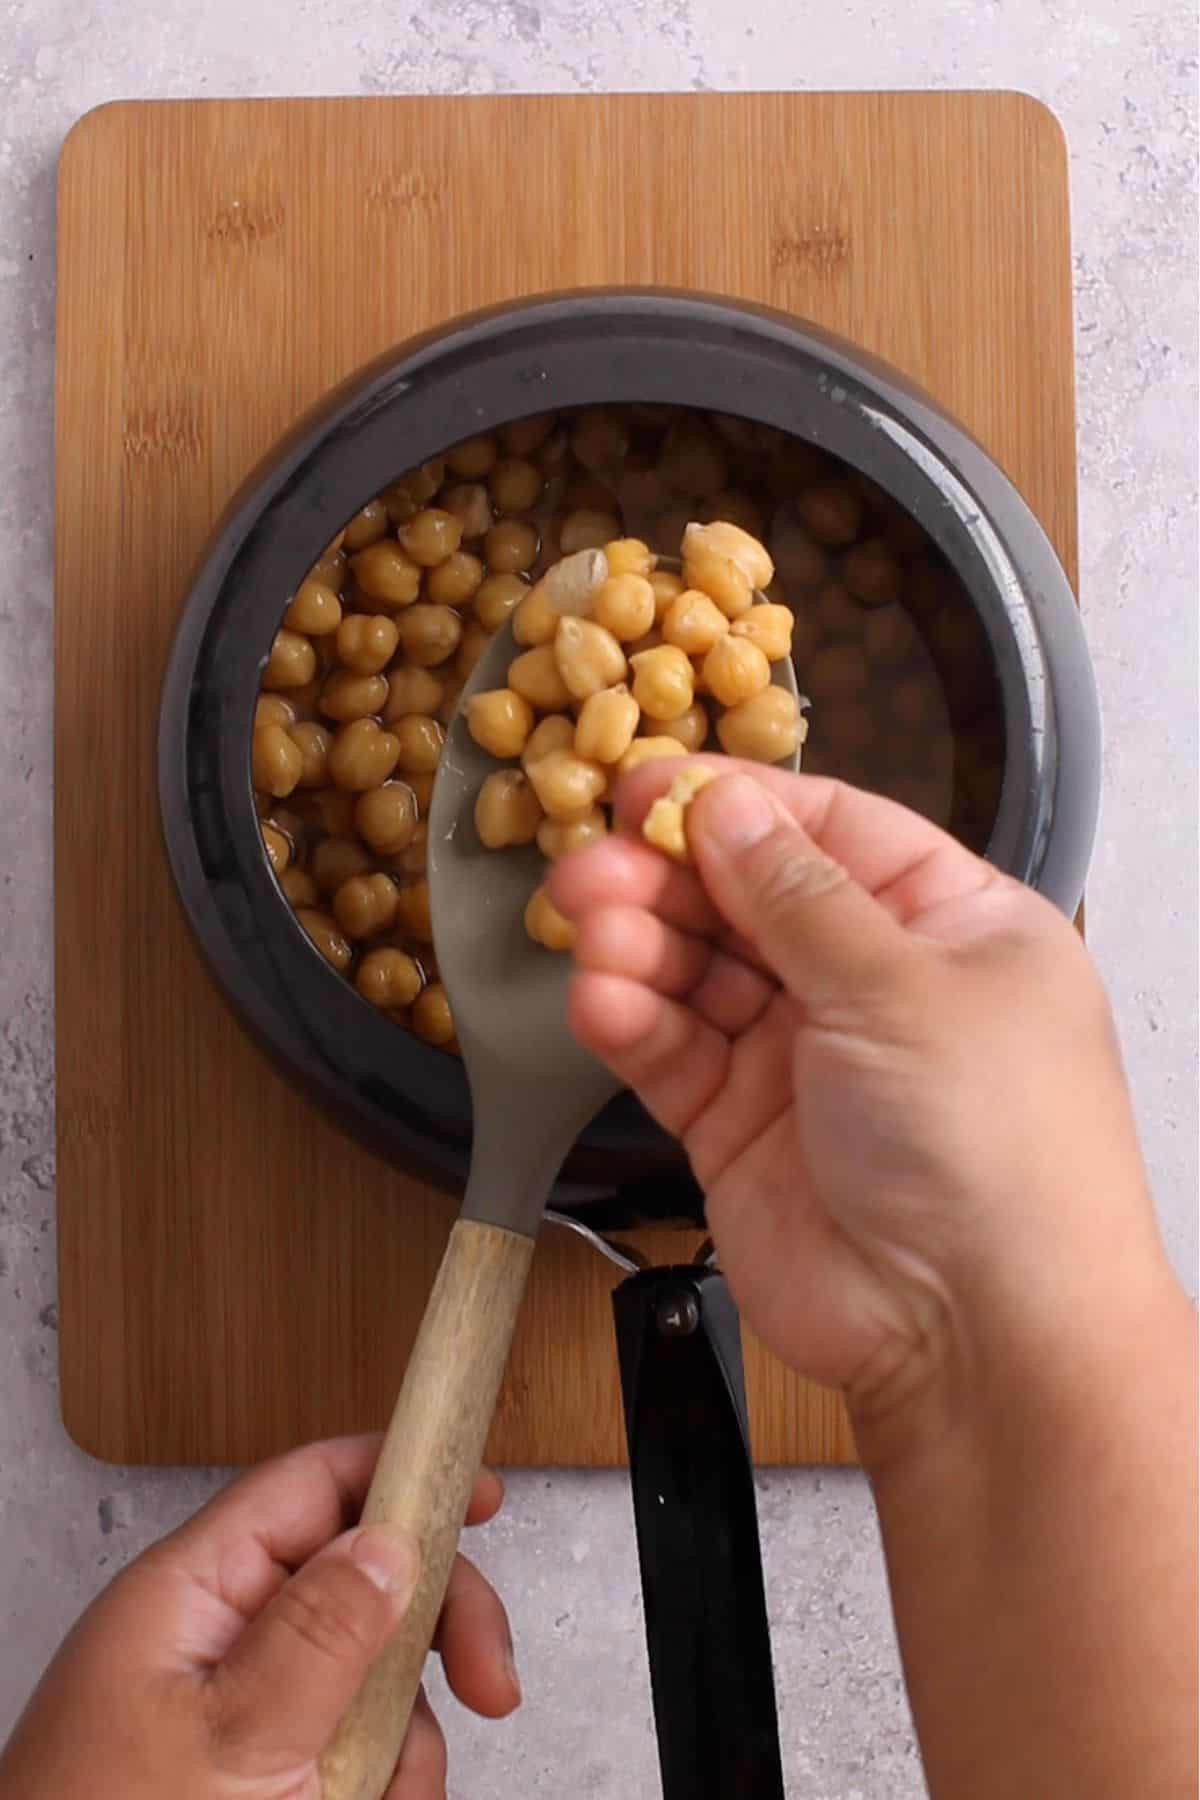
- Switch off and let pressure release naturally. To check, carefully open the pressure cooker lid. The chickpeas should hold shape yet you should be able to squeeze them betweem thumb and index finger.
- At this point, I drain the chickpeas and set aside the cooking liquid. The chickpeas go into a bowl and the reserved stock will be used later in the curry.
Get Everything Ready
- Before you start cooking, make sure all your aromatics are prepped and your spices are measured and within reach of the stove. Have a cup or two of hot water ready as well, since we will be using it throughout the process to deglaze the pan. I use an electric kettle in my kitchen for this. I just fill it with water and switch it on while prepping the rest.
Build The Masala
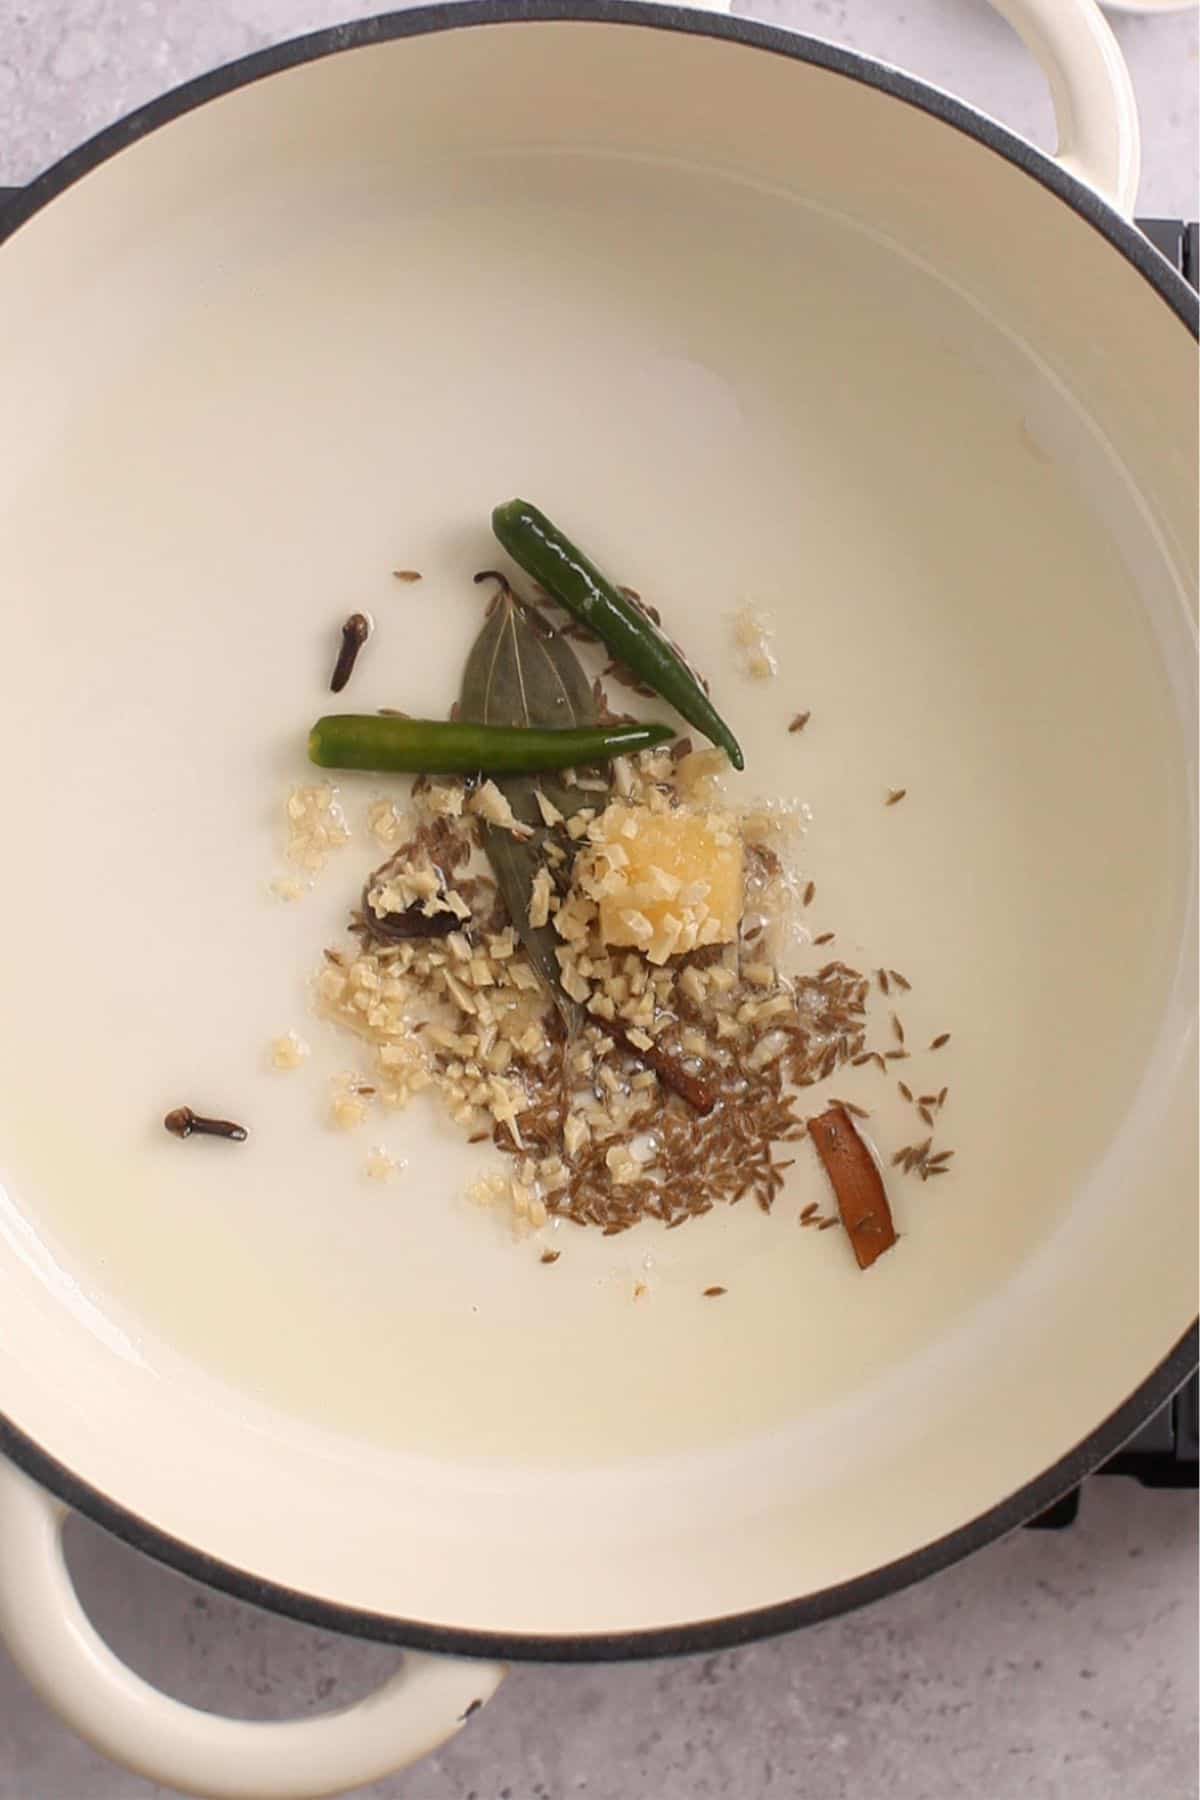
- Place a cooking pot (I use my 4 qt braiser) on medium stove. Add oil and let heat up. To the hot oil(but not too hot else spices will burn instantly), add the bay leaf, cloves, cumin seeds and cinnamom stick. Also add the chopped ginger, garlic paste and green chillies. Fry everything for 8-10 seconds untill stirring continuously to flavor the oil. The spices will crisp up but should not change too much color else the curry will have a mild bitter taste and aroma.
- Next, add the chopped onions to the oil. On low medium heat, for the next 7-9 minutes, fry the onions while stirring regularly until they are golden brown(not deep brown). This is one of the most important step which sets the color as well as the depth of flavor of your curry. Please dont rush.
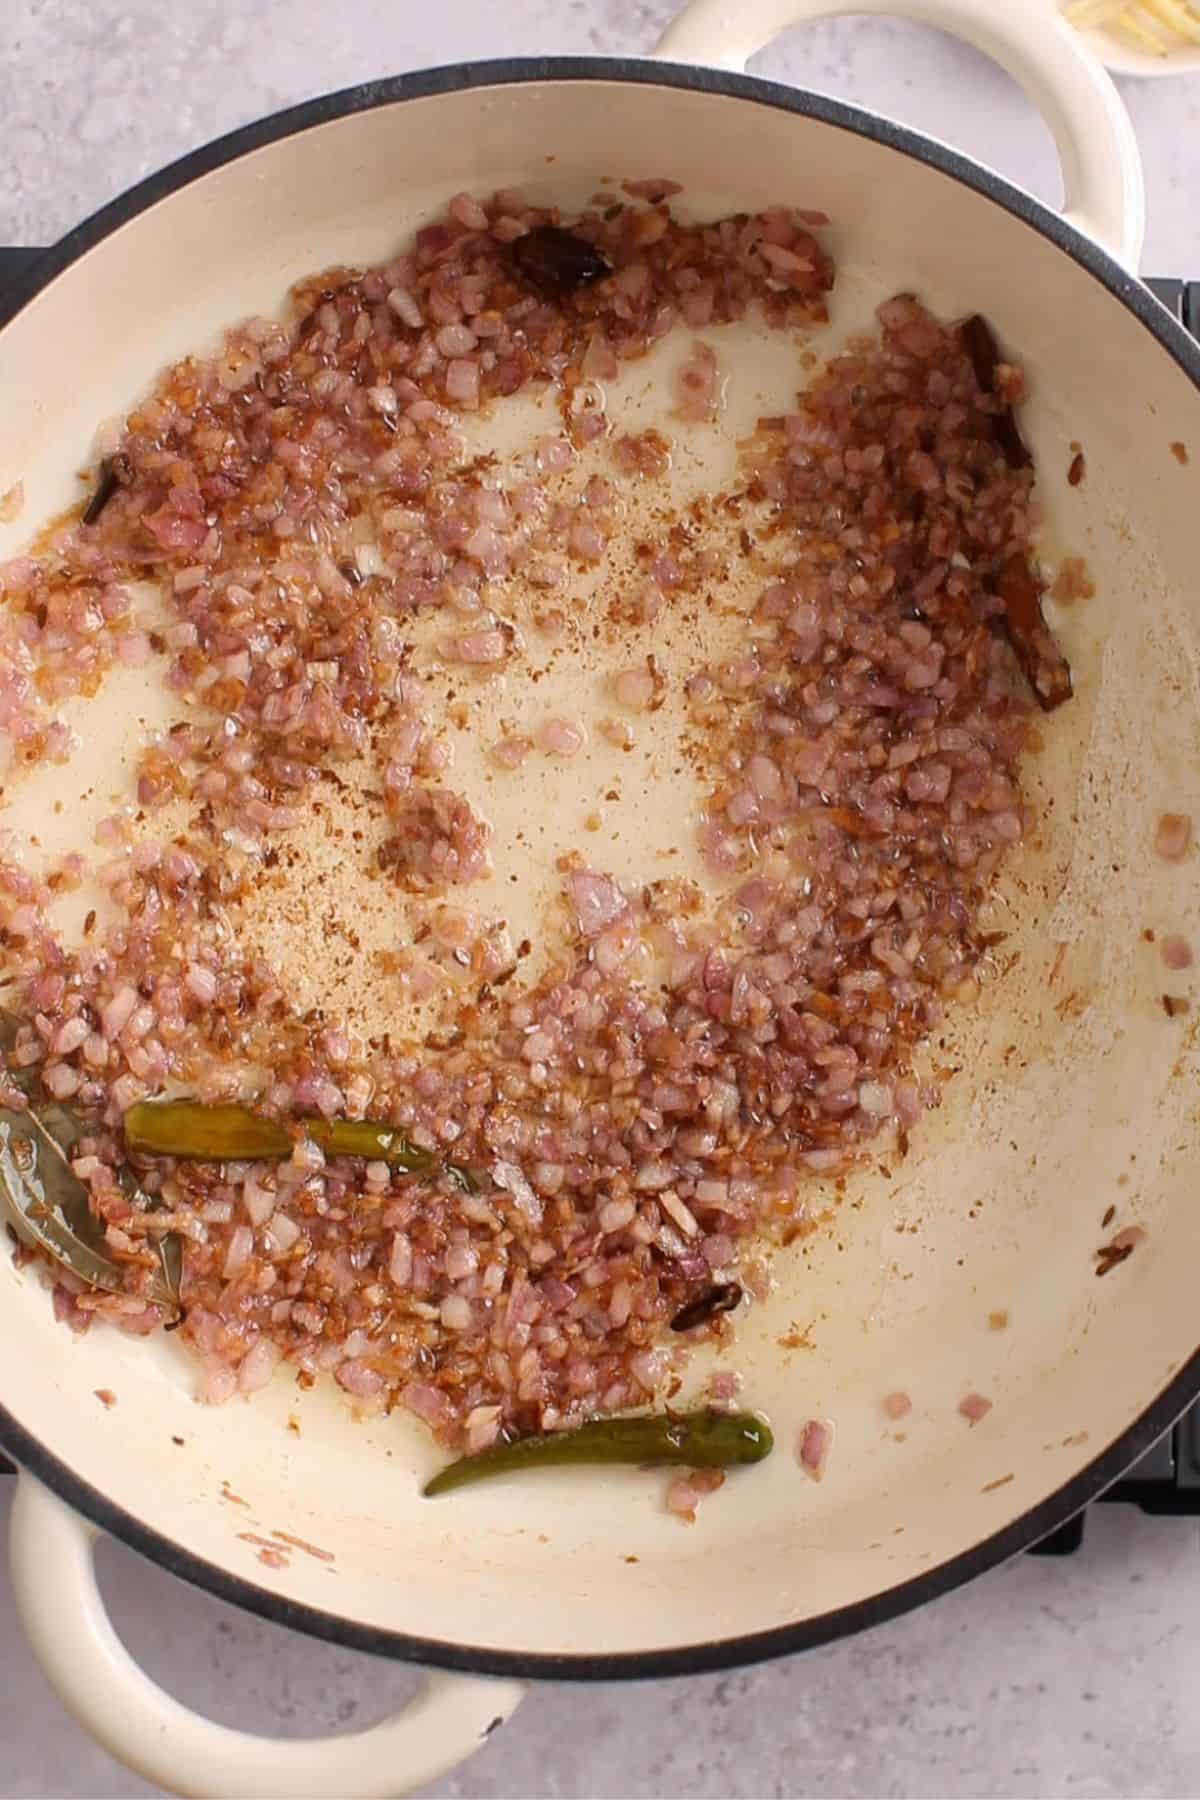
- As soon as the onions are golden, add a splash of hot water(about ⅓ cup) and deglaze the bottom of the pot. Scrape to get all the small bits and mix in. In few seconds you will see that the onions become of soften. Let the water cook off for 1 minute or so but don't dry out completely.
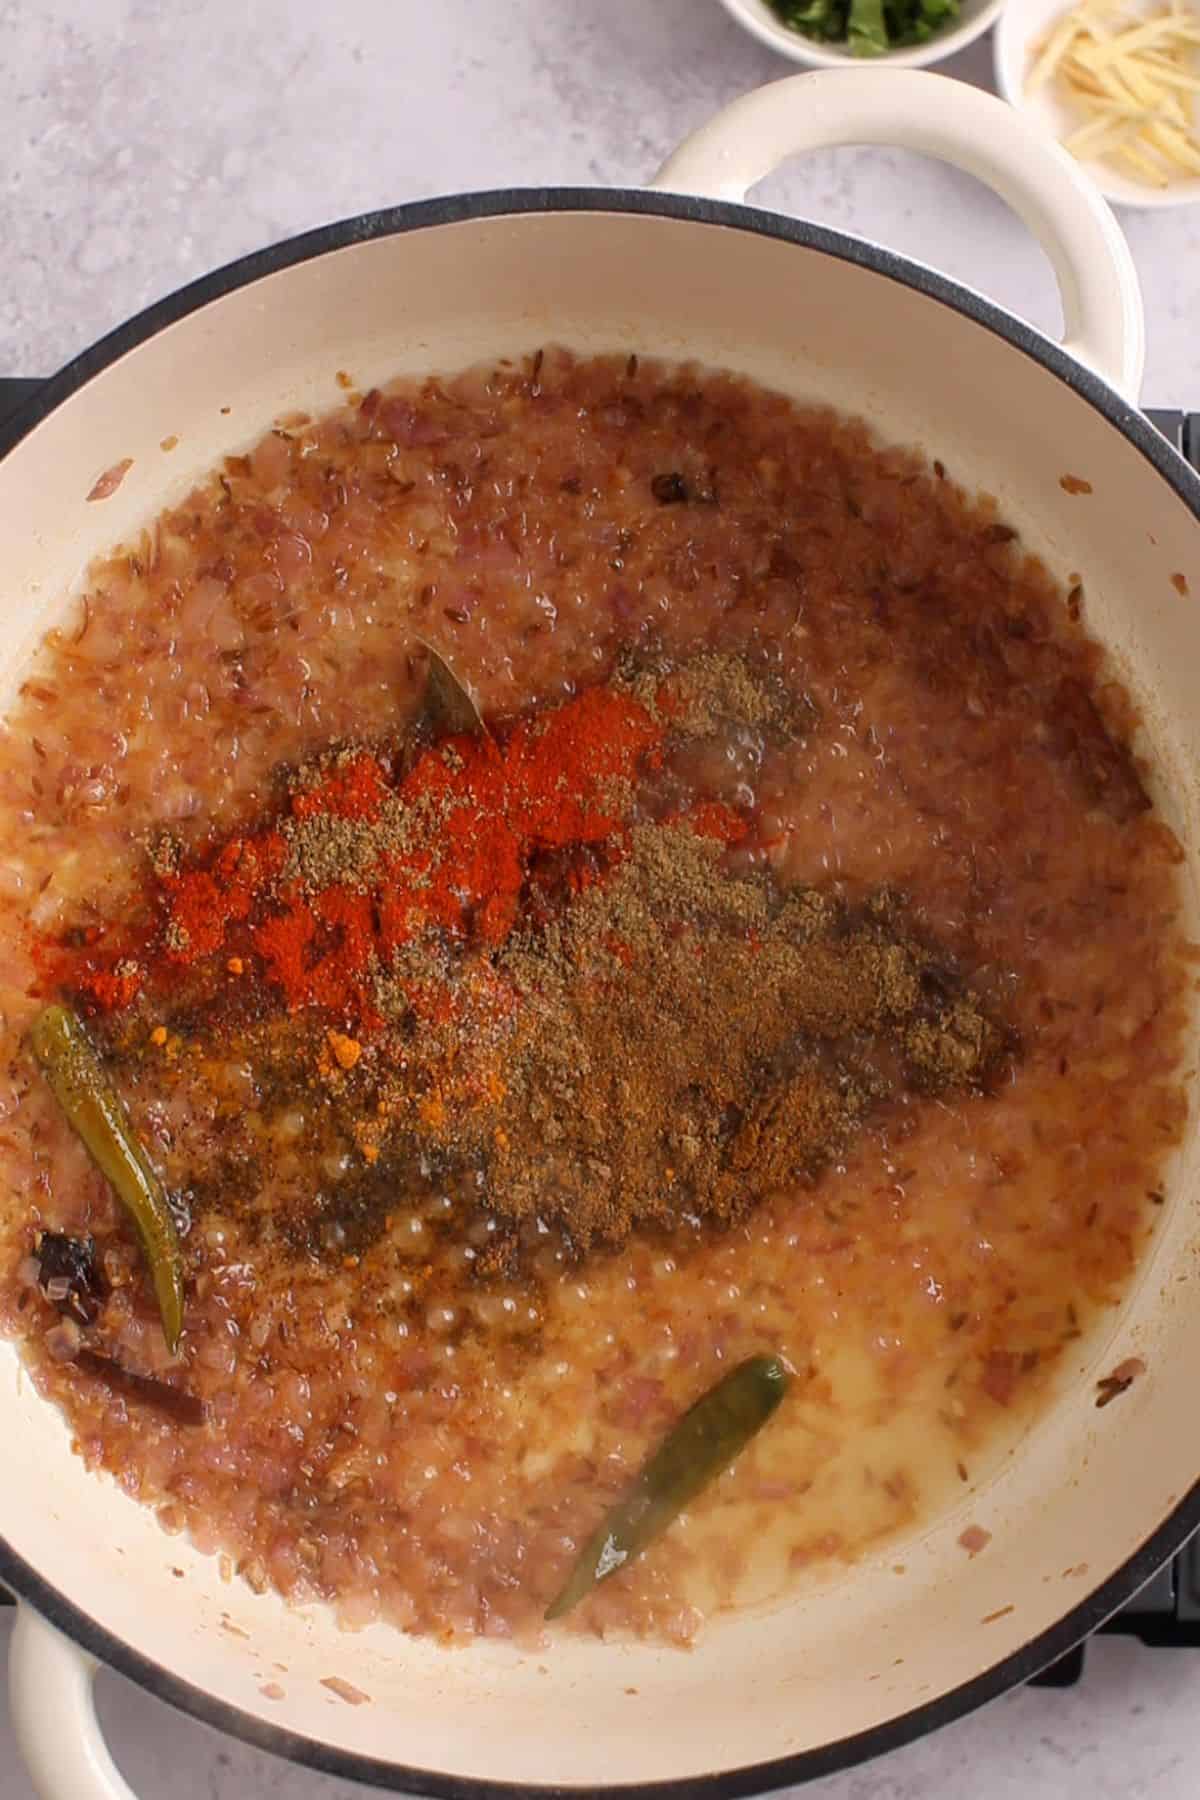
- Sprinkle the ground spices - coriander powder, turmeric powder, red chilli powder, kashmiri chilli powder, ground cumin, and black pepper powder over the onions. Also add salt.
- Stir the spices into the onions and continue cooking over low to medium heat for one to two minutes. Add a splash of hot water as needed, a few times, to prevent sticking and help everything cook evenly. You're aiming for the spices to be well toasted, the masala to look rich and glistening, and the raw smell to completely disappear. At this point, your kitchen will smell incredible.
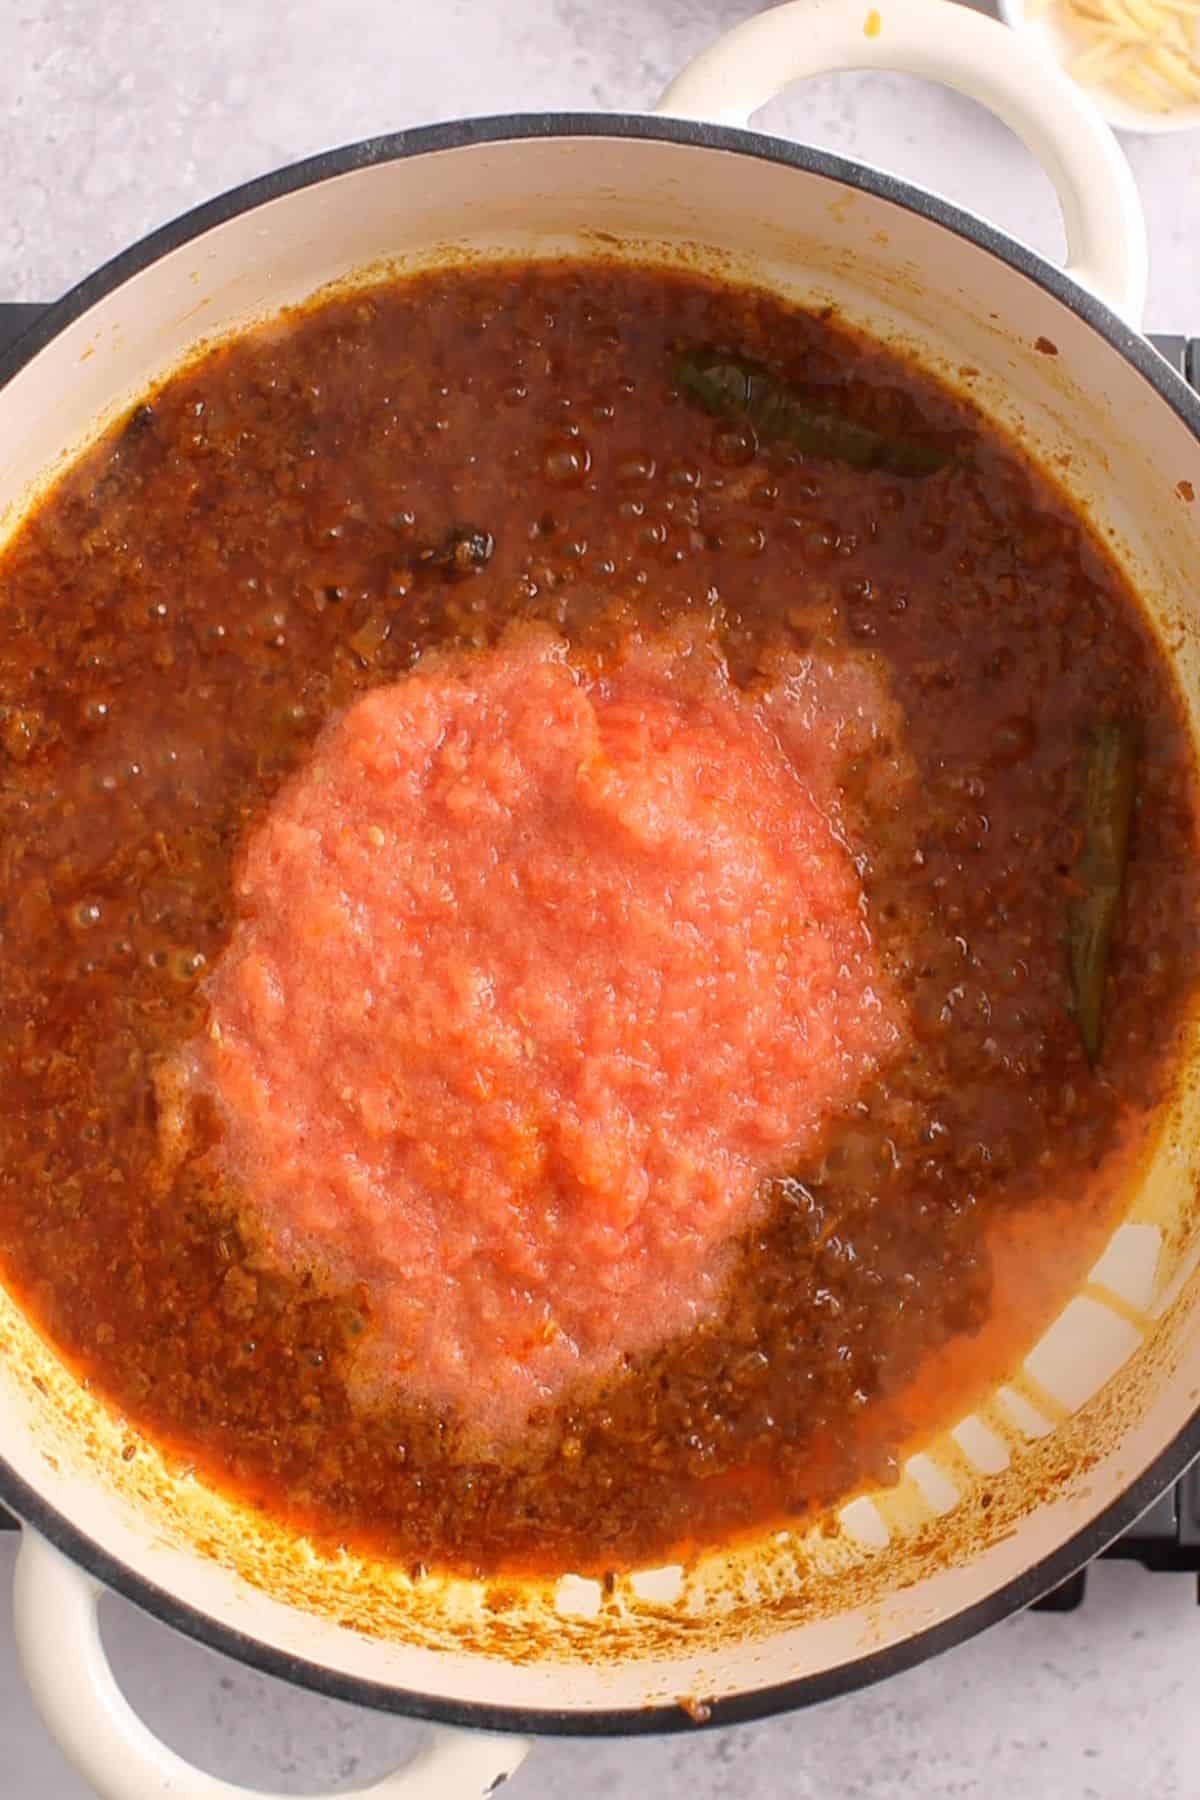
- Next, add in the pureed tomatoes to the pot. Mix and on bhuno (cook down) while stirring regularly untill the most of the moisture has evaporated and you will again see tiny oil bubbles seperating to make the masala shiny. This means that our masala is ready for next step.
Simmer The Chana Curry
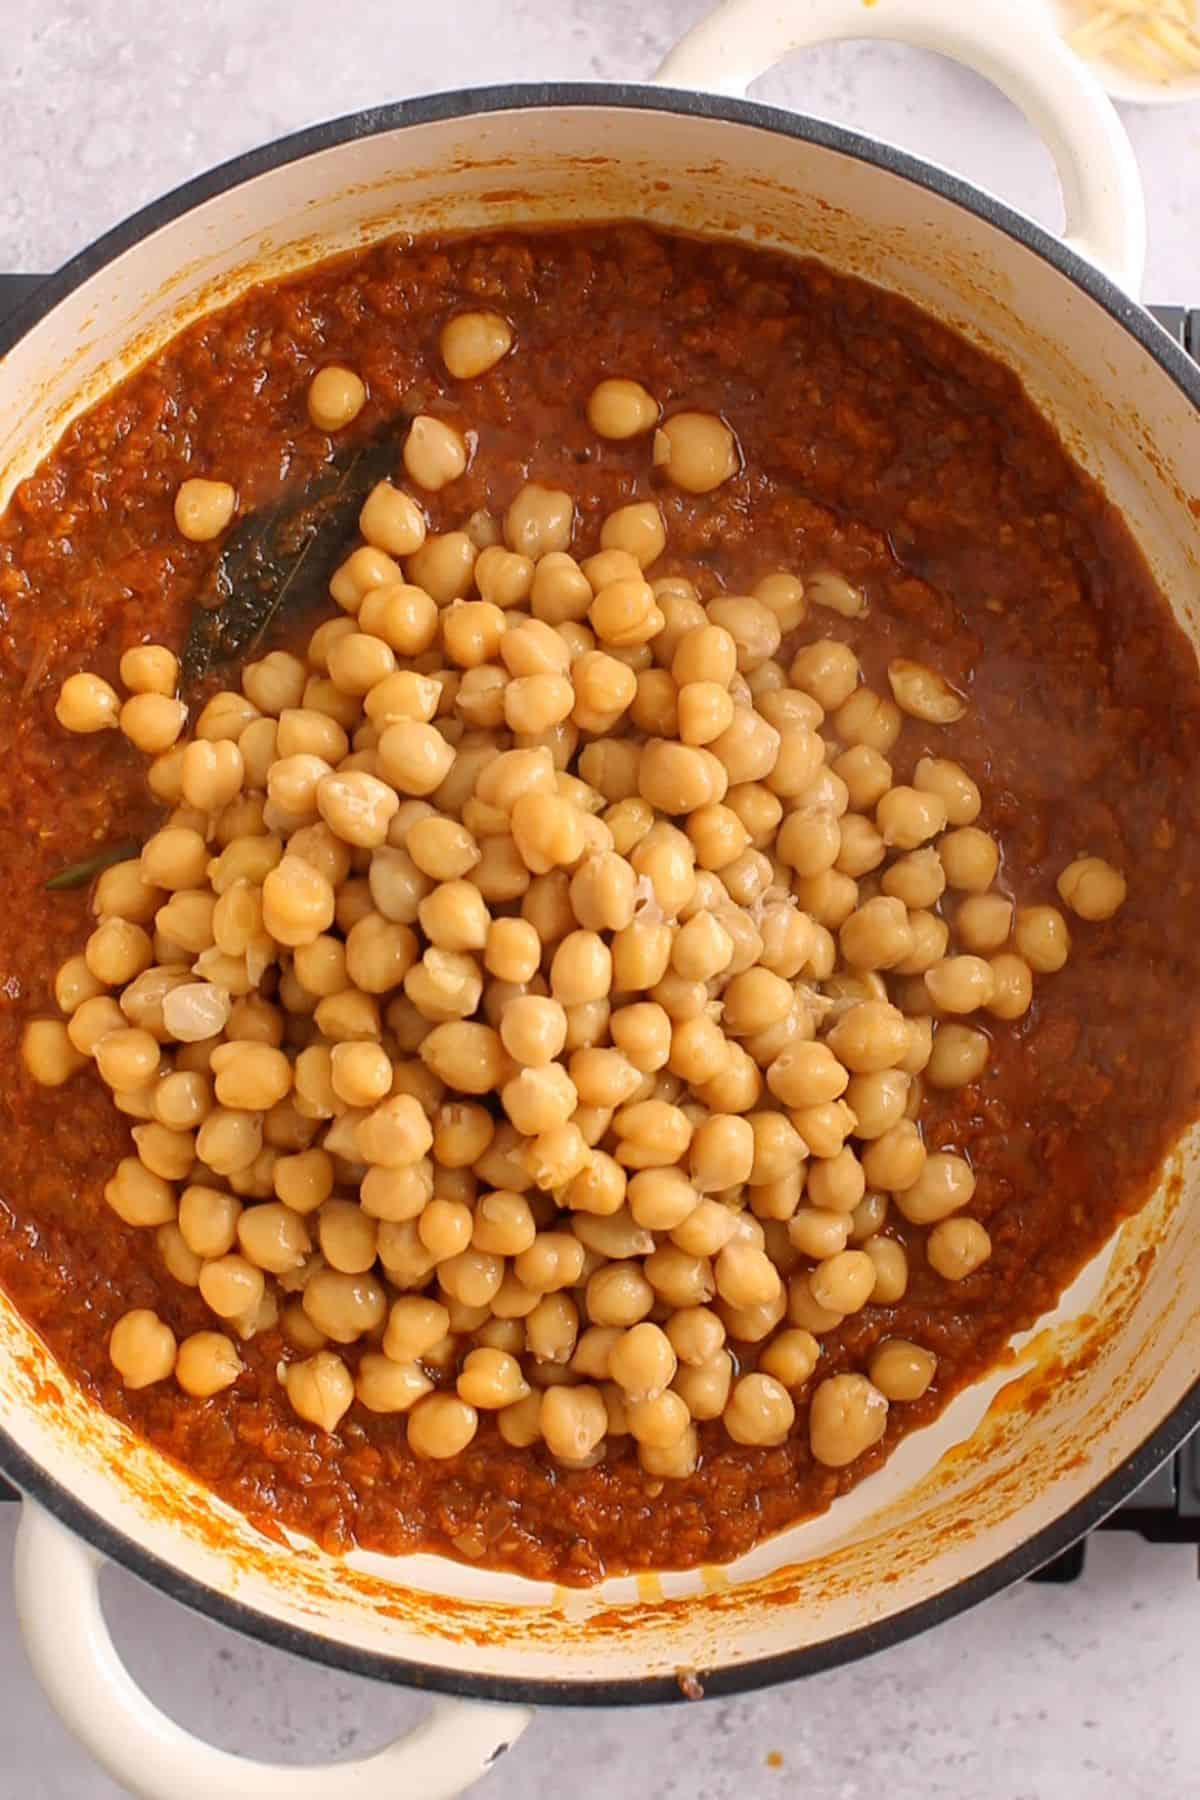
- Add the chickpeas to the masala. Mix, stir and cook with the masala for 2-3 minutes to give them time to absorb the flavors right away.
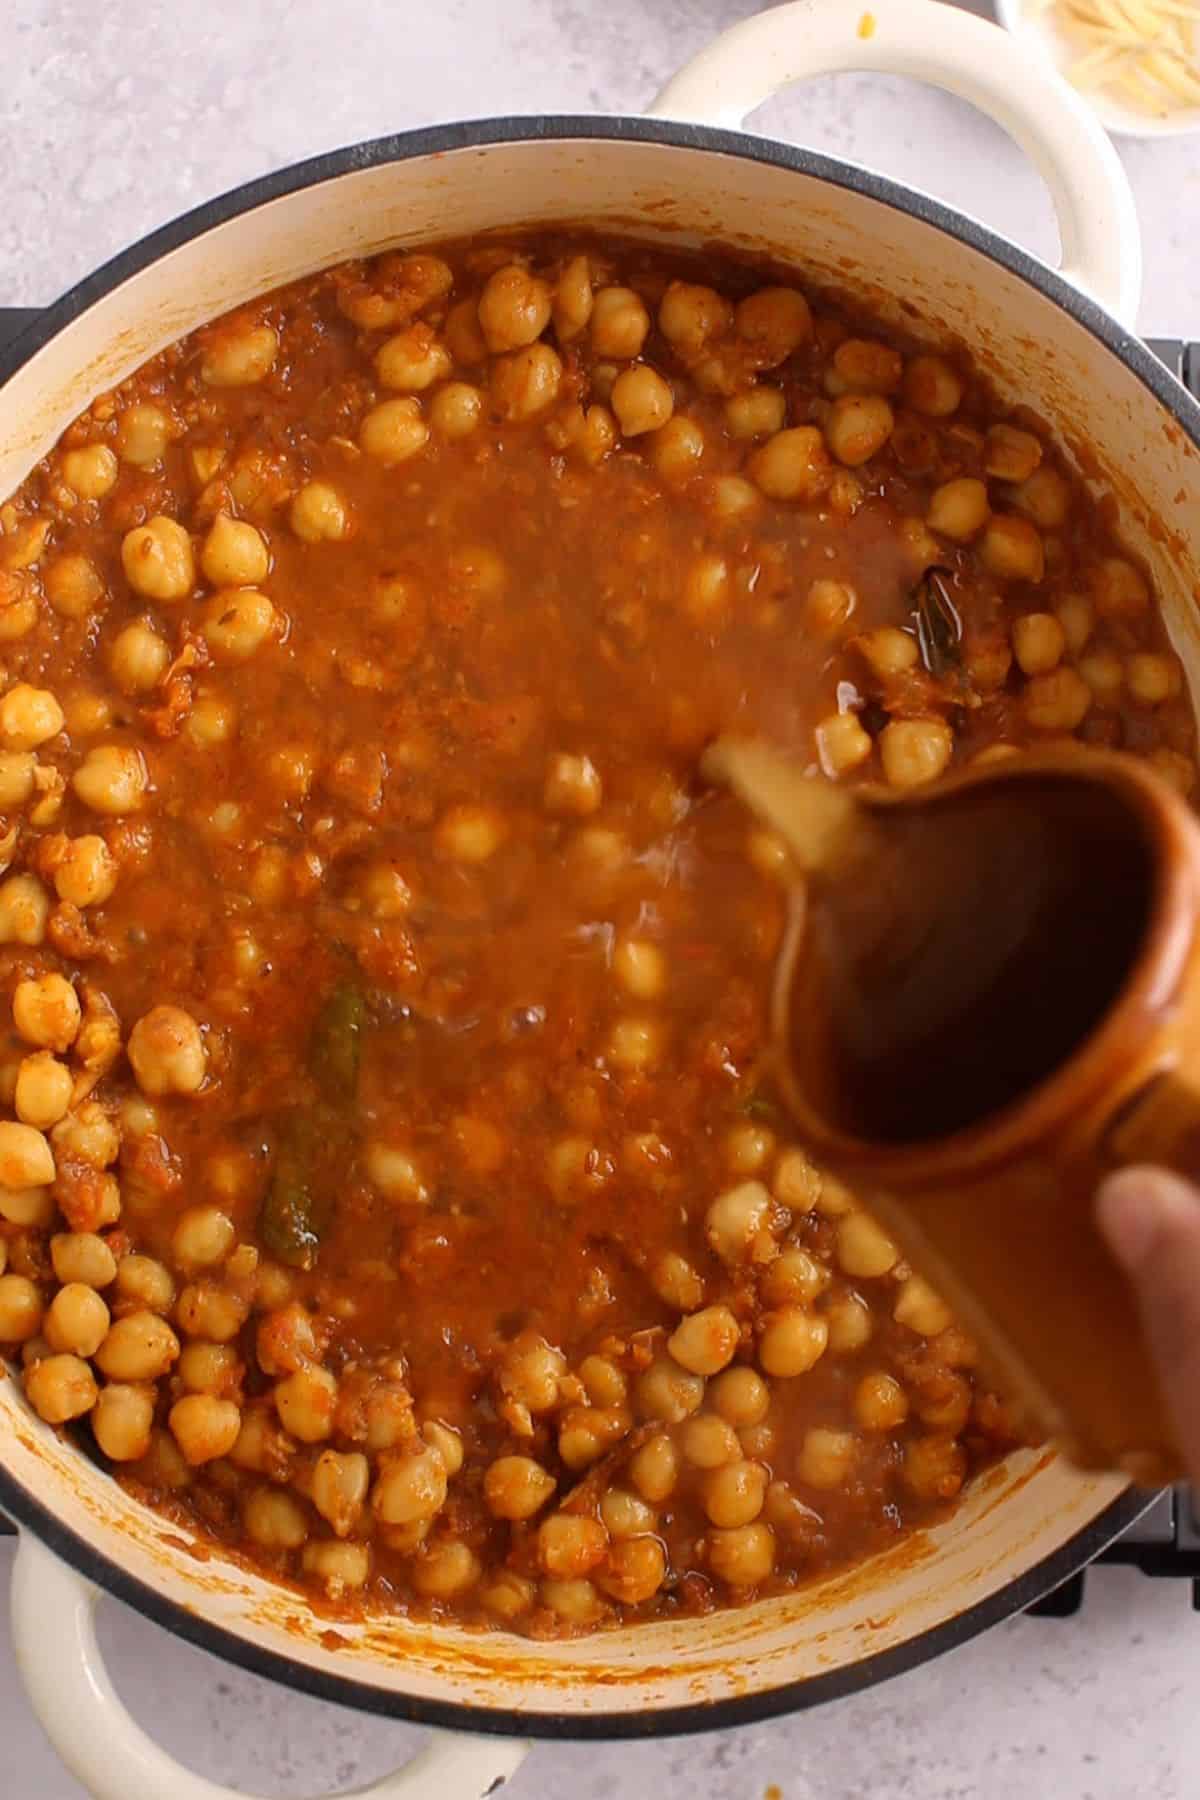
- Pour the reserved chickpeas stock (or baking soda +water if using canned chickpeas) and mix. Chana masala is not supposed to be very soupy so don't add lot of water. Remember, you can add more water later if needed.
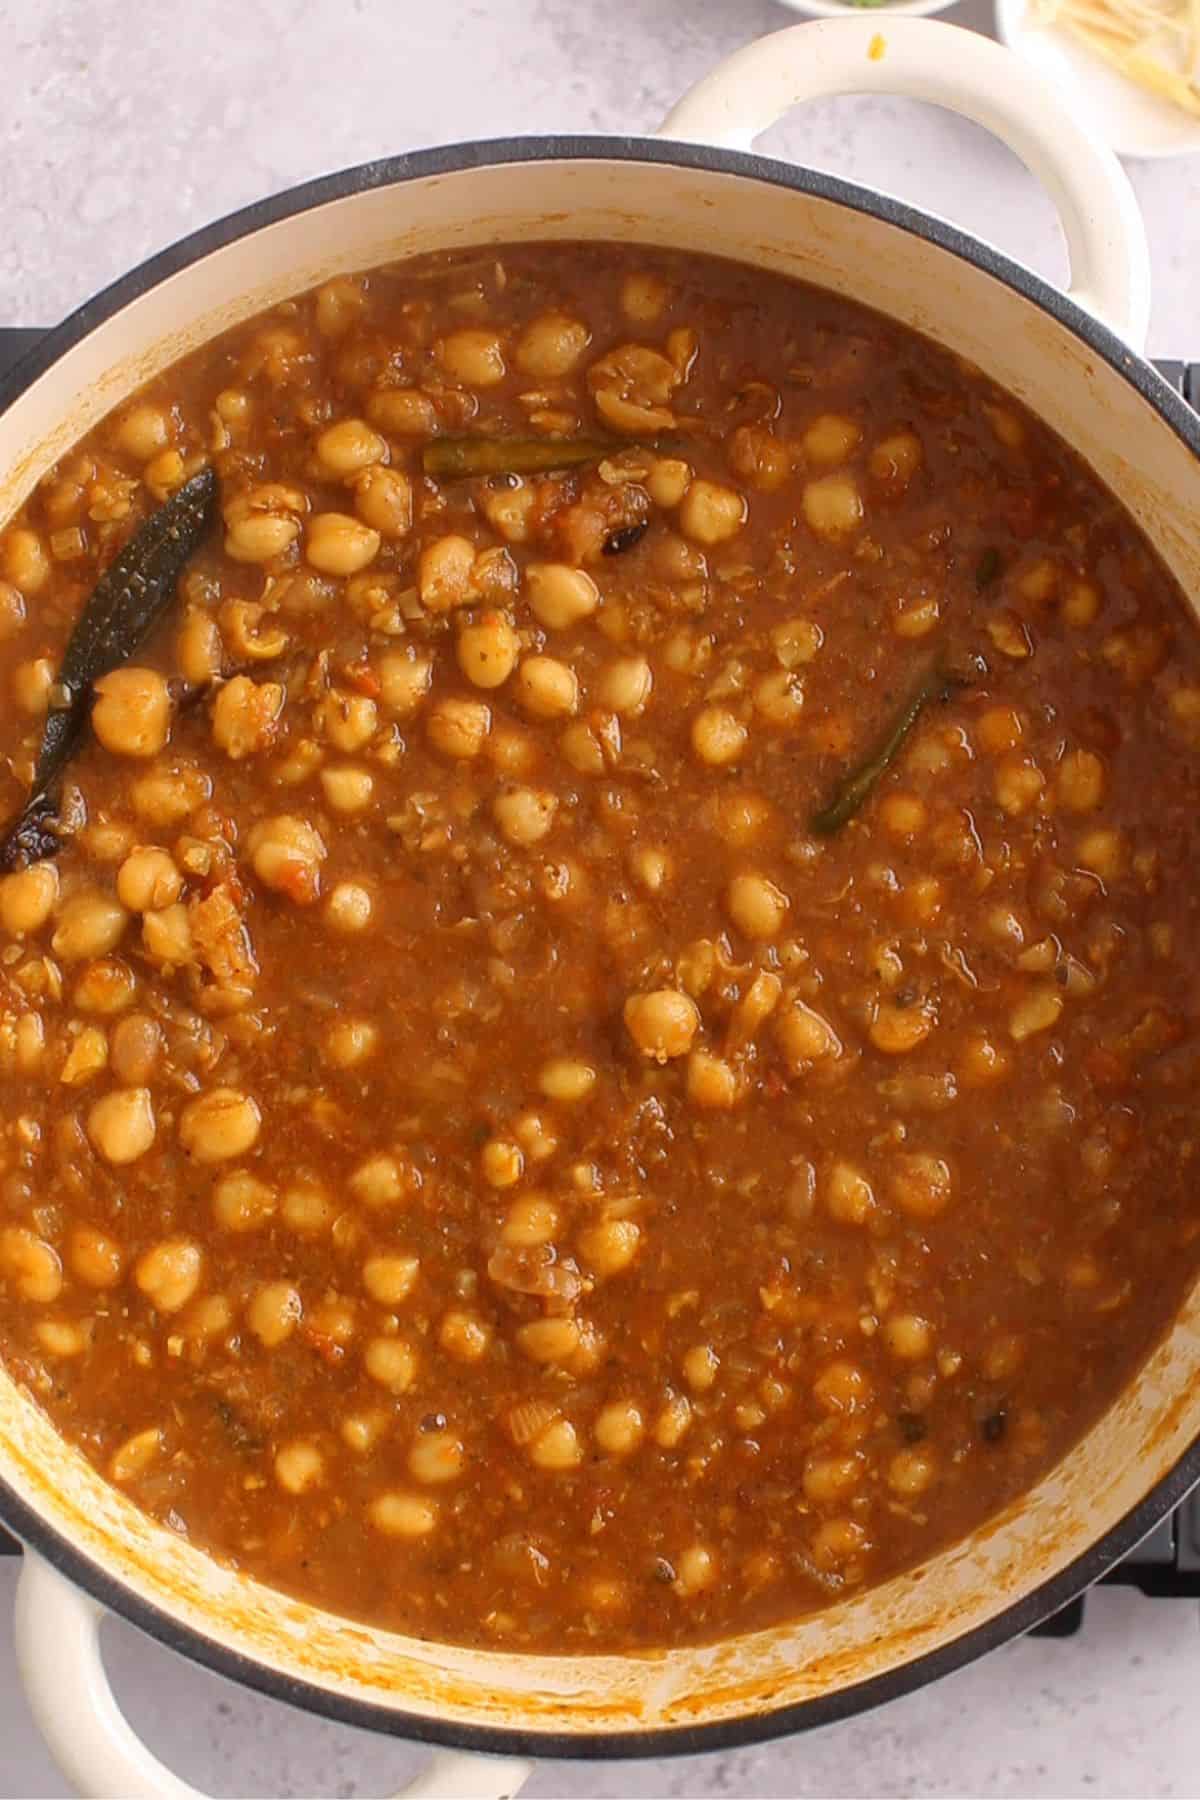
- Once the stock or water has come to a boil, cover the cooking pot and let simmer low and slow for 15-18 minutes making sure to check in between that the masala is not drying out (add water as needed).
- After simmering, open the lid and using the back of your cooking spoon, mash few chickpeas. This naturally thickens the curry due to high starch in chana. At this stage, taste and adjust the salt if needed.
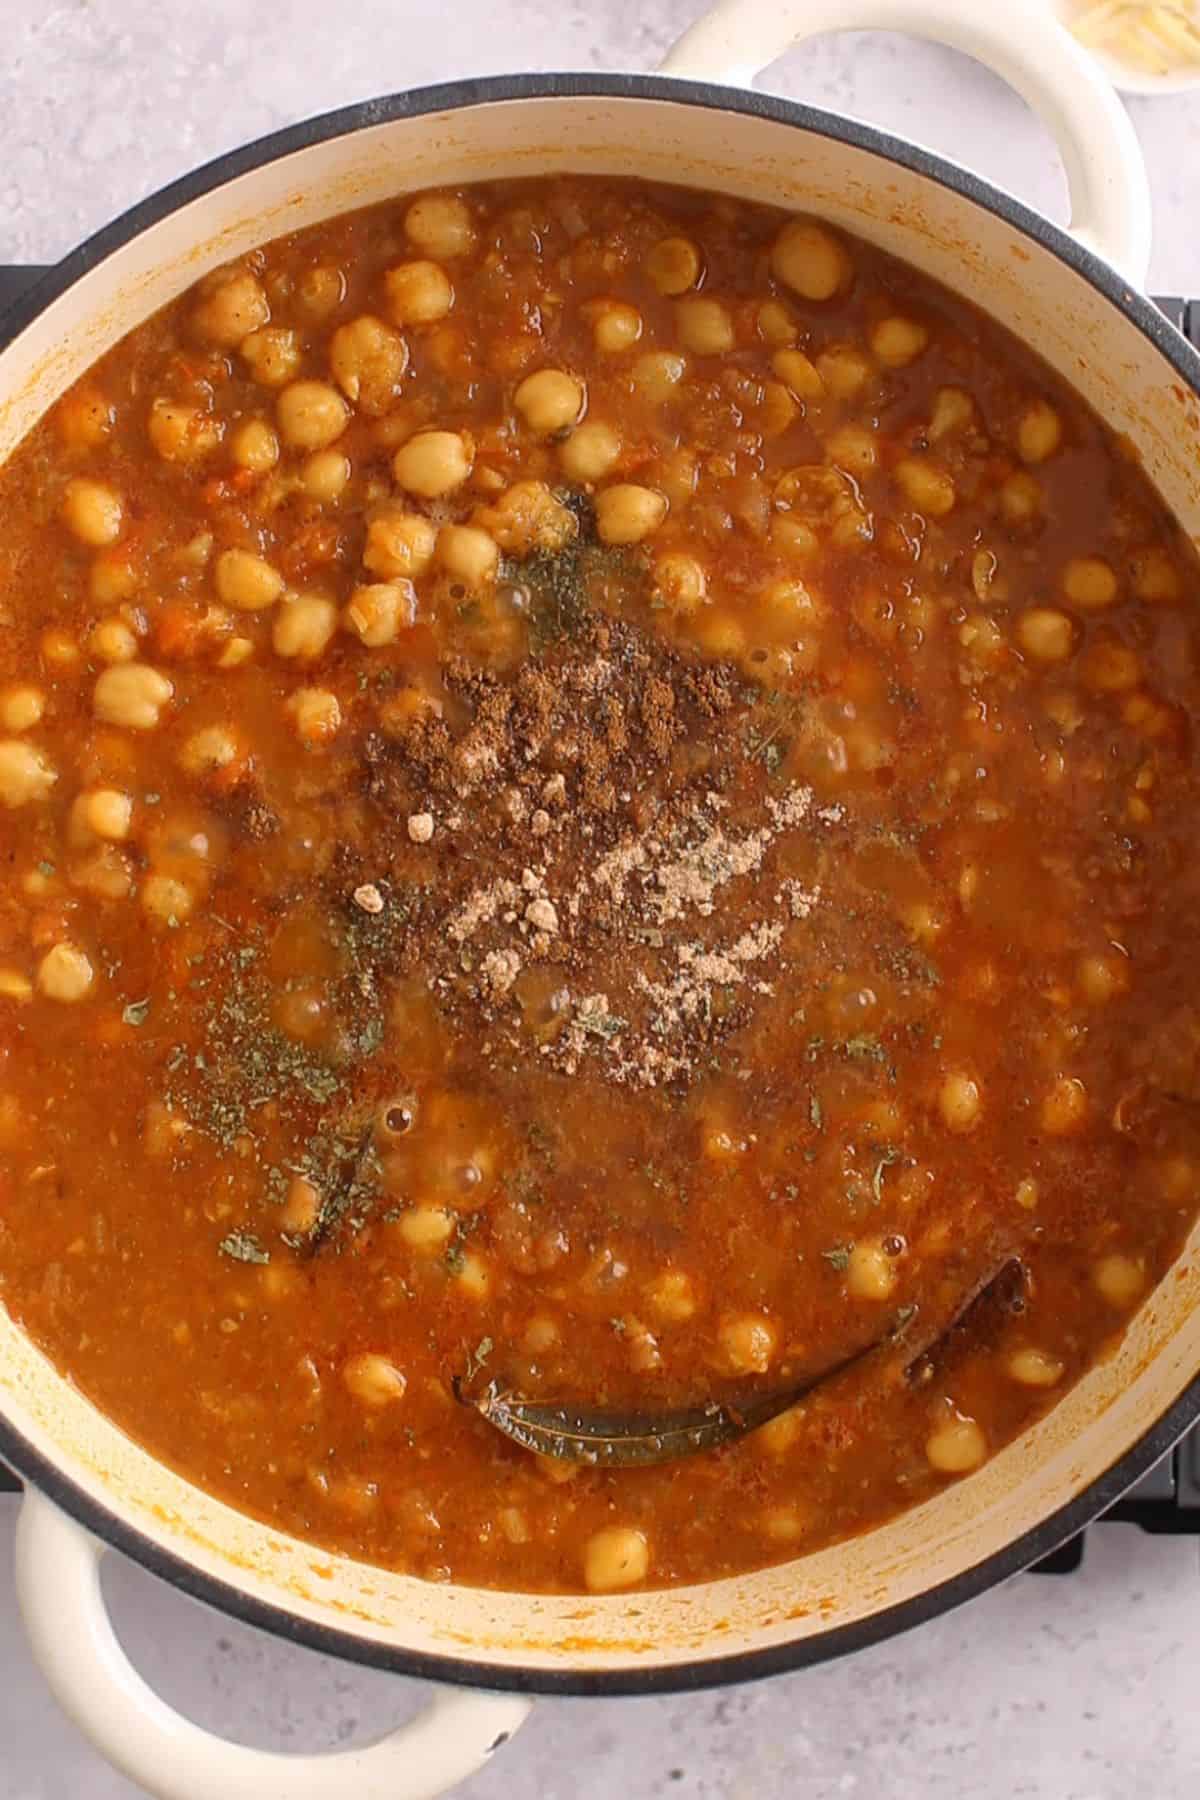
- Finish the chana masala curry with garam masala powder, amchur powder and crushed kasuri methi. Also add the ginger julinnes if using. Combine well and let the curry cook for additional 3-5 minutes.
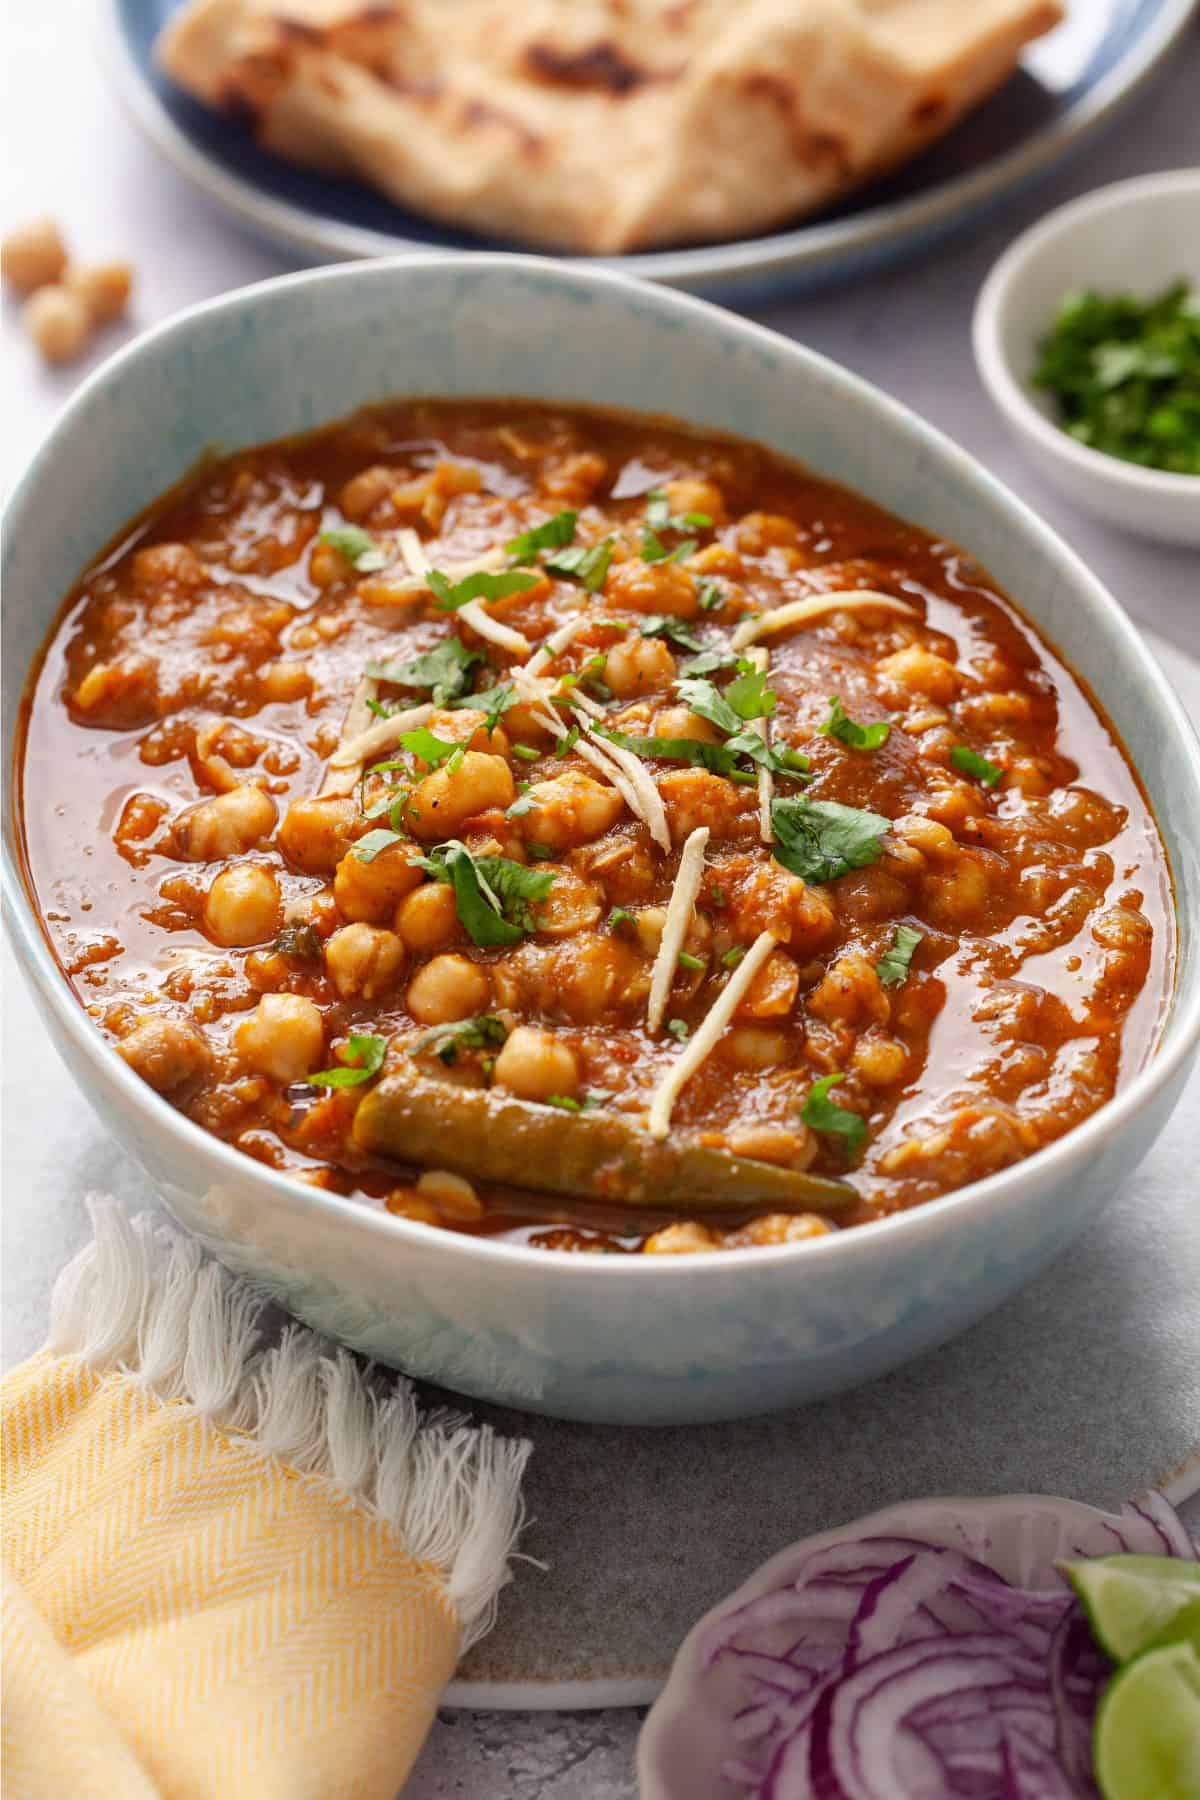
- Your chana masala is ready.Naturally, the curry will thicken as it cools so when you are re heating, add water as needed to adjust the consistency and bring it to a simmer.
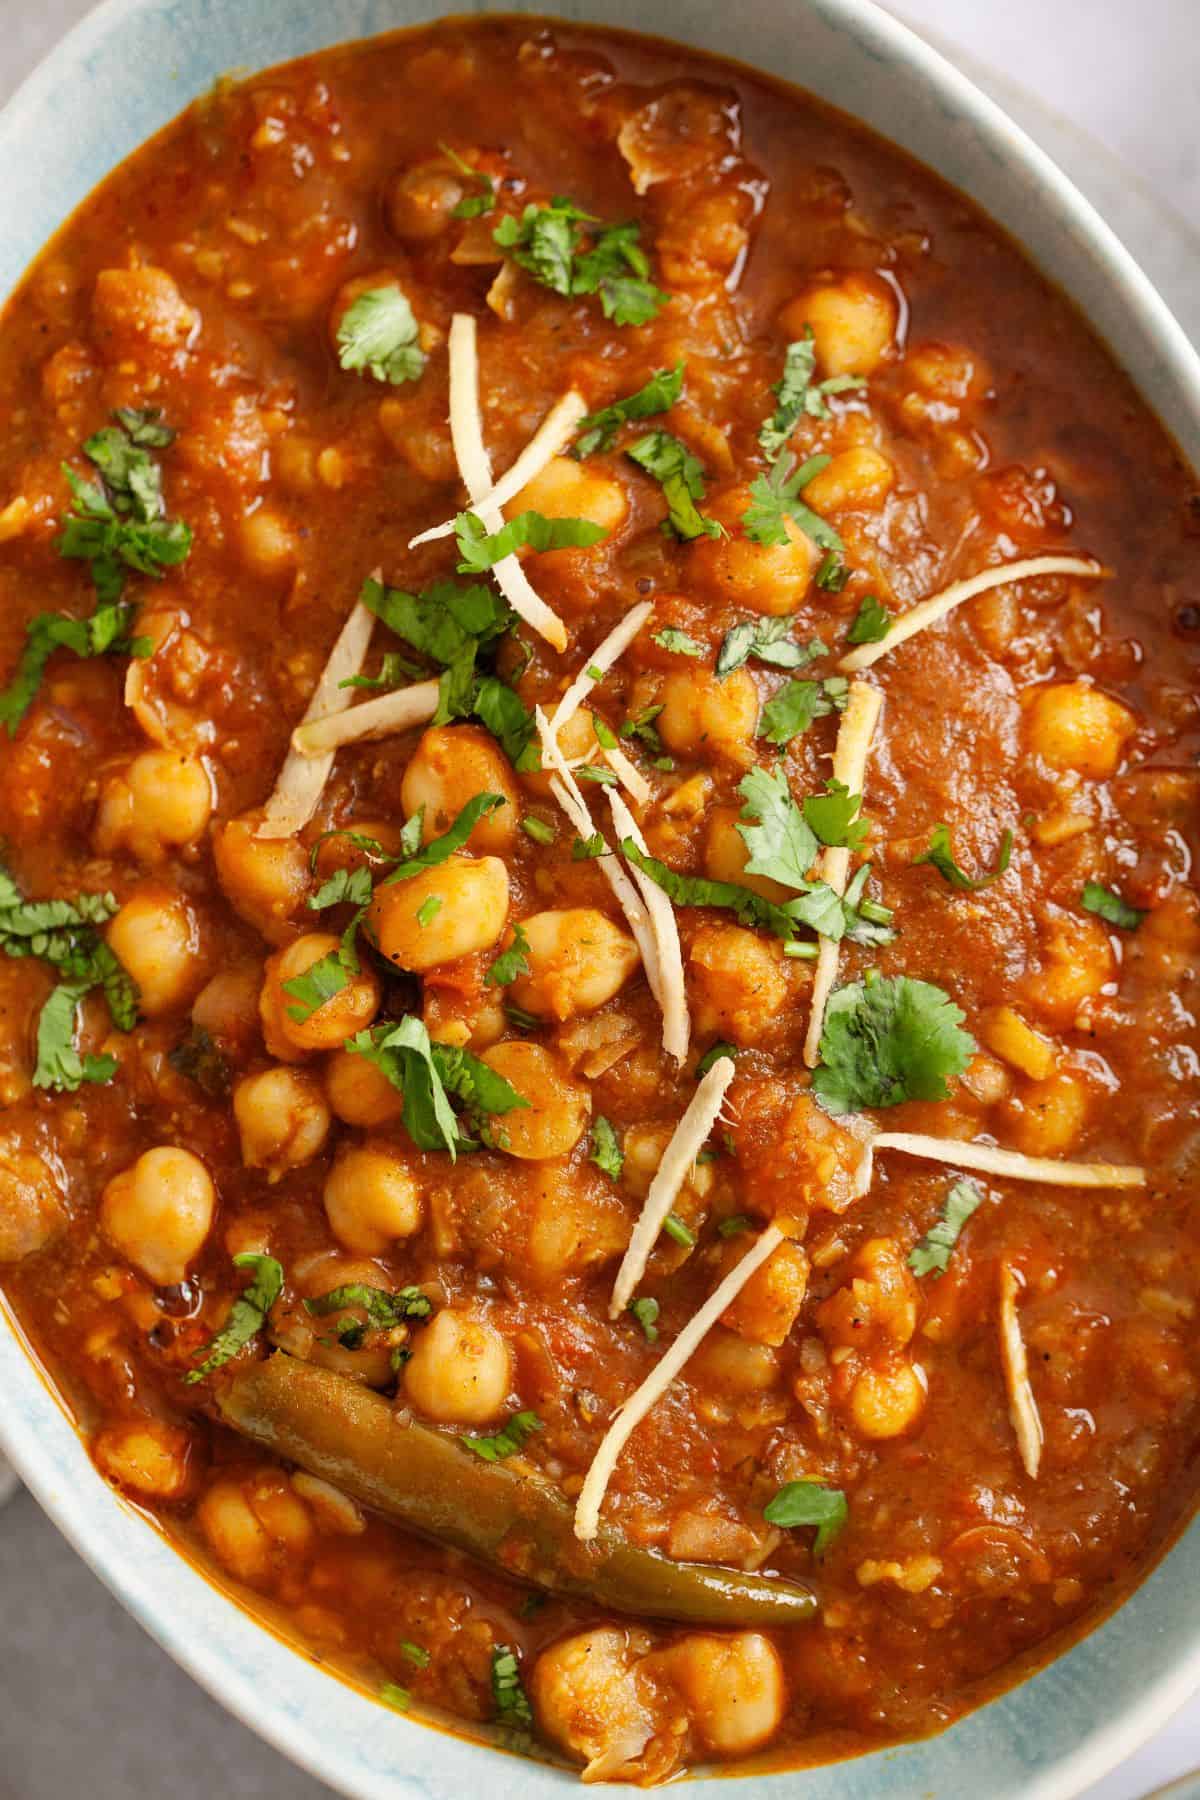
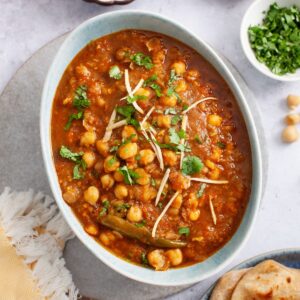
Garnish the chickpea curry with cilantro, and few ginger julienne(if desired) and serve warm with flabreads or cumin rice. Thiny sliced onions are a must with chana in indian meals. A bowl of cooling boondi raita balance the warmth of the curry.
If you enjoyed this recipe, please consider leaving a rating below.
Old-School Chana Masala (With Dried or Canned Chickpeas)
Ingredients
For Boiling Dried Chickpeas
- 1 cup (230g) kabuli chana dried chickpeas (Or use 2, 15oz canned chickpeas, drained)
- 1 tablespoon oil
- ⅛ teaspoon baking soda
- 2 cup water needed for pressure cooking
- ½ teaspoon salt
- 1-2 pinch turmeric powder optional
For Making The Masala
- 4 tablespoon cooking oil any neutral oil
- 2 teaspoon garlic paste
- 2 teaspoon ginger finely chopped
- 2-3 green chillies (hot), adjust to tolerance, I slit them but you can halve them
- 220 g onion finely chopped
- 1 teaspoon salt adjust to taste
- 250 g tomatoes pureed in a blender
Whole Spices
- 1 large bay leaf
- ½ inch cinnamon stick
- 1 small black cardamom or use 2-3 green cardamom
- 1 teaspoon cumin seeds
- 2-3 cloves
Ground Spices
- 2 teaspoon coriander powder
- ½ teaspoon ground cumin
- ½ teaspoon turmeric powder
- 1+¼ teaspoon kashmiri chili powder (or paprika) , adjust to taste
- ½ teaspoon red chili powder (extra hot), adjust to taste
- ¼ teaspoon black pepper powder
To Finish
- ½ teaspoon kasuri methi (dry fenugreek leaves)
- ½ teaspoon garam masala powder
- ¼ teaspoon amchur powder (dry mango powder), sub with lemon juice, adjust to taste
- 2 tablespoon cilantro leaves finely chopped
- 1 tablespoon ginger julinnes
Instructions
Pressure Cook Dried Chickpeas (Skip these steps if using Canned)
- Place the dried chickpeas in a large bowl-they expand significantly as they soak so you want to choose big enough vessel. Rinse them thoroughly under running water, scrub with finger and rinse 2-3 times to remove any dust or impurities.
- Once washed, cover the chickpeas with plenty of water (about 3-4 inches above their surface), cover and leave them to soak at room temperature for at least 10 hours. In colder weather, they may take a bit longer to fully soak. If you're unsure whether they're ready, here's a quick test- a well-soaked chickpea can be cleanly sliced with a sharp knife without skittering away(get the idea?)
- Discard the soaking water and transfer the drained chickpeas to a pressure cooker. Add 1 tablespoon of oil, baking soda, ½ teaspoon salt, and 1-2 pinches of turmeric powder (optional). Pour in 2 cups water to cover the chickpeas, then secure the lid.
- Start cooking on high heat until the first whistle sounds. Then reduce the heat to medium or medium-low and cook for another 4-6 whistles.
- Turn off the heat and allow the pressure to release naturally. Once safe to open, check the doneness: the chickpeas should hold their shape but be soft enough to press between your thumb and forefinger.
- At this stage, drain the chickpeas and set aside the cooking liquid. Transfer the chickpeas to a bowl. We. will use the reserved stock while preparing the curry.
Prepare The Masala
- Before you start cooking, prep all your aromatics and measure out the spices. Keep everything within arm's reach of the stove. Also, have 1-2 cups of hot water ready to go; you'll need it throughout the process to deglaze the pan. I use an electric kettle: just fill it and switch it on while you prep the rest.
- Place a heavy-bottomed cooking pot (I use a 4-quart braiser) over medium heat. Add oil and let it warm up. Once the oil is hot (but not smoking), add the bay leaf, cloves, cumin seeds, and cinnamon stick. Immediately follow with the chopped ginger, garlic paste, and green chillies. Sauté everything for 8-10 seconds, stirring constantly to infuse the oil. The spices should sizzle and crisp up slightly, but not change color for too much browning can introduce a bitter note.
- Next, add the chopped onions. Cook on medium-low heat for 7-9 minutes, stirring regularly, until the onions turn golden brown (not dark brown). This step is key since it develops both the color and flavor base of your curry, so take your time.
- Once the onions are golden, deglaze the pot with about ? cup of hot water. Scrape the bottom to release all the flavorful bits and mix them in. Let the water reduce for about a minute; it should soften the onions further without drying them out completely.
- Now sprinkle in the ground spices-coriander, turmeric, red chilli powder, Kashmiri chilli powder, ground cumin, and black pepper. Also add the salt. Stir to coat the onions evenly. Cook this spice mix over low to medium heat for 1-2 minutes, adding small splashes of hot water to prevent sticking and to help the spices toast evenly. You'll know it's ready when the masala looks rich and glossy, and the raw spice aroma has mellowed. Your kitchen will smell amazing!
- Add the pureed tomatoes and cook down (bhuno) the mixture, stirring regularly until most of the moisture has evaporated and the oil begins to separate. At this stage your masala should look shiny and well-blended.
Simmer The Chana Masala
- Add the cooked chickpeas to the masala. Stir well and cook for 2-3 minutes to let them soak up the flavors.
- Pour in the reserved cooking liquid from the chickpeas (or water with ⅛ teaspoon baking soda if using canned chickpeas). Chana masala shouldn't be too watery, so don't add too much liquid, just enough to create a thick, stew-like consistency. You can always adjust the consistency as you go.
- Once the liquid comes to a boil, reduce the heat, cover the pot, and let the curry simmer gently for 15-18 minutes. Check occasionally to make sure the masala isn't drying out. Add a splash of water if needed.
- After simmering, uncover the pot and use the back of your spoon to mash a few chickpeas. This helps naturally thicken the curry thanks to their starch content.At this stage, taste and adjust the salt if needed.
- To finish, stir in garam masala, amchur (dried mango) powder, and crushed kasuri methi. Add julienned ginger if using. Let the curry simmer uncovered for another 3-5 minutes so all the flavors mingle together.
- Your chana masala is now ready. Keep in mind, it will thicken as it cools, so when reheating, simply add water to loosen the consistency and bring it back to a gentle simmer.
- Garnish with chopped cilantro and extra ginger juliennes if desired.Serve warm with flabreads or cumin rice. Thiny sliced onions are a must with chana in indian meals. A bowl of cooling boondi raita balance the warmth of the curry
I'd Love to Hear from You!