

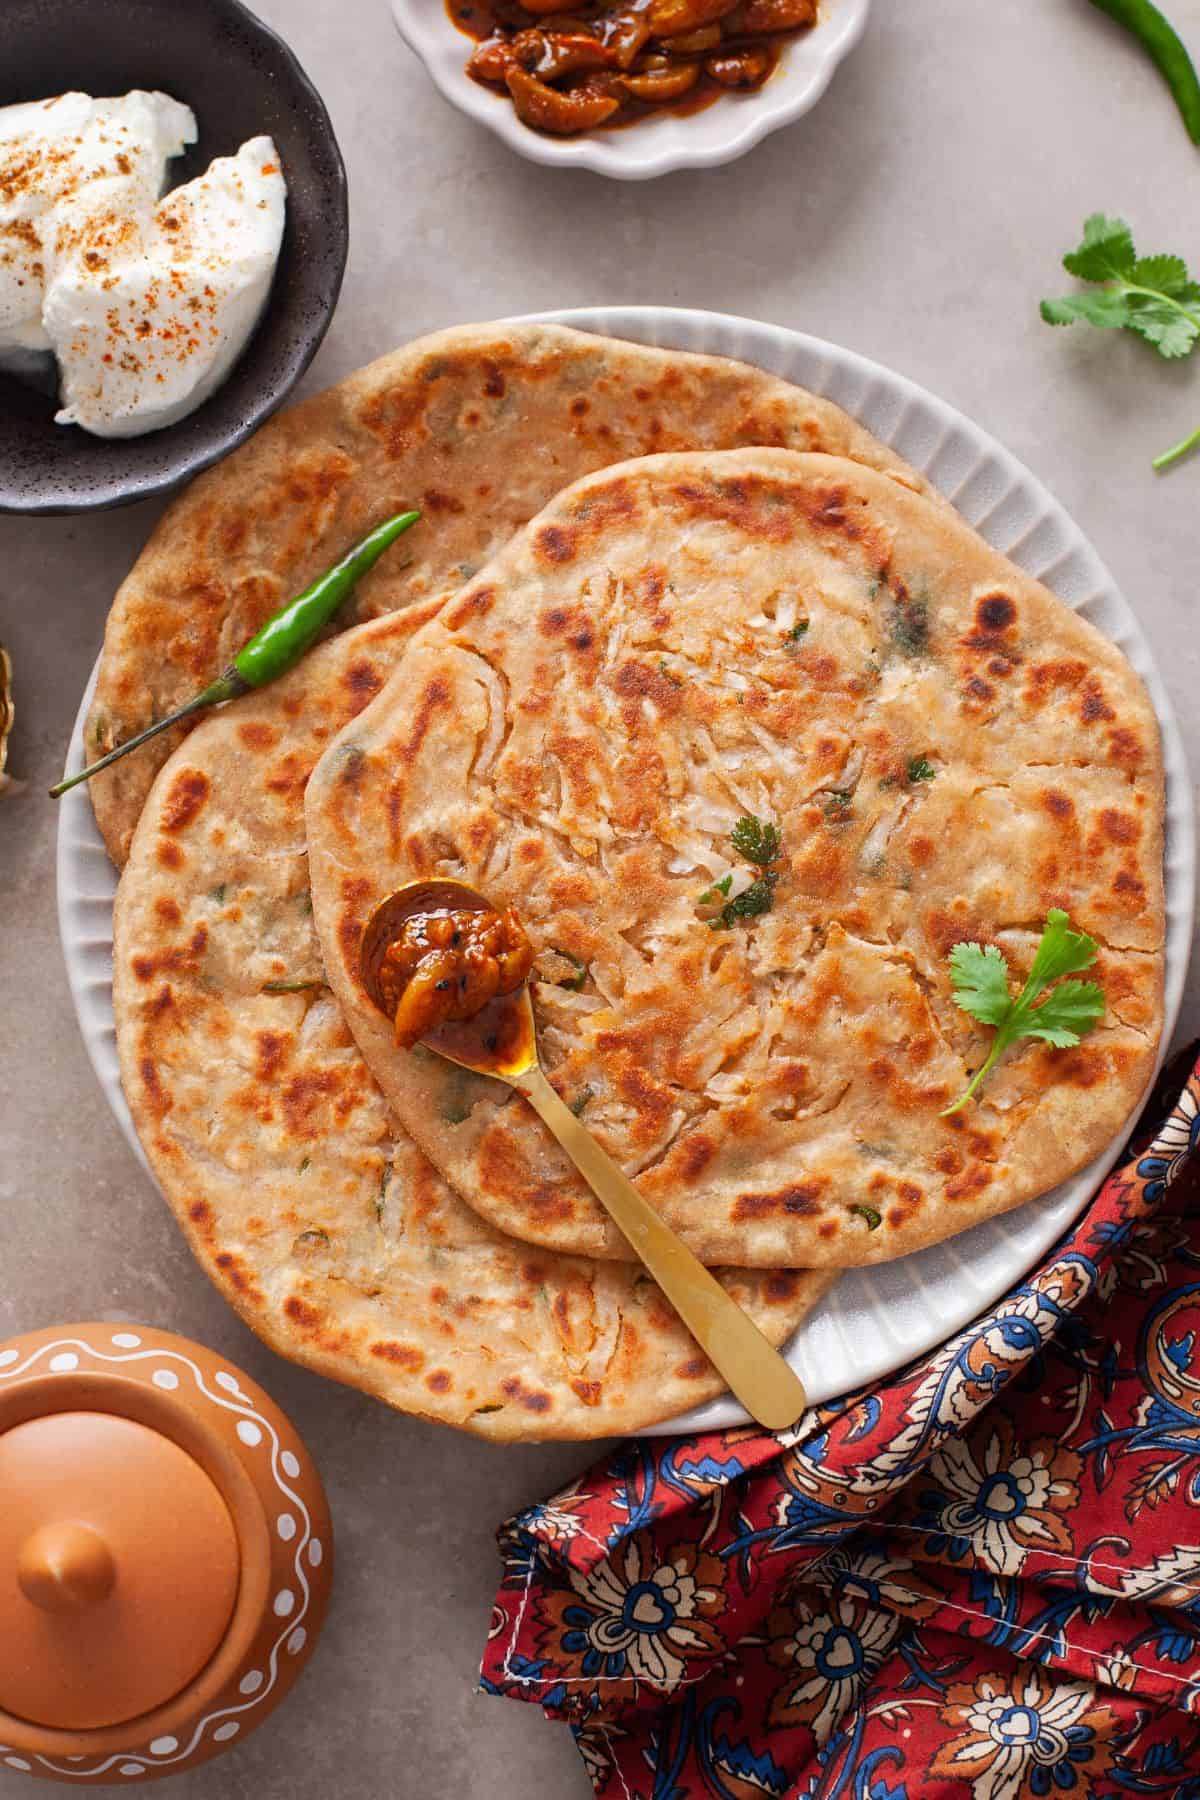
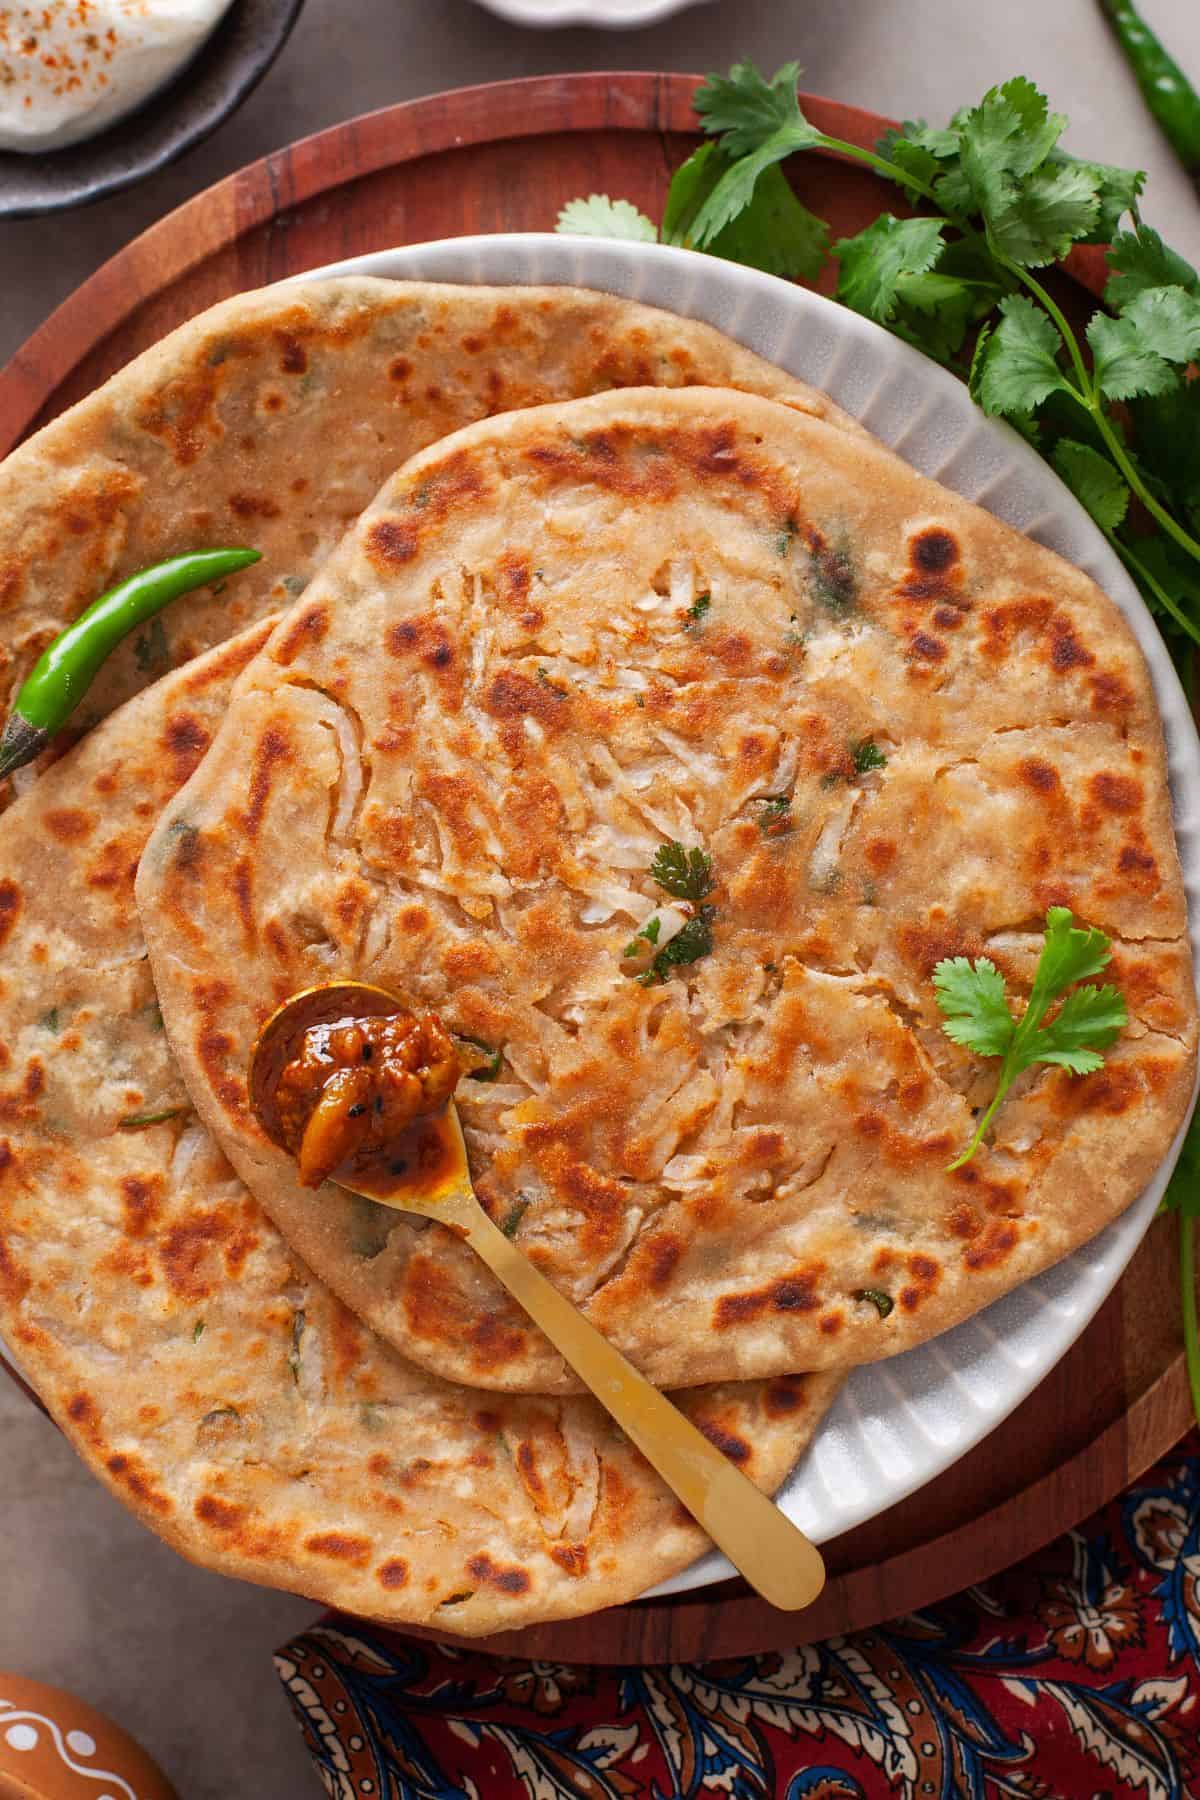
This punjabi style mooli paratha recipe will help you make parathas that are soft inside, nicely toasted outside, and full of texture and flavor. These flatbreads are made with whole wheat flour and stuffed with a perfectly spiced radish stuffing.
I am also sharing my tried and tested tips, from getting the radish filling just right to rolling the dough without tearing and cooking the parathas to crisp. Don't forget to watch the full video included in the post, which will also guide you through every step.
You know those mornings when you just want something comforting but not boring? To me, that's when indian flatbreads hit the spot! I grew up eating all kinds of stuffed parathas like paneer paratha, dal parathas, aloo methi paratha (and more!) for breakfast every weekend and many times for lunch or dinner too.
We make them with atta or whole wheat flour because that's what gives these mooli parathas their homemade, earthy flavor and pleasantly chewy texture. The radish filling is spiced just right, with grated radish (mooli), heat of green chillies, and touch of spices.
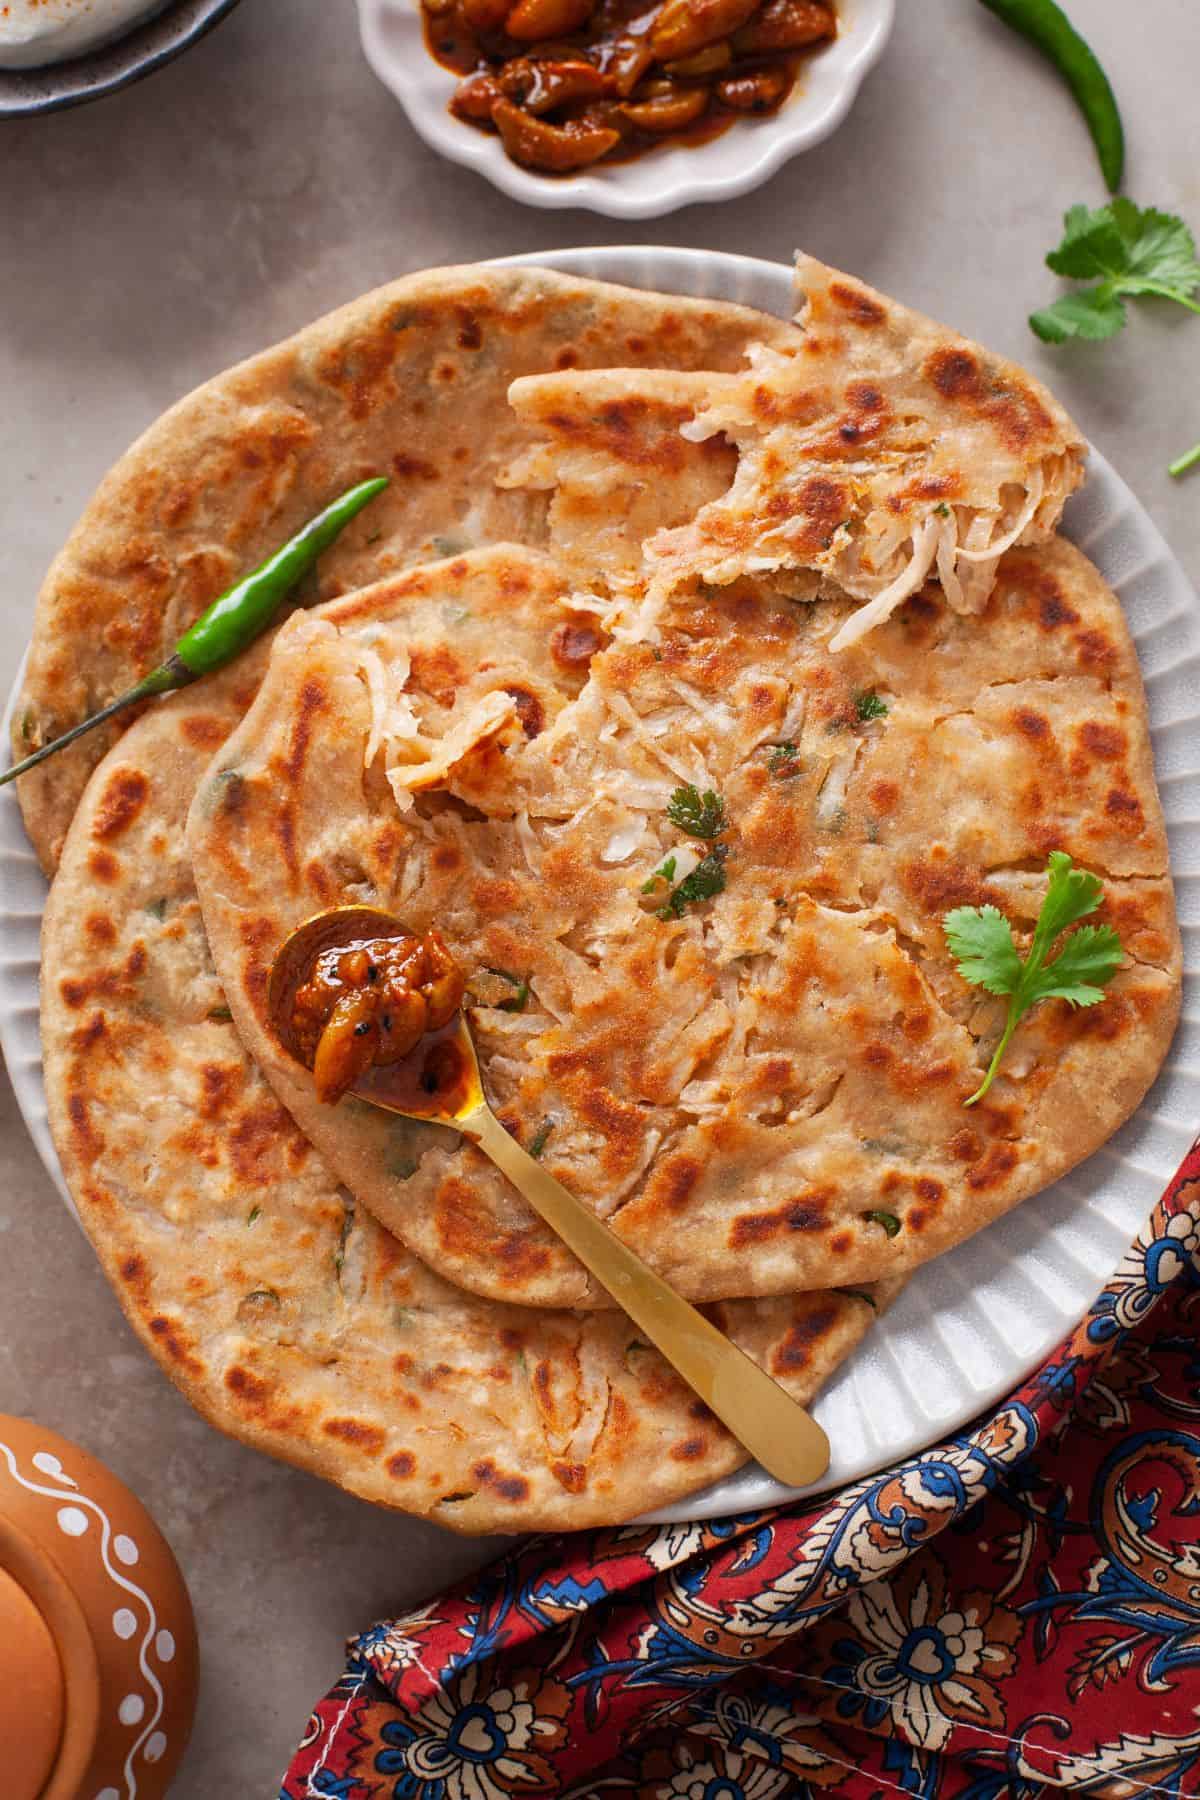
Once stuffed and rolled out, the best part begins as you watch them puff up lightly on the pan and get those beautiful golden spots. Unlike basic plain paratha, stuffed ones don't need a lot of sides. Serve them hot with a dollop of butter or with yogurt, add a small bowl of chutneys, or enjoy them with a cup of masala tea.
Trust The Process
As compared to other bharwan parathas, mooli paratha are slightly tricky. A lot of people find it difficult to make them(and rightly so!). Because mooli is a high water content vegetable, it's challenging to work with since it releases those juices when salted and also, when we put pressure on the stuffing while rolling the paratha.
The main challenge is that often parathas tear while rolling or get soggy due to this excess moisture. Many people prefer cooking the grated mooli first to dry up the moisture, but in my family, we always stuff raw grated mooli into the dough.
Raw shredded mooli tastes much crunchier and fresher that way. Some people also mix grated mooli with salt, let it sit for a while, and then squeeze out the excess water before making the filling.
My recipe is a little different. And it all comes to when we add salt to mooli. If you follow my method, you will not waste the juices, and they turn out so tasty. The filling also does not get soggy. So let's get into my tips in next section.
Tips To Avoid Sogginess
- Choose fresh and tender radishes. If you cannot find Indian mooli, Japanese daikon works well too. If your mooli is dry and tough, the parathas will not taste as good.
- Always taste the mooli before using it. Tasty mooli means tasty parathas. Even when it is in season, mooli can sometimes be quite pungent, and that can spoil the taste of parathas. Pick radishes that are sweet and fleshy for the best flavor.
- Make the radish filling first. And salt the filling right before you stuff the each paratha. Salt the filling individually for each paratha. This prevents the radish filling from getting watery and your parathas won't tear.
- Do not discard the mooli juice you collect. We will use it when kneading the dough. Remember, I said we are not letting anything go to waste.
How To Make Mooli Paratha
- Using a peeler, remove the skin from the mooli. Wash and dry it thoroughly, then grate it finely.
- Place the grated mooli over a bowl and squeeze out all the juice.Extract as much liquid as possible. You can use your hands, a potato masher, or a cheesecloth to do this.Keep the juice aside to use later for kneading the dough.
- Add grated mooli to a bowl. Add all the spices, cilantro and finely chopped green chilies. Do not add salt. Gently mix everything and set aside the radish filling.
- In a large mixing bowl, add the atta (whole wheat flour) and ¼ teaspoon of salt. Mix lightly.
- Knead well, then cover and rest the dough for 15-20 minutes to allow the gluten to relax. This makes the dough easier to roll.
If the dough becomes sticky, it will stick to rolling pin and tear. If your dough is dry(ish) or hard, you will have to press harder to roll the paratha and again, that can make the filling soggy and tear again.
Roll, Stuff and Toast Paratha
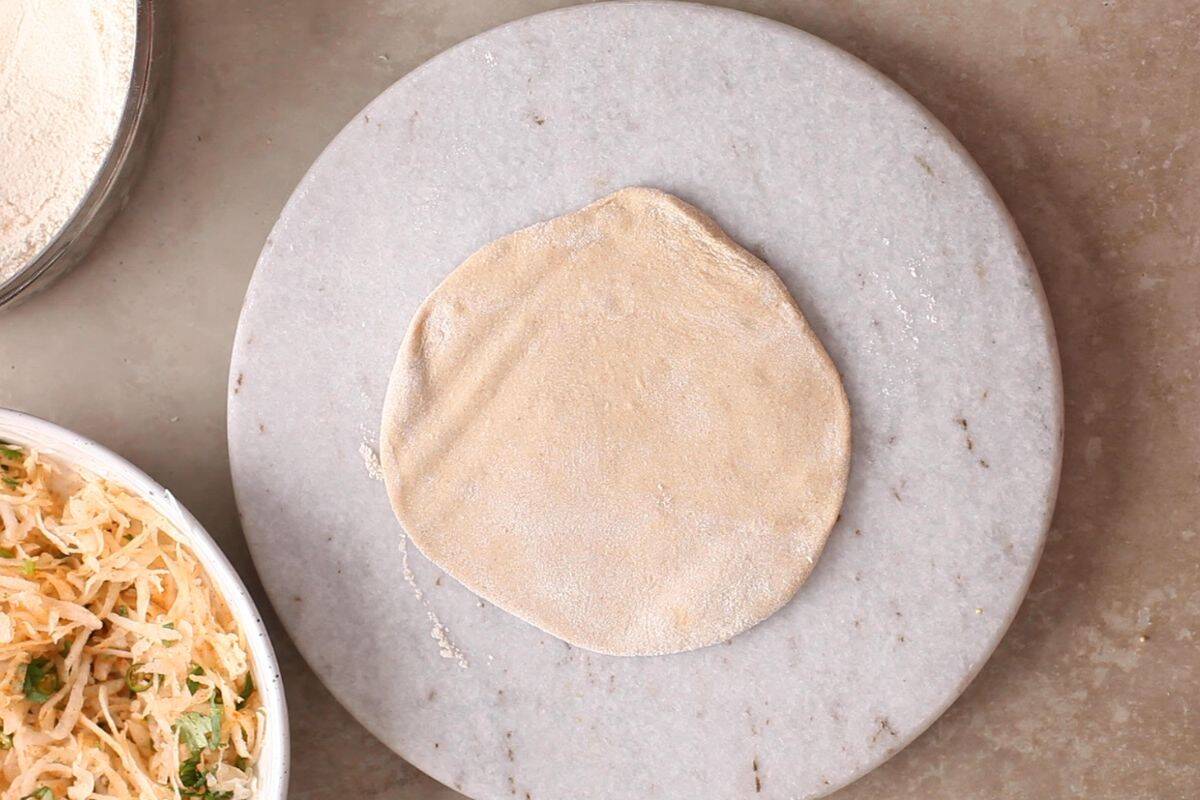
9. When ready to roll, take a small portion of dough and roll it into a 2.5-3 inch circle, keeping the edges slightly thinner than the center.
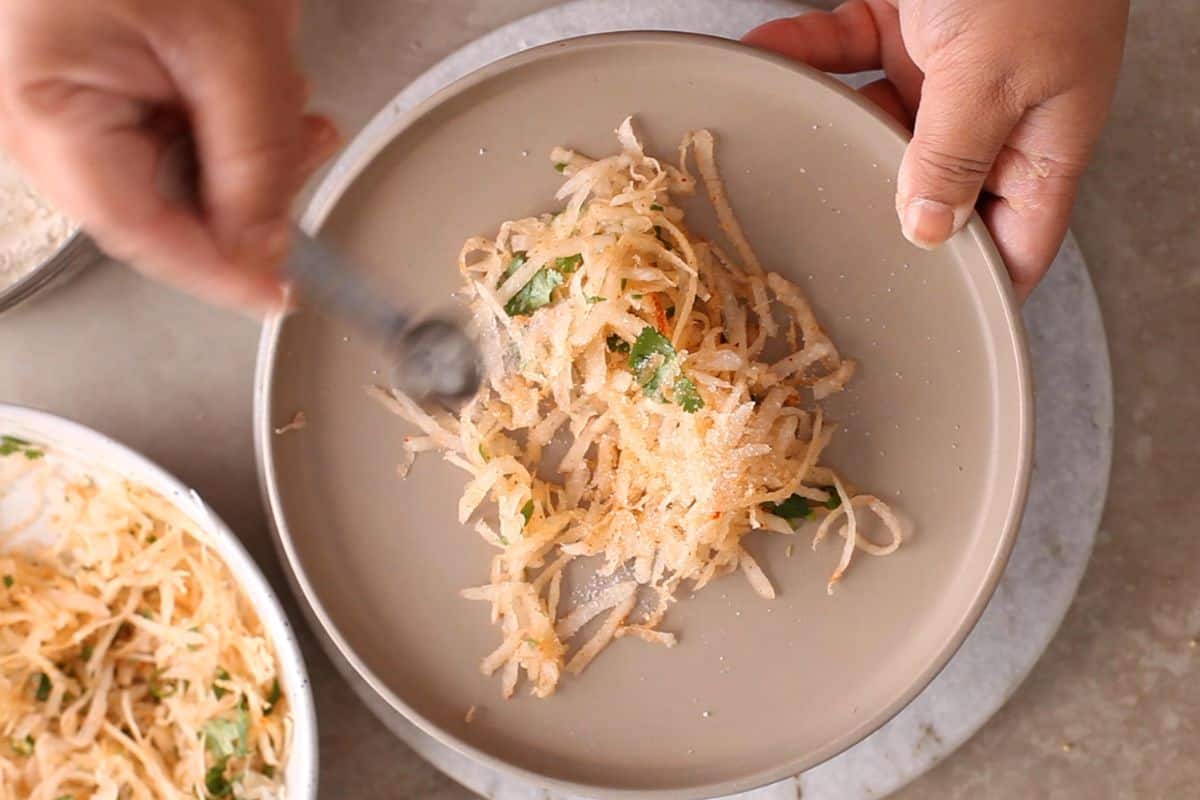
10. In a small plate or bowl, take about ¼ cup of grated mooli and sprinkle a little salt over it. Mix gently.
My Top Tip - Always salt a small portion of filling just before making each paratha. This prevents the radish from releasing too much water as it sits and helps avoid tearing.
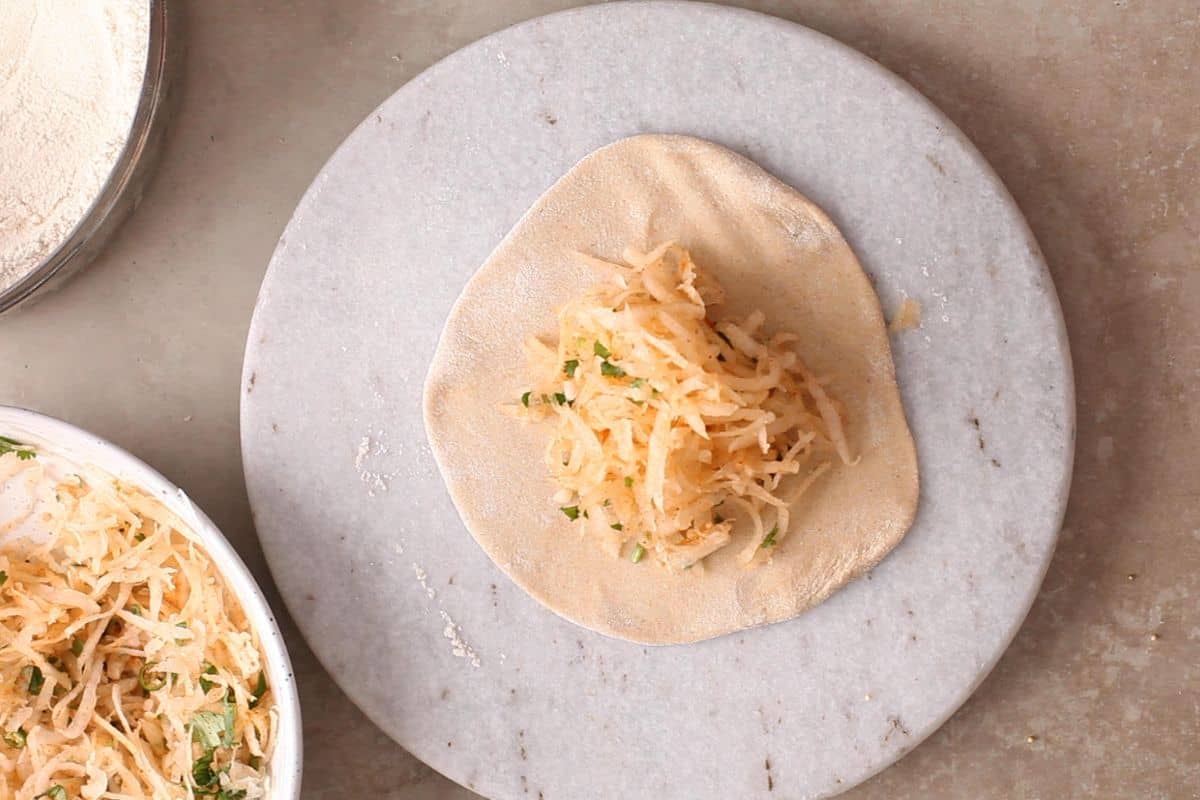
11. Place the salted mooli filling in the center of the rolled dough. Bring the edges together to seal the filling inside.
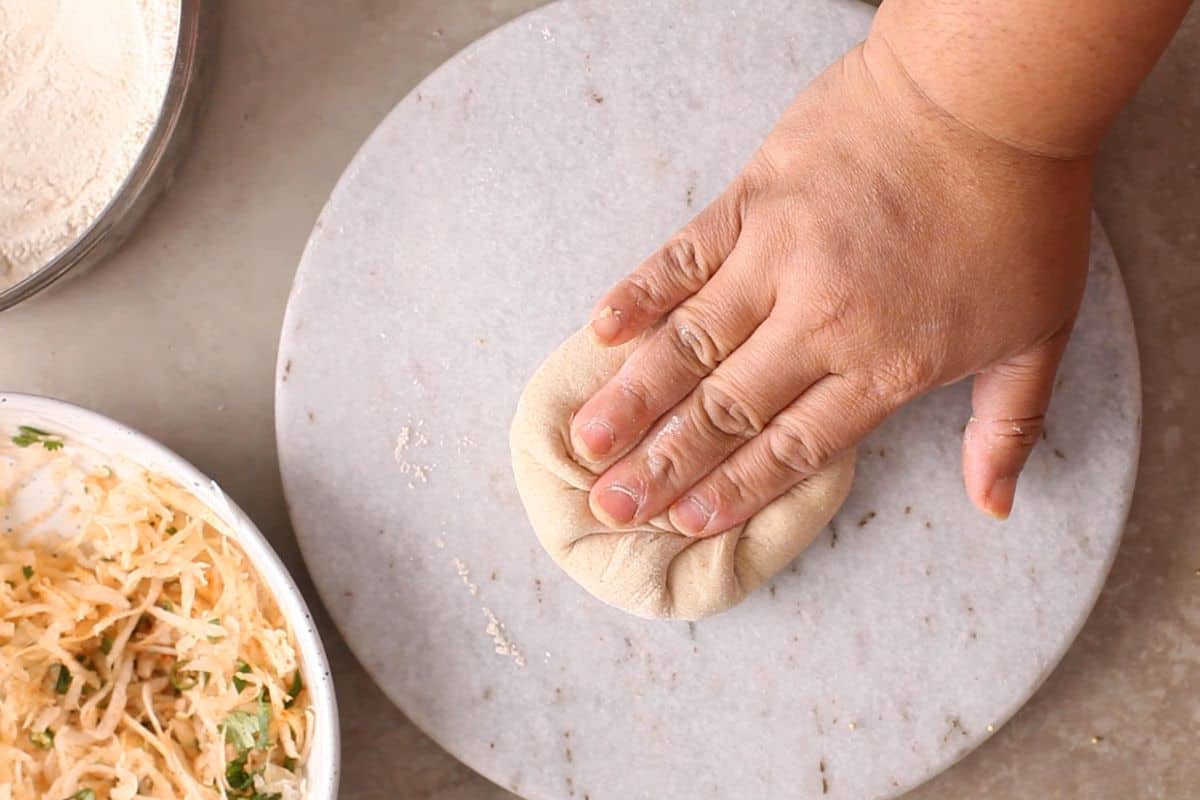
12.Gently flatten the stuffed dough ball, and dust lightly with flour.
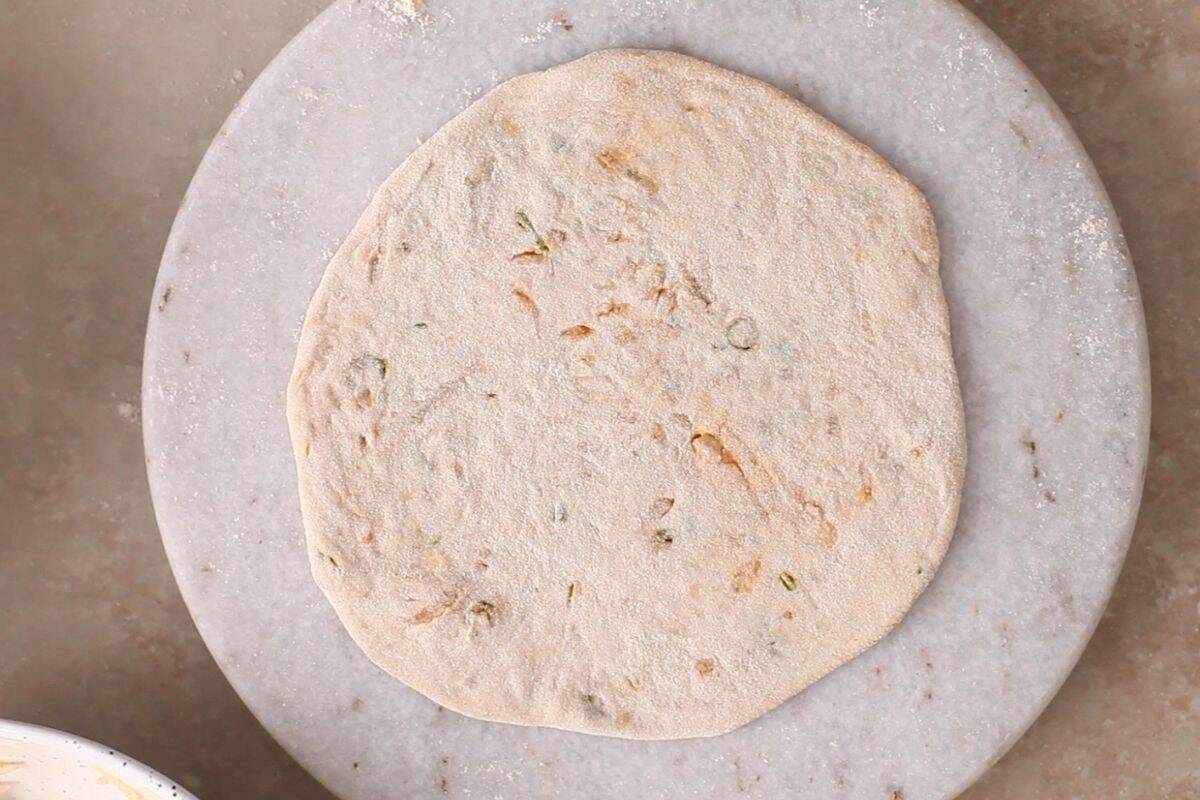
13. Roll it out into a 6-7 inch circle. Apply even and gentle pressure so the filling does not break through.
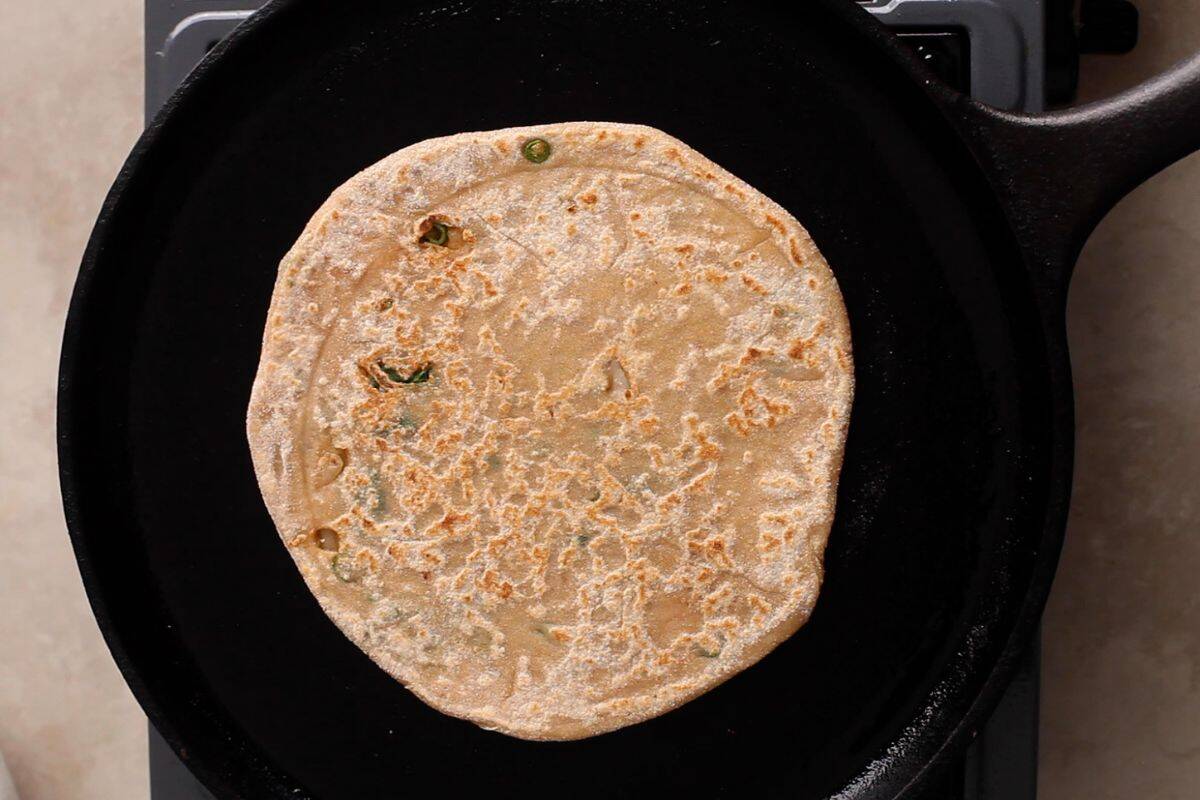
14. Heat a tawa over medium flame. Place the rolled paratha on the hot tawa and cook until light bubbles appear on the top surface.Flip it over and apply a little oil or ghee to the cooked side.

15. Flip again, apply oil on the other side, and cook until golden brown spots appear on both sides.Serve warm with raita, pickle, or chutney.

Punjabi Mooli Paratha (Stuffed Radish Paratha)
Ingredients
To Make The Mooli Stuffing
- 450 g fresh mooli (daikon) after peeling and grating you will get 350 to 400g shredded mooli
- 2-3 green chilli finely chopped, adjust to taste, substitue with serrano pepper or thai bird chilies
- 2 tablespoon cilantro leaves finely chopped
- salt as needed
Spices for mooli stuffing
- ⅛ teaspoon ajwain seeds
- ½ teaspoon red chilli powder (hot), adjust to taste
- ¾ teaspoon garam masala powder adjust to taste
- ½ teaspoon amchur powder or chaat masala powder adjust to taste
For Paratha Dough
- 2 cup whole wheat flour atta (plus ¼ cup dry flour to use during rolling parathas)
- 3 teaspoon oil I use avocado oil
- ¼ teaspoon salt
- water if needed(we will knead the dough using mooli juices)
- ⅓ to ½ cup Oil or as needed while cooking the paratha
To Serve
- Garlic Achar
- Green Chutney
- Yogurt or raita
Instructions
Make The Radish Stuffing
- Using a vegetable peeler, carefully remove the outer skin of the mooli. Rinse it thoroughly under running water to remove any dirt, then pat it completely dry with a clean kitchen towel. Once dry, grate the mooli finely using the small side of a grater. We want medium shreds.
- Place the grated mooli in a fine sieve or muslin cloth set over a bowl. Press or squeeze firmly to extract as much juice as possible. The goal is to remove all excess moisture. Reserve this juice, as we will use it to knead the dough for extra flavor.
- Transfer the squeezed, grated mooli to a mixing bowl. Add all the spices, freshly chopped cilantro, and finely chopped green chilies. Do not add salt at this stage, as it will draw out more water from the mooli and make the stuffing soggy. Gently combine everything to prepare the radish filling, then set it aside.
Prepare the Paratha dough
- In a separate large mixing bowl, combine the whole wheat flour (atta) with oil and salt. Mix lightly to distribute the salt evenly. Gradually add the reserved mooli juice and knead until a soft, pliable dough forms. Add water slowly as needed after you've used up the mooli juices. When kneading the dough, make sure that it is neither too sticky nor too dry. A sticky dough will cling to the rolling pin and tear easily, while a dry or stiff dough will require extra pressure, which can cause the radish filling to release moisture and make the paratha soggy or prone to breaking.
- Cover the dough with a damp cloth and let it rest for 15-20 minutes. This resting period helps the gluten relax, and makes the dough smoother and easier to roll.
Stuff and Cook the Mooli Paratha
- When ready to roll the parathas, take a small portion of the rested dough and shape it into a smooth ball. Using a rolling pin, roll it out into a small circle about 2.5 to 3 inches in diameter while keeping the edges slightly thinner than the center to help with sealing later.
- In a small bowl or plate, take roughly ¼ cup of the grated mooli filling. Sprinkle ⅛ teaspoon of salt (or to taste) over it and mix gently.Top Tip: Always salt only a small portion of the filling right before making each paratha. This prevents the radish from releasing excess moisture, which can make the dough soggy and cause it to tear during rolling.
- Place the freshly salted mooli filling in the center of the rolled dough circle. Bring the edges together carefully, and pinch them at the top to seal the filling inside and form a neat stuffed ball.
- Gently flatten this stuffed dough ball with your fingers, dust it lightly with dry flour, and begin to roll it out again. Using light, even pressure, roll it into a 6-7 inch circle. Dush lightly with dry flour as needed during rolling. Move the rolling pin gently to avoid pressing too hard, to make sure that the filling stays evenly distributed without breaking through the dough.
- Heat a tawa or flat griddle over medium flame. Once hot, place the rolled paratha on the tawa. Cook until small bubbles begin to appear on the surface, then flip it over.
- Brush or drizzle a little ghee or oil on the partially cooked side, then flip again and repeat on the other side. Continue cooking until both sides are golden brown with crisp, golden brown charred spots.Serve the mooli parathas hot, accompanied by cooling raita, tangy pickle, or your favorite chutney.
Video
Notes
- Choose fresh and tender radishes. If you cannot find Indian mooli, Japanese daikon works well too. If your mooli is dry and tough, the parathas will not taste as good.
- Always taste the mooli before using it. Tasty mooli means tasty parathas. Even when it is in season, mooli can sometimes be quite pungent, and that can spoil the taste of parathas. Pick radishes that are sweet and fleshy for the best flavor.
- Make the radish filling first. And salt the filling right before you stuff the each paratha. Salt the filling individually for each paratha. This prevents the radish filling from getting watery and your parathas won't tear.
- Do not discard the mooli juice you collect. We will use it when kneading the dough. Remember, I said we are not letting anything go to waste.
- Read the blog post for additional tips and tricks.

I'd Love to Hear from You!