

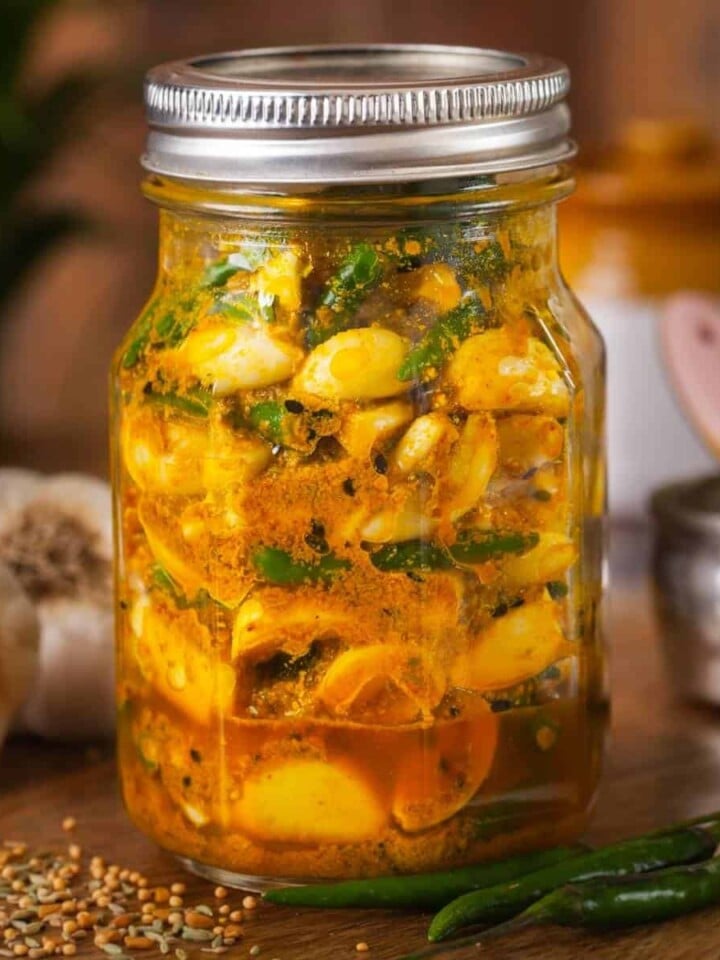
Gobhi Gajar Shalgam ka achar is a mix vegetable pickle extremely popular in northern India during the winter season. This punjabi pickle recipe uses a handful of ingredients and is very easy to put together.

For us, winter time is incomplete without a jar of pickled vegetables.
Achar or Achaar = Pickle. Achar are an integral part of cuisine from the indian subcontinent.We love our pickles in India, all meals are better with pickles! Indian pickles are quite different from western pickles due to preservation in oil and spices. This technique of oil preservation enhances the shelf life and there is no need for refrigeration.
If the pickles are sun cooked, even better ! that is how I saw my grandmother and mom do. There is something incredibly priceless about what sun fermentation does to concoction of spices & mustard oil lending them a distinct flavor & aroma.
At this time of the year, I am all about soups and pickling at this time of the year. When I am not stirring chicken soup, I love to steer around the house with jars of pickles, chasing sun light.
Crunchy, juicy, tangy & spicy, this punjabi mix vegetable gajar gobhi shalgam achar appears as a side to all our meals. If you are like me, you would love it straight out of the jar. I like to make small batches throughout the season to maintain the crunchy texture of vegetables.
What is Gajar Gobhi Ka Achaar
Gobi or Gobhi = cauliflower, Gajar = carrots, Mooli = Indian Radish (Similar to Daikon), Shalgam = Turnip. Some people call it Gobi Gajar Mooli ka Achar too. Along with seasonal vegetables, you will need pickle spices, apple cider vinegar and mustard oil.
This gajar gobhi pickle is typical to northern parts of India during winter months. It is made in most homes.
Honestly, the real joy in eating these pickles is when you pair them with flatbreads and curry or drizzle few extra teaspoons of that flavored oil on top your bowl of rice & lentils - a taste that cannot be defined, just devoured.
The achar is not too oily and is a great and delicious way to up your vegetable intake during the cold months. My recipe is spicy and tangy however you can definitely add sugar if you prefer that sweetish flavor profile in your pickles.
I am sharing my grandmother's recipe. She used to make the best achaars as I have mentioned many times before.
The vegetables I use in this recipe are available all round the year here in States , however in India, these vegetables flood the markets during winters. When you spot red, juicy Delhi gajar (carrots), sem phalli (indian broad beans), cauliflowers and subtly sweet indian radishes and turnips on vegetables carts- that's when you know its time to bottle up!
Ingredients (Notes and Substitutions)
- Mixed Vegetables - Carrots, Mooli, Cauliflower, Turnip, Ginger, Green Chillies. If you cannot find mooli, use japanese daikon. If you find sem beans (broad beans) at indian store, use those too. You may skip or use any vegetable you prefer, just keep the total weight of the vegetables same in the recipe
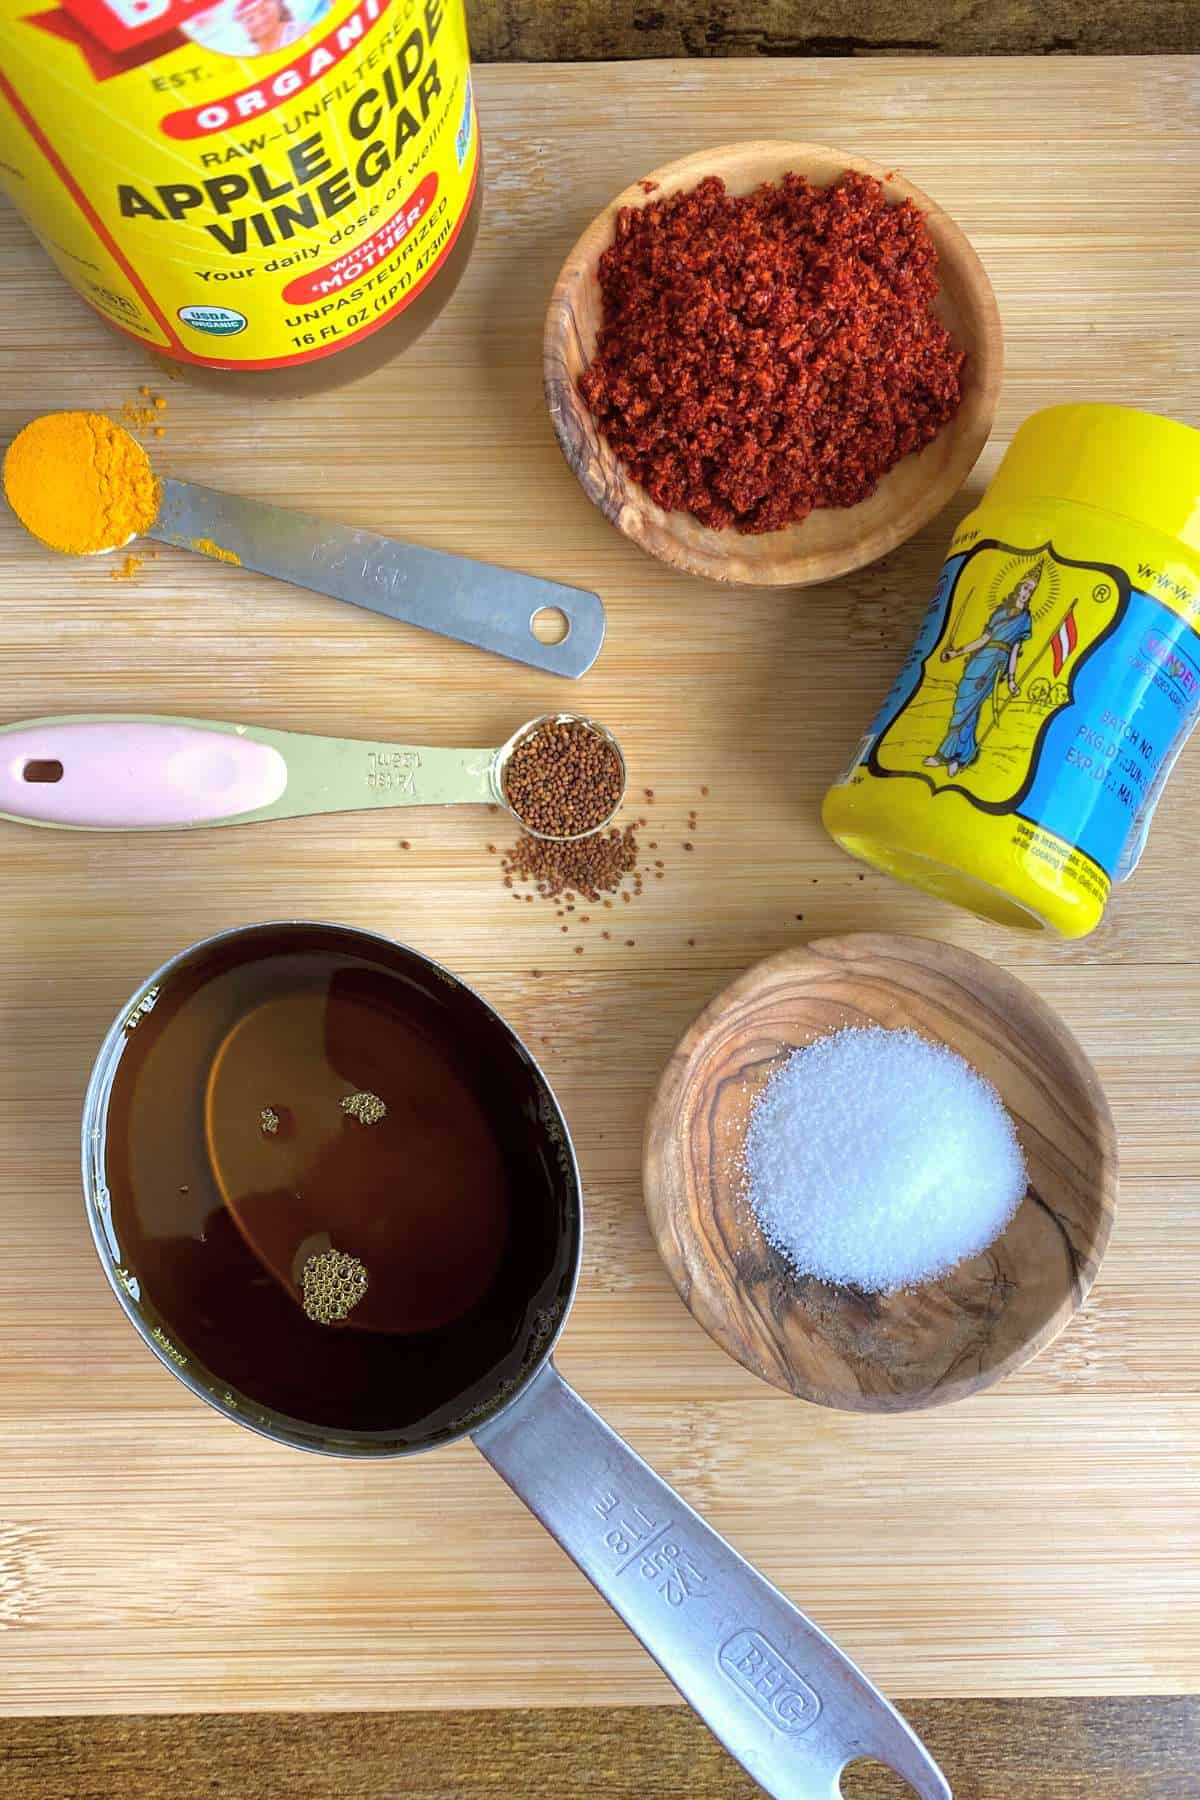
- Rai (Small Mustard Seeds)- These are different from black mustard seeds. Rai dana or rai seeds are less bitter and as the pickle ferments, they add a wonderful pungent tang to it. You can very easily find these in indian stores. Grind the seeds using mortar pestle before adding.
- Powdered Spices - Red Chilli Powder, Hing (Asafoetida), Turmeric Powder, Salt
- Achar Masala - Most indian stores carry a powdered pickle spice blend which has mixed ground spices like fennel seeds, nigella seeds, fenugreek seeds etc. If you don't find or don't want to use it, use a tablespoon or two of masala from the pickles you have at home (my mom does this!). Achar masala helps catalyse the pickling process as well as bumps the flavor of your achar.
- Mustard Oil- Helps in preservation of the pickle. Also adds the unique pungency that we associate with indian pickles. Punjabi cuisine has mustard oil as a prominent ingredient and in this punjabi style pickle, mustard oil is a must.
- Apple Cider Vinegar- I like to use it because I feel that it quickens the process of pickling and adds a wonderful tang. If you find the taste of ACV too strong, use white vinegar instead.

How To Make Gobi Gajar Ka Achar
Get the Vegetables Ready (Cut, Blanch & Dehydrate)
- Wash off any dirt on the vegetables. Peel the skins of carrots, daikon and turnip. Cut carrot and daikon into small batons. Cut the turnips in a more or less similar size. Remove the stems and leaves of cauliflower and cut into small pieces. The important thing is to make sure that more or less the size and thickness of vegetables is same. I personally dont cut them too big or thick.
- Peel the ginger and cut lengthwise. You can leave the green chillies whole with a slit. Or cut into halves.
- Bring a large pot of water to a boil. Add turmeric and salt give a stir and wait for 3-4 minutes until the water is boiling.
- Take the pot off the stove and immediately add all the vegetables (except ginger & green chillies) to the hot water. Let the vegetables blanch in hot water for 5-6 minutes.
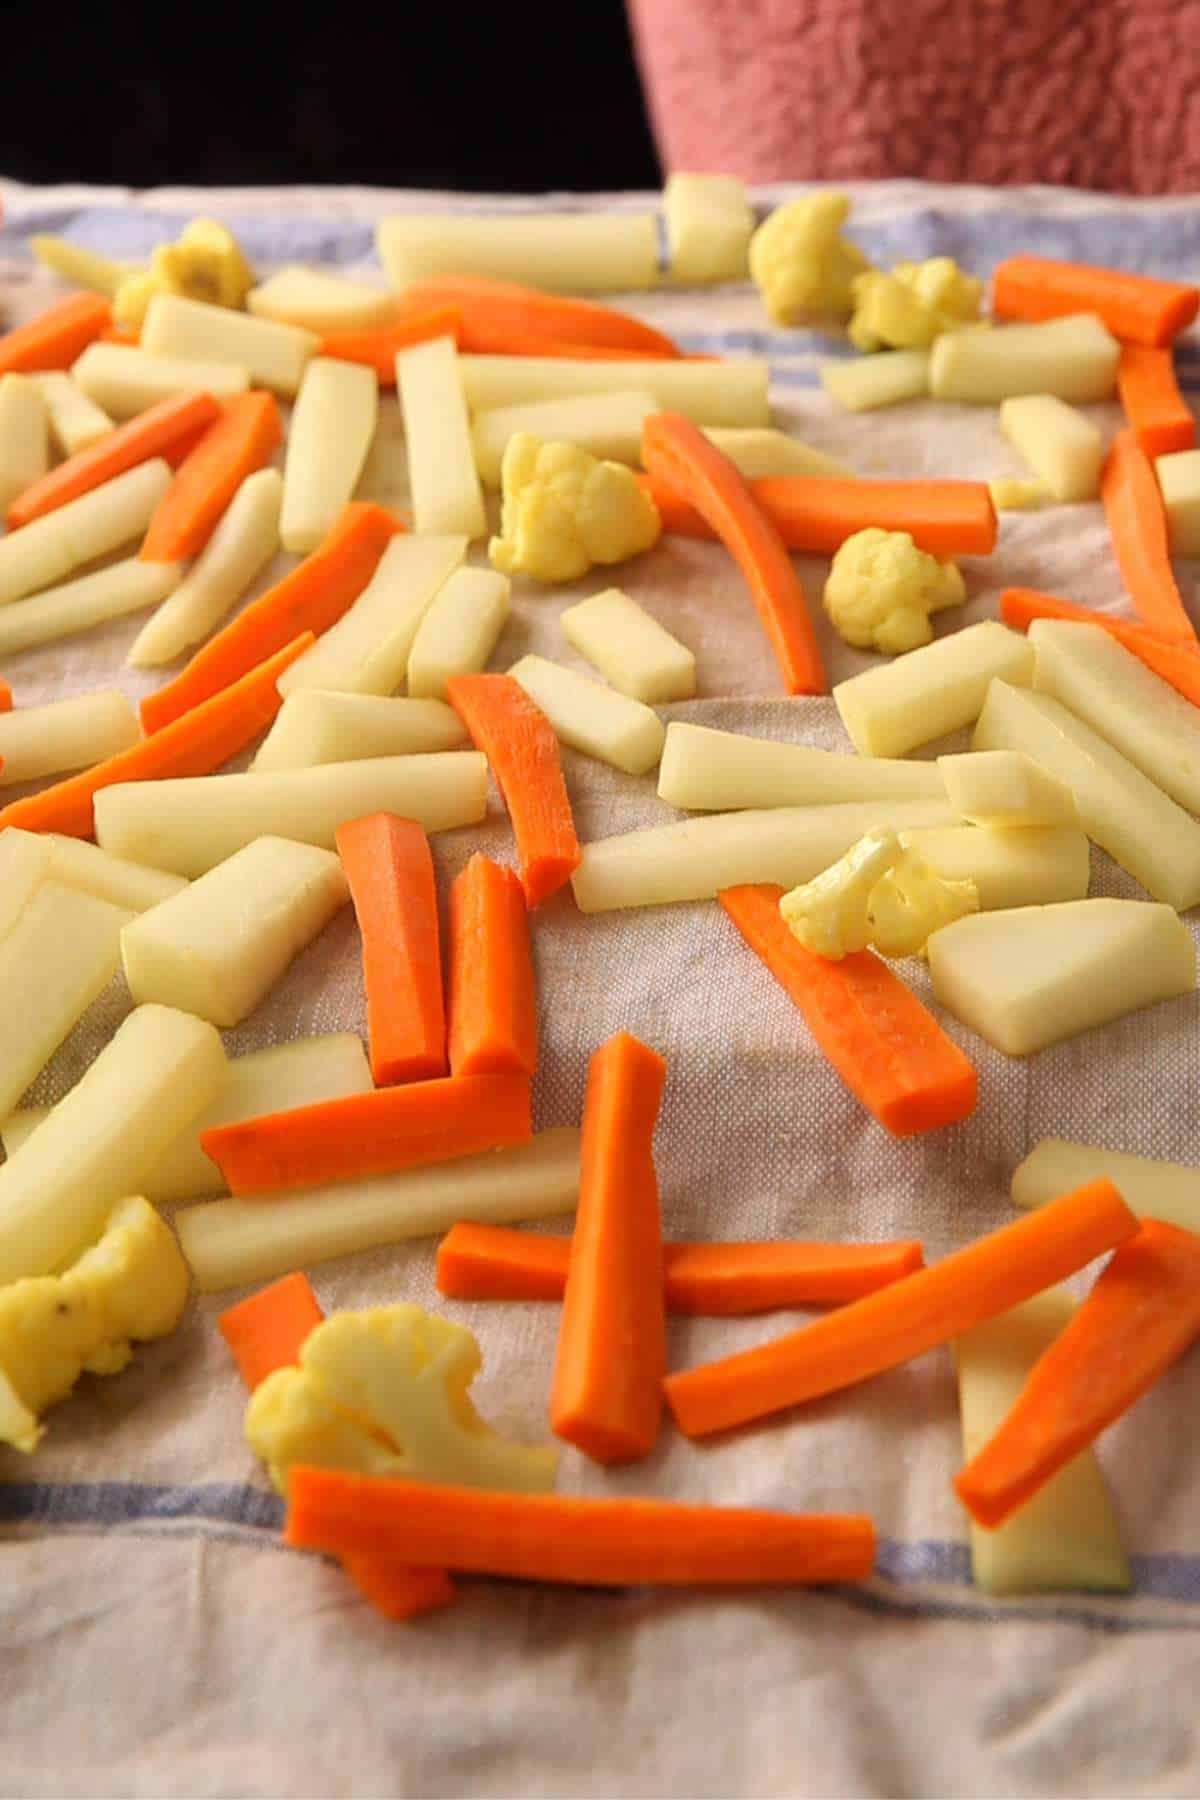
- Dehydrate - Drain the vegetables using a colander. Spread in a single layer on a large kitchen towel and let air dry for 1-2 hours. Move around a few times for even drying. This is extremely important step.
- Place the dried vegetables along with ginger and green chilies in a large bowl and make the oil/
Make the Achar Masala
- Add mustard oil to a pan and heat up on stove till slightly smoky.
- Take off the stove and wait for a minutes to cool off.
- Temper the oil with powdered rai, turmeric and red chilli powder, achar masala, salt and hing. The spices should not sizzle but we want to add to hot oil to get best flavor. Mix well.


Mix Together & Ferment
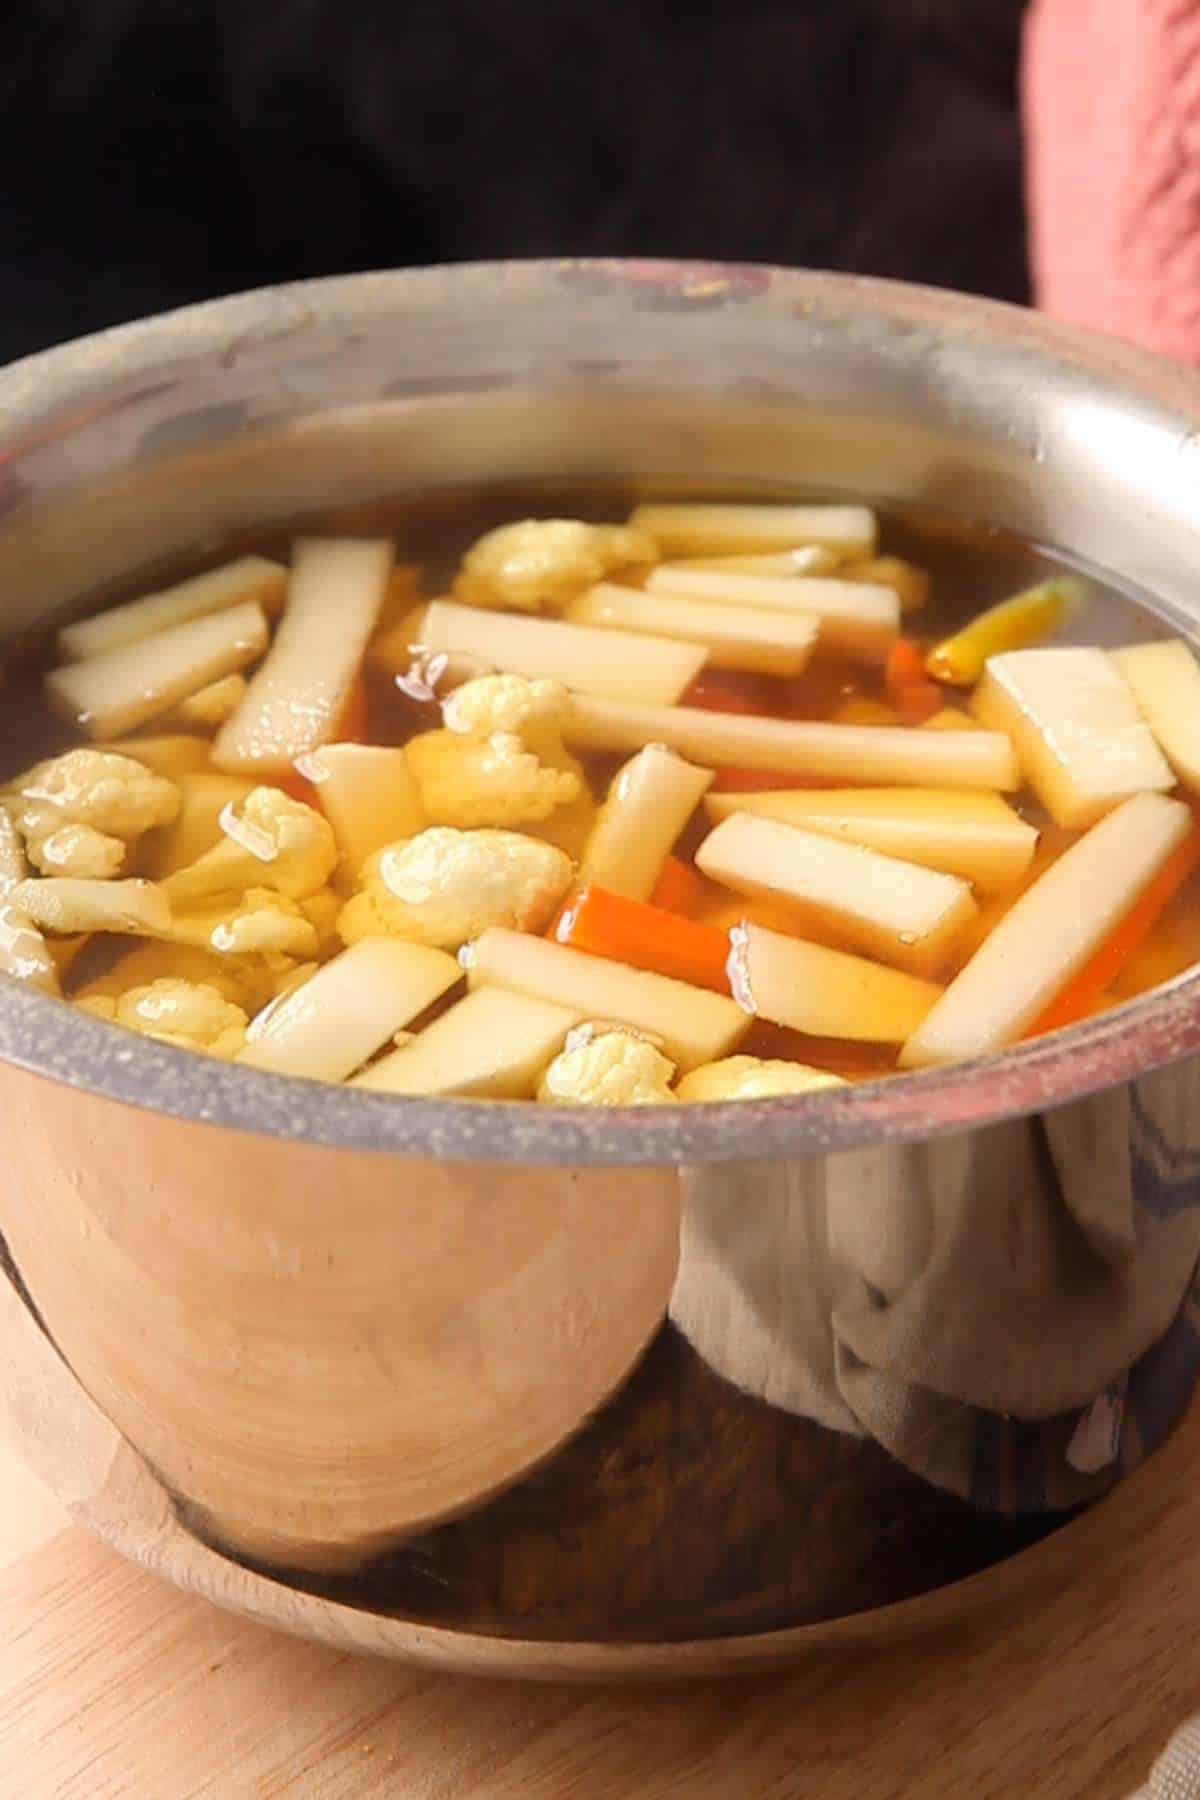
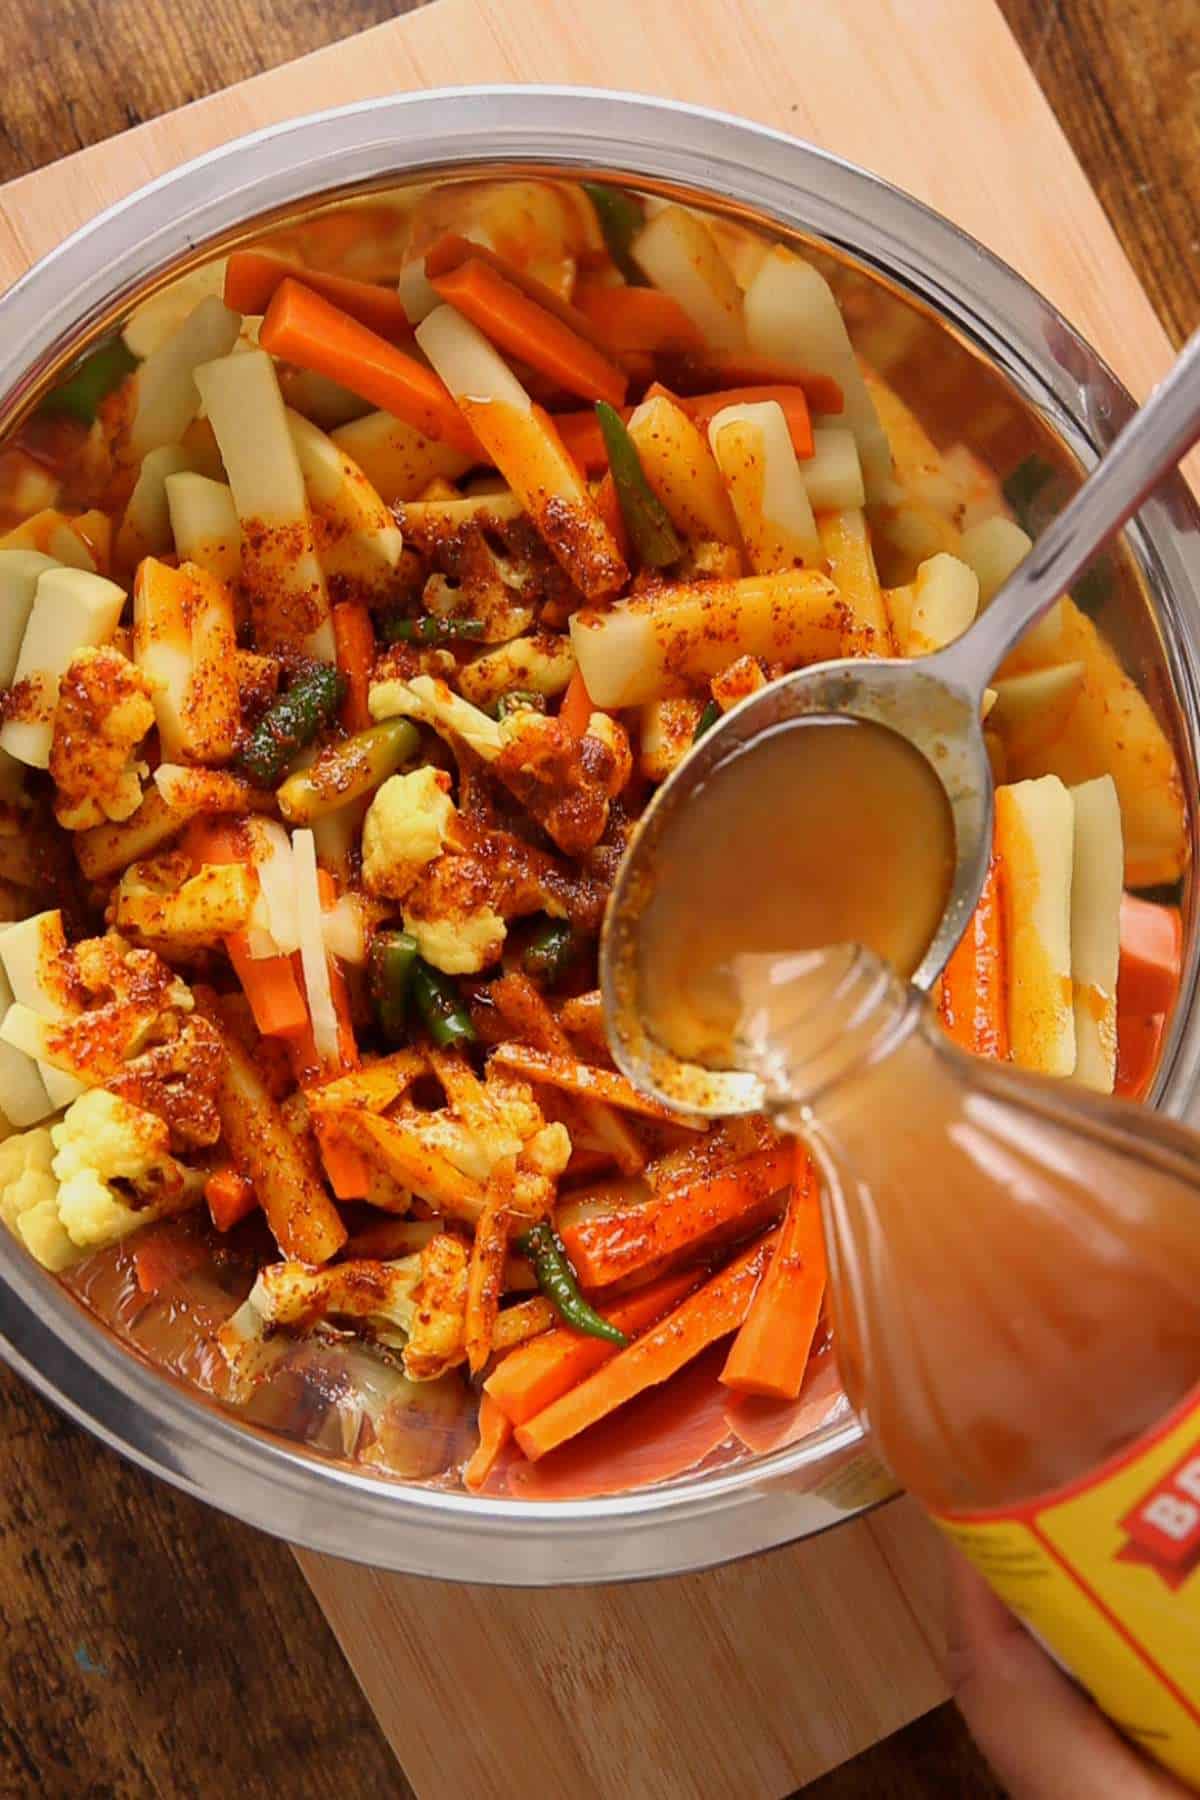
- Pour the tempered mustard oil over the vegetables. Add the apple cider vinegar. If you want to add sugar or jaggery, add right now. Using a dry spoon,mix very well. Taste a tiny bit and adjust the salt and vinegar if needed.
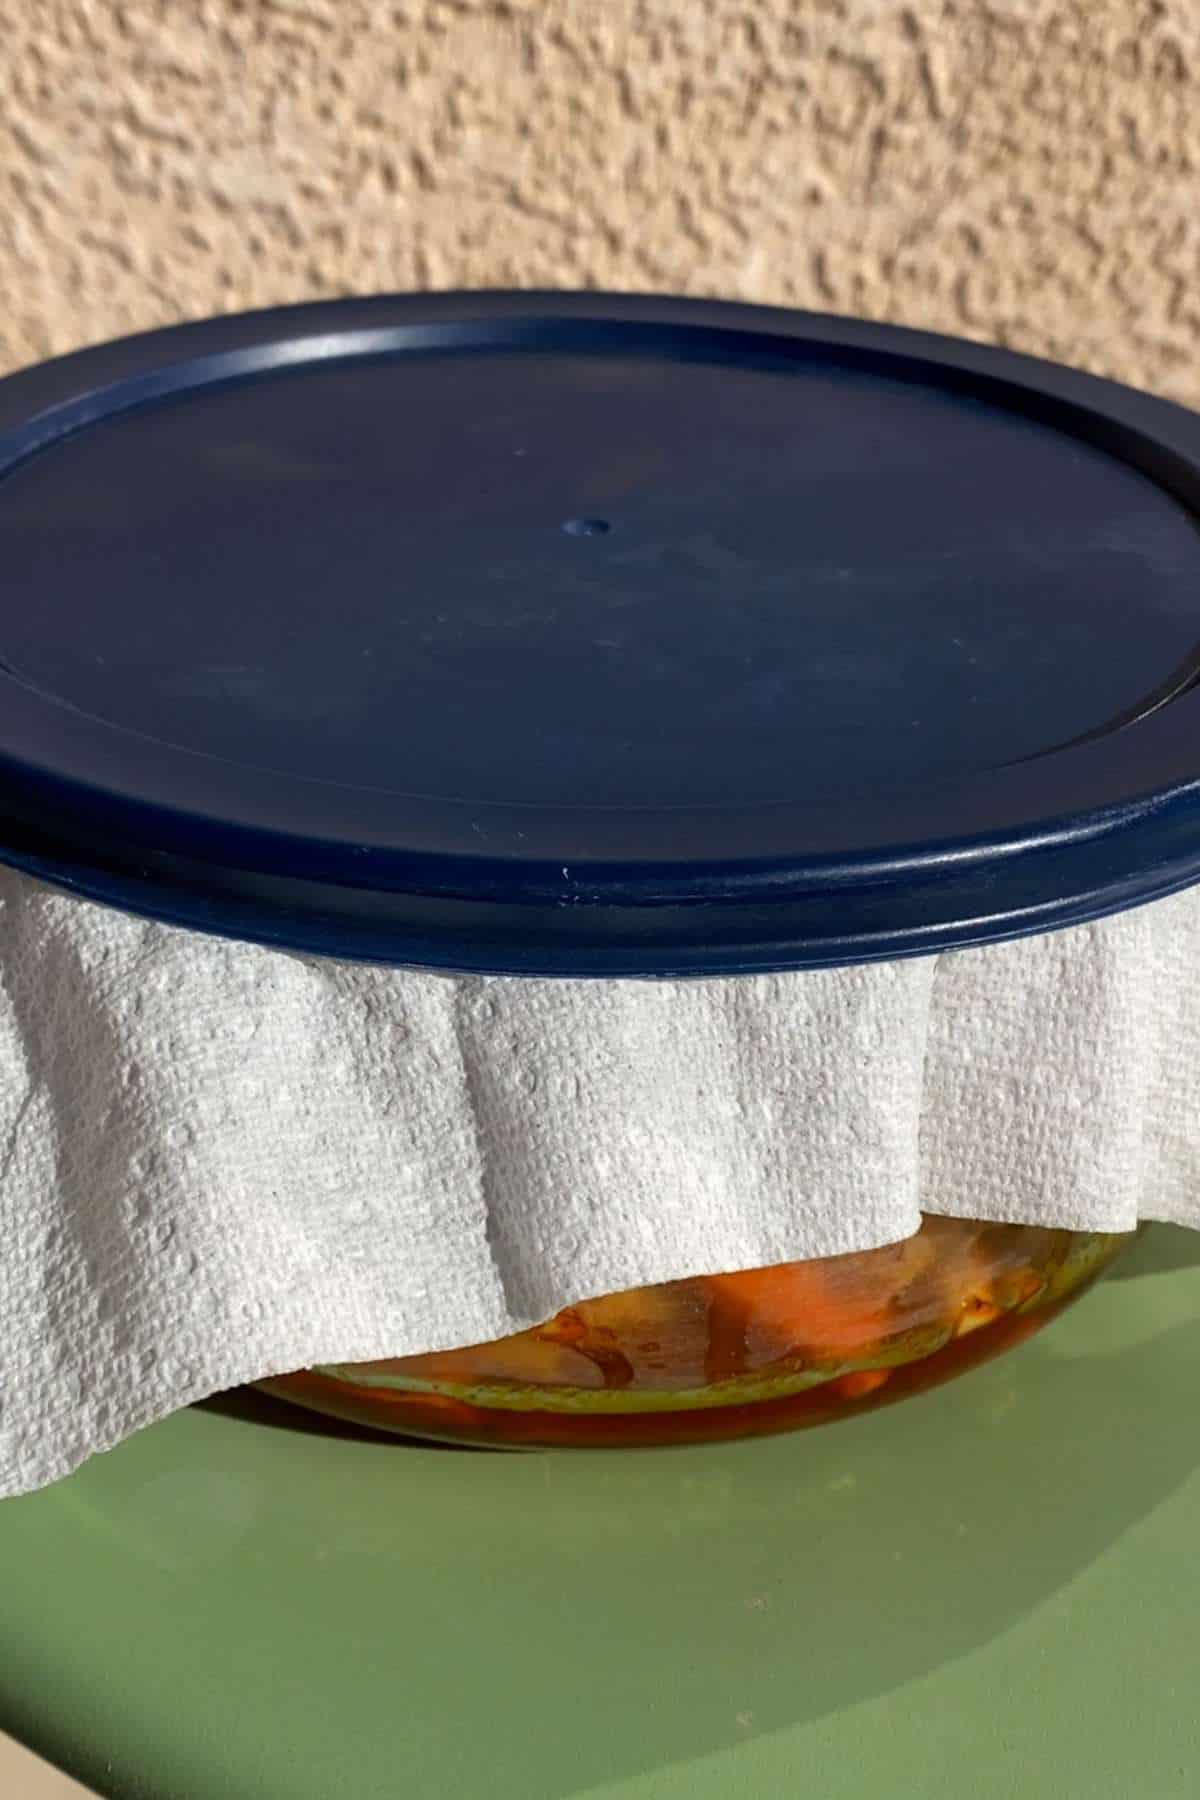
- Transfer the pickle to a dry clean glass container or jar. Cover the mouth of the container with a cheesecloth or muslin or paper towel.
- Ideally, the pickle should be kept in winter sun for 2-5 days. Here in bright Las Vegas sun, it took 3 days to develop that tang. However, if you don't get much sun where you live, place the container in a dry, warm spot of your kitchen. Mix or shake the pickle with a clean spoon couple times a day. If you feel that the muslin or paper towel is wet, change it.
- The pickle should be ready to consume in 2-4 days. Always use a dry clean spoon to serve it. It stays good for 2 weeks without needing refrigeration during winters.

Storing & Serving Suggestions
Store the achar at room temperature on your kitchen counter or cabinet during winters. If you making it during warm months, keep it refrigerated. It is best to use sterilized glass containers for strorage. Always use a clean and dry spoon to serve them. Never touch the achar with your hands.
It stays well for 2 weeks. My recipe makes a small batch and for the two of us, a batch lasts about 10-12 days. I don't make a large batch because I feel that as the pickle ferments, the vegetables start losing their crunch and get soft (that I don't prefer)
Serving - We love this achar with winter meals. I love it with parathas, spring onion sabzi and a bowl of yogurt. It is great with stuffed parathas too.
Another way is to serve with sarson ka saag or palak paneer and roti. Khichdi and this achar tastes great too.
You can serve it with meat dishes like lamb or tikka too.
My Tips
- Cut the vegetables in small and similar sizes. How the vegetables are cut affects the overall texture of the pickle manifolds. I learnt this after making many vetches of this achar. Vegetables when cut smallish and similar to each other look good, they ferment in more or less the same time and are appetizing to eat.
- Dont cook the vegetables in water. Dont leave in the hot water beyond time mentioned in the recipe. This achar needs to have crunch in vegetables. It wont taste good with soft vegetables.
- Use fresh vegetables and fresh spices (that aren't lying around for more than 3 months in your cabinet).
- If you are using organic daikon and carrots, no need to peel the skins if they look clean and spotless. Just scrub to remove dirt from the skin.
- Make sure that the vegetables are fully dry before you start pickling. Water is number one enemy of any pickle. Your achar will catch fungus if there is moisture in the vegetables.
- My suggestion is to make small batches of this achar every 10-15 days or so through out the season and finish off a batch before making next. This makes sure that the vegetables remain crunchy. This achar doesn't last year long.
- Taste a little bit of achar masala, and adjust the red chilli powder accordingly. Remember we have also added green chillies.
- There is no substitute for rai seeds (tiny brown mustard seeds) and mustard oil. However these two ingredients are easily available in indian stores.
Variations
- Add sem phali if you can find it in indian stores. These are small board beans. Blanch the beans along with other vegetables.
- Add beetroot. You can add a small beetroot. However, it will change the color of the achar.
- Use Kacchi haldi (fresh turmeric root) cut similar to ginger. No need to blanch the haldi.
- If you like sweet pickles- you may add a tablespoon or two of jaggery when you add the vinegar.
- Add lemon pieces. Cut the lemon in very small pieces (else the skins will taste bitter) and remove the seeds before adding.
- For a gluten free achar- make sure that the hing you are using is gluten free.
This blog post has been updated from the archives, I first published this recipe on 12/05/2012.

Gajar Gobhi Shalgam Ka Achar
Equipment
- Large Coking Pot
- Colander
- Sauce Pan
- mixing bowls
- Kitchen towel
Ingredients
- 130 g turnip 1 medium turnip, peeled, cut and diced
- 140 g carrots peeled and cut into batons
- 130 g mooli (daikon) peeled and cut into batons
- 100 g cauliflower florets
- 25 g fresh ginger peeled and julienne
- 6-8 green chilli stems removed, whole & slit or halved
- 2 litre water
- ½ teaspoon salt
- 1 teaspoon turmeric powder
Achar Masala
- ¾ cup mustard oil
- 1.25 teaspoon rai seeds brown mustard seeds, crushed into a powder using mortar pestle
- ½ teaspoon turmeric powder
- ½ teaspoon red chilli powder cayenne
- ¼ teaspoon hing asafetida
- 1.5 tablespoon achar masala store bought our use masala from any home pickle
- 1.25 teaspoon salt
- 1 tablespoon Apple cider vinegar
Instructions
Prepping the vegetables (Cut, Blanch & Dehydrate)
- Thoroughly wash all the vegetables under stream of running water to remove all the dirt. If you are nit peeling carrots, scrub the skins lightly.
- Cut the carrots and daikon into 1.5 inch long, not too thick batons.
- Peel the turnip skins and dice them(keep the thickness same as other vegetables). Cut off the cauliflower stems leaves and cut small size florets.
- Peel the ginger and cut juliennes. Remove stems from green chillies and slit them if leaving whole. Or half them.
- In a large cooking pot, bring water to a rolling boil. Once boiling, add the salt & turmeric, let boil for 3-4 minutes and then take the pot off the stove.
- Immediately add the prepped vegetables and let blanch for 5-6 minutes. Dont let overcook else the pickle wont be crunchy.
- Drain using a colander and then spread the vegetables on a large kitchen towel to air dry completely for 2-3 hours. Turn them around at half time to dry from all sides.
- Add dried vegetables to a large mixing bowl along with prepped ginger and green chillies. Make the achar masala now.
Make The Achar Masala
- Add mustard oil to a pan and heat up on stove till slightly smoky. Take off the stove and wait for a minutes to cool off.
- Temper the oil with powdered rai, turmeric and red chilli powder, achar masala, salt and hing. The spices should not sizzle but we want to add to hot oil to get best flavor. Mix well. Taste a little bit of this oil and adjust the seasonings. At this tome the masala would taste very sharp and pungent. Pro Tip- Taste the store bought achar masala and adjust the red chilli powder accordingly.
Mix together & Let ferment
- Pour the tempered mustard oil over the vegetables. Add the apple cider vinegar. If you want to add sugar or jaggery, add right now.
- Using a clean, dry wooden spoon or your hands, mix well so that all the vegetables are well coated with the spices & oil. At this point, if you taste, the pickle will be very bitter. But dont worry, it will be okay after fermenting.Again taste a tiny bit and adjust the salt and vinegar if needed.
- Transfer the vegetables to dry clean glass container or canning jars. Don't fill till the top of the jar but at the same time do not leave a lot of room for bacteria in air to get moldy. Leaving ½" space from the top is okay. If you are using jars with metal lid, make sure to cover the mouth of jar with muslin or cheesecloth to avoid the contact between pickle & metal.
- Ideally, the pickle should be kept in winter sun for 2-5 days. Here in bright Las Vegas sun, it took 3 days to develop that tang. However, if you don't get much sun where you live, place the container in a dry, warm spot of your kitchen.
- Mix with a clean spoon couple or shake the jar couple times a day. If you feel that the muslin or paper towel is wet, change it. The pickle should be ready to consume in 2-4 days. .In Las Vegas winter sun, it took about 8-10 days to get that stage.
- The pickle is ready when the spices taste sour and you see vegetables releasing their juices at the bottom of the jar. Note - You would want to check the salt of the pickle after 2 days and adjust. By this time, the vegetables would have absorbed the salt and flavors of pickling spices.
- There is no need to refrigerate.This pickles stays good for 2 weeks. Always use a clean spoon to serve. Never touch the pickle with fingers since this can propagate bacterial formation and your achar may go bad.

Kay Rodriques says
How do you "sun cook?" Is it simply just leaving them in the sun to parch, like you'd do with coffee beans, for example???
Tanvi says
yes. Leaving it in the sun to ferment.
Kay Rodriques says
Thanks! It i
s "winter" in the Bay Area of California but I have a sunny kitchen window. Will try to sun some veggies for pickling there.
Tanvi says
I live in Las Vegas so ample sunlight here..bay area is not too bad, atlas no snow 🙂 It may take a few days longer than what I mentioned in the recipe but you will know from the pungent, acidic aroma when the pickle ready!