

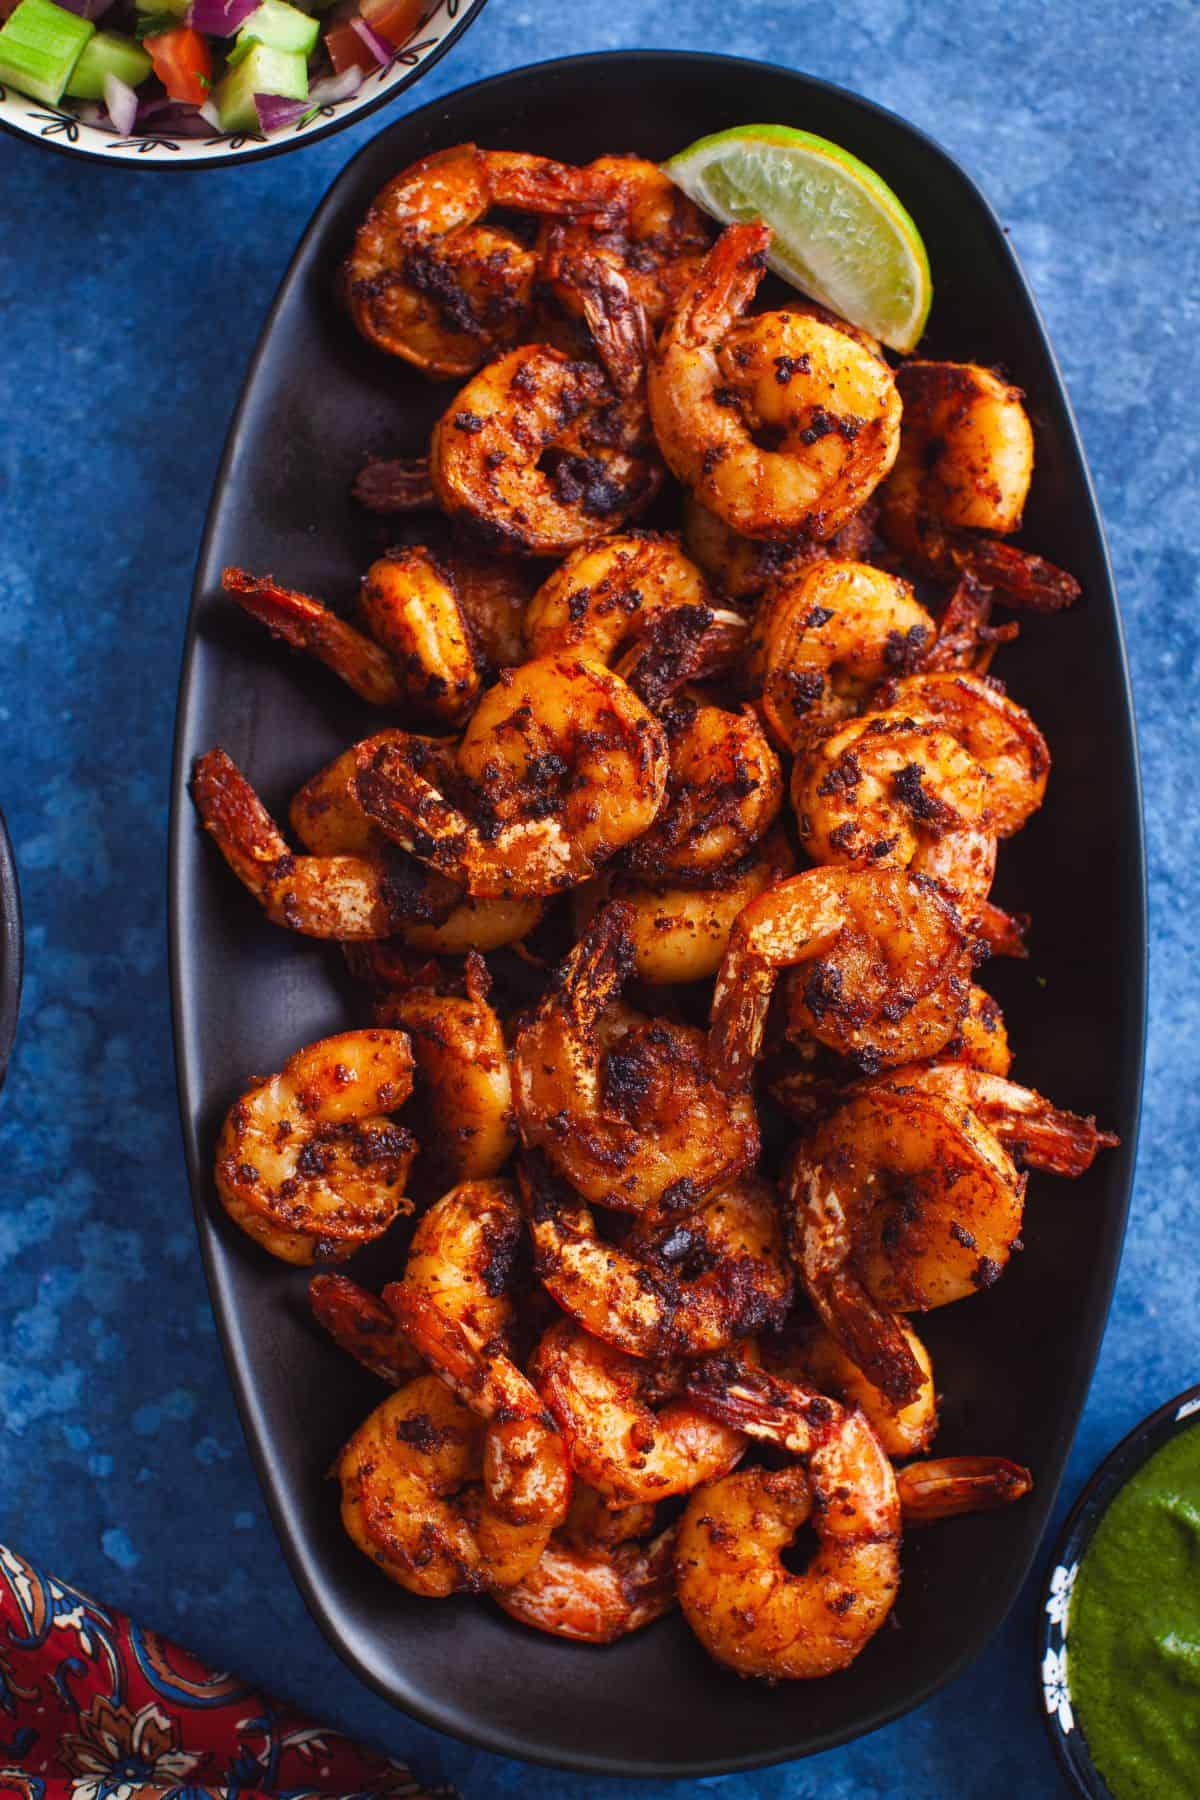
This tandoori shrimp recipe hits the table fast, but tastes like you've been working on it all afternoon. The shrimps soak up the spiced tandoori marinade and cook in minutes over high heat in a pan. You get charred smoky edges, juicy centers, and just enough kick to keep going back for more. It's messy, addictive, and meant to be eaten hot, straight off the pan! They can be air fried too (instructions included!)
Whether it's fish tikka or shrimp tikka, seafood and tandoori flavors just crackle together! Unlike classics such as tandoori chicken, the shrimp need just 20-30 minutes of marination and as they sit in a tandoori marinade, the yogurt tenderizes them while the bold masala clings to every curve. What you get is big restaurant style flavor in every single bite.
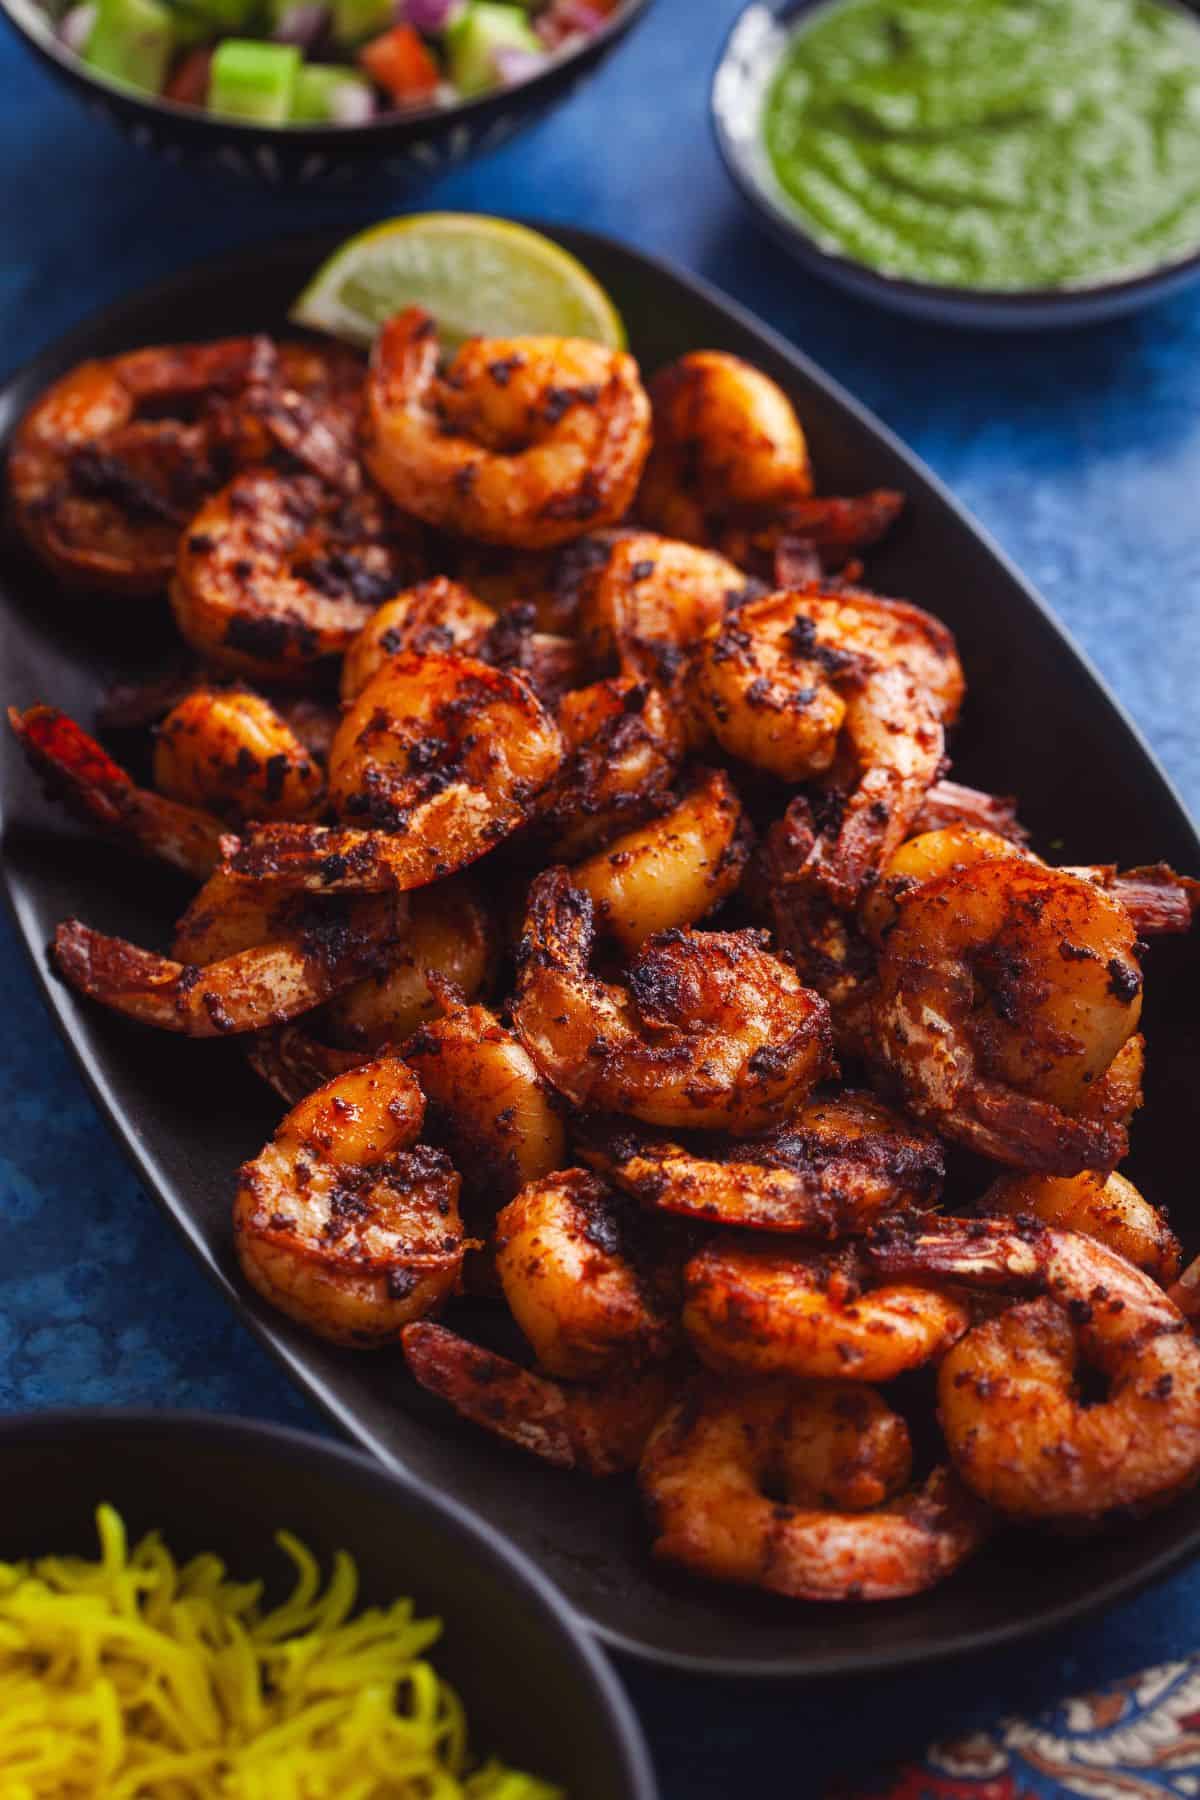
Also called prawns tikka or tandoori jhinga on restaurant menus, these are perfect finger food! Thread them onto skewers if you wish. Cook in air fryer or sear them on a hot cast iron pan(my go-to). The heat blisters the marinade into crisp bits while the shrimp stay juicy inside. That smoky tandoori aroma is unmistakable! Serve them hot with onions, cilantro, a squeeze of lemon, maybe a pinch of chaat masala. Always a crowd favorite!
Shrimp Selection Matters
- Jumbo or extra large shrimp work best! They are meaty and do not overcook as soon as they hit the hot pan.
- I like to buy deveined, shell-off shrimp with tails on for extra flavor and easy handling. Avoid shell on shrimp because you want the tandoori marinade to cling to the shrimp itself.
- If you're starting with frozen, just make sure to thaw the shrimp fully and pat them dry so the marinade sticks. I usually just thaw them in the refrigerator overnight-nice and easy. I know some people soak frozen shrimp in water and let them sit, but honestly, I find that method kind of messy. Plus, drying the shrimp afterward feels like more work than it's worth.
- Fresh shrimp should smell like the ocean, not ammonia. If using frozen, buy from a trusted brand, and don't skip the drying step.
- Avoid tiny shrimp here. They'll turn rubbery before they pick up any char.
Tail or no tail?
- Tail-on shrimp look fancier, hold their shape better, and are easier to pick up as finger food. That little tail also packs in extra flavor when cooked, adding just a bit more depth to the dish. Perfect if you're serving these tandoori prawns as an appetizer or a party starter.
- No-tail is neater for fork-and-knife situations or if you're stuffing them into wraps, rolls, or bowls. Less messy and no pausing to pull the tail off.
My Tips & Recipe Testing Notes
- Pat the shrimp dry. Extra moisture waters down the marinade and messes with the char. Dry shrimp = better flavor.
- Make a thick marinade. After making numerous tandoori dishes, I've found that thick, pasty marinades work best! Hung curd or greek yogurt helps the marinade cling. It coat the surface nicely and stay put while cooking, so you don't lose all that spice and flavor. The runny ones? They just make a mess and don't do much.
- When it comes to tandoori shrimp, I skip the usual double marination step that I use in some of my other tandoori recipes. Shrimp are naturally tender and quick to absorb flavor, so there's no need to double down here, one well-balanced marinade is more than enough to do the job beautifully.
- You also dont need to add the roasted besan (gram flour) in the marinade. Besan is great for helping marinades stick-especially with paneer or chicken. But with shrimp, I find it unnecessary because shrimp cook so quickly and have such a delicate taste and texture. Plus, leaving out the besan keeps the coating light and allows the natural sweetness of the shrimp to shine through.
- Don't over-marinate. 20-30 minutes is plenty. The yogurt and lemon juice work fast. Too long and the shrimp start to get rubbery due to acidic environment.
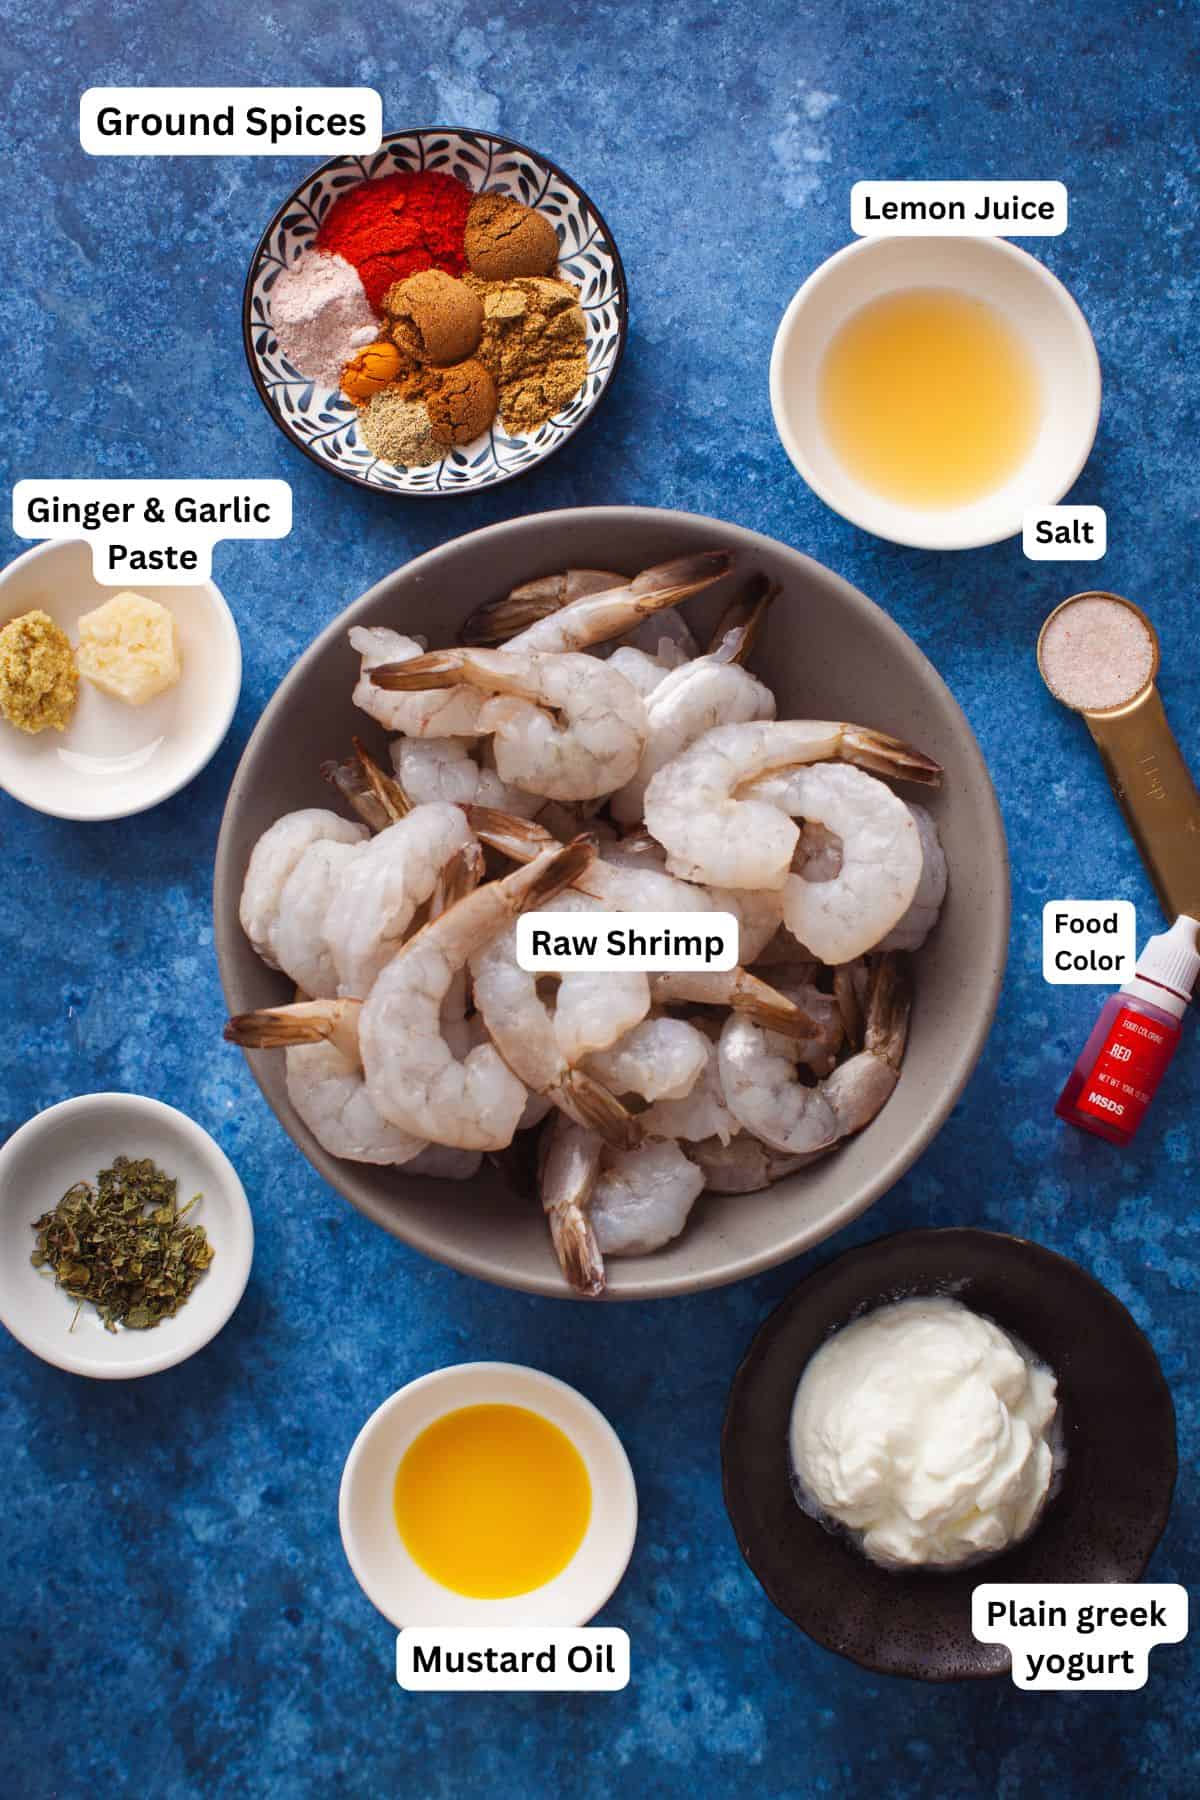
Ingredients
Instructions
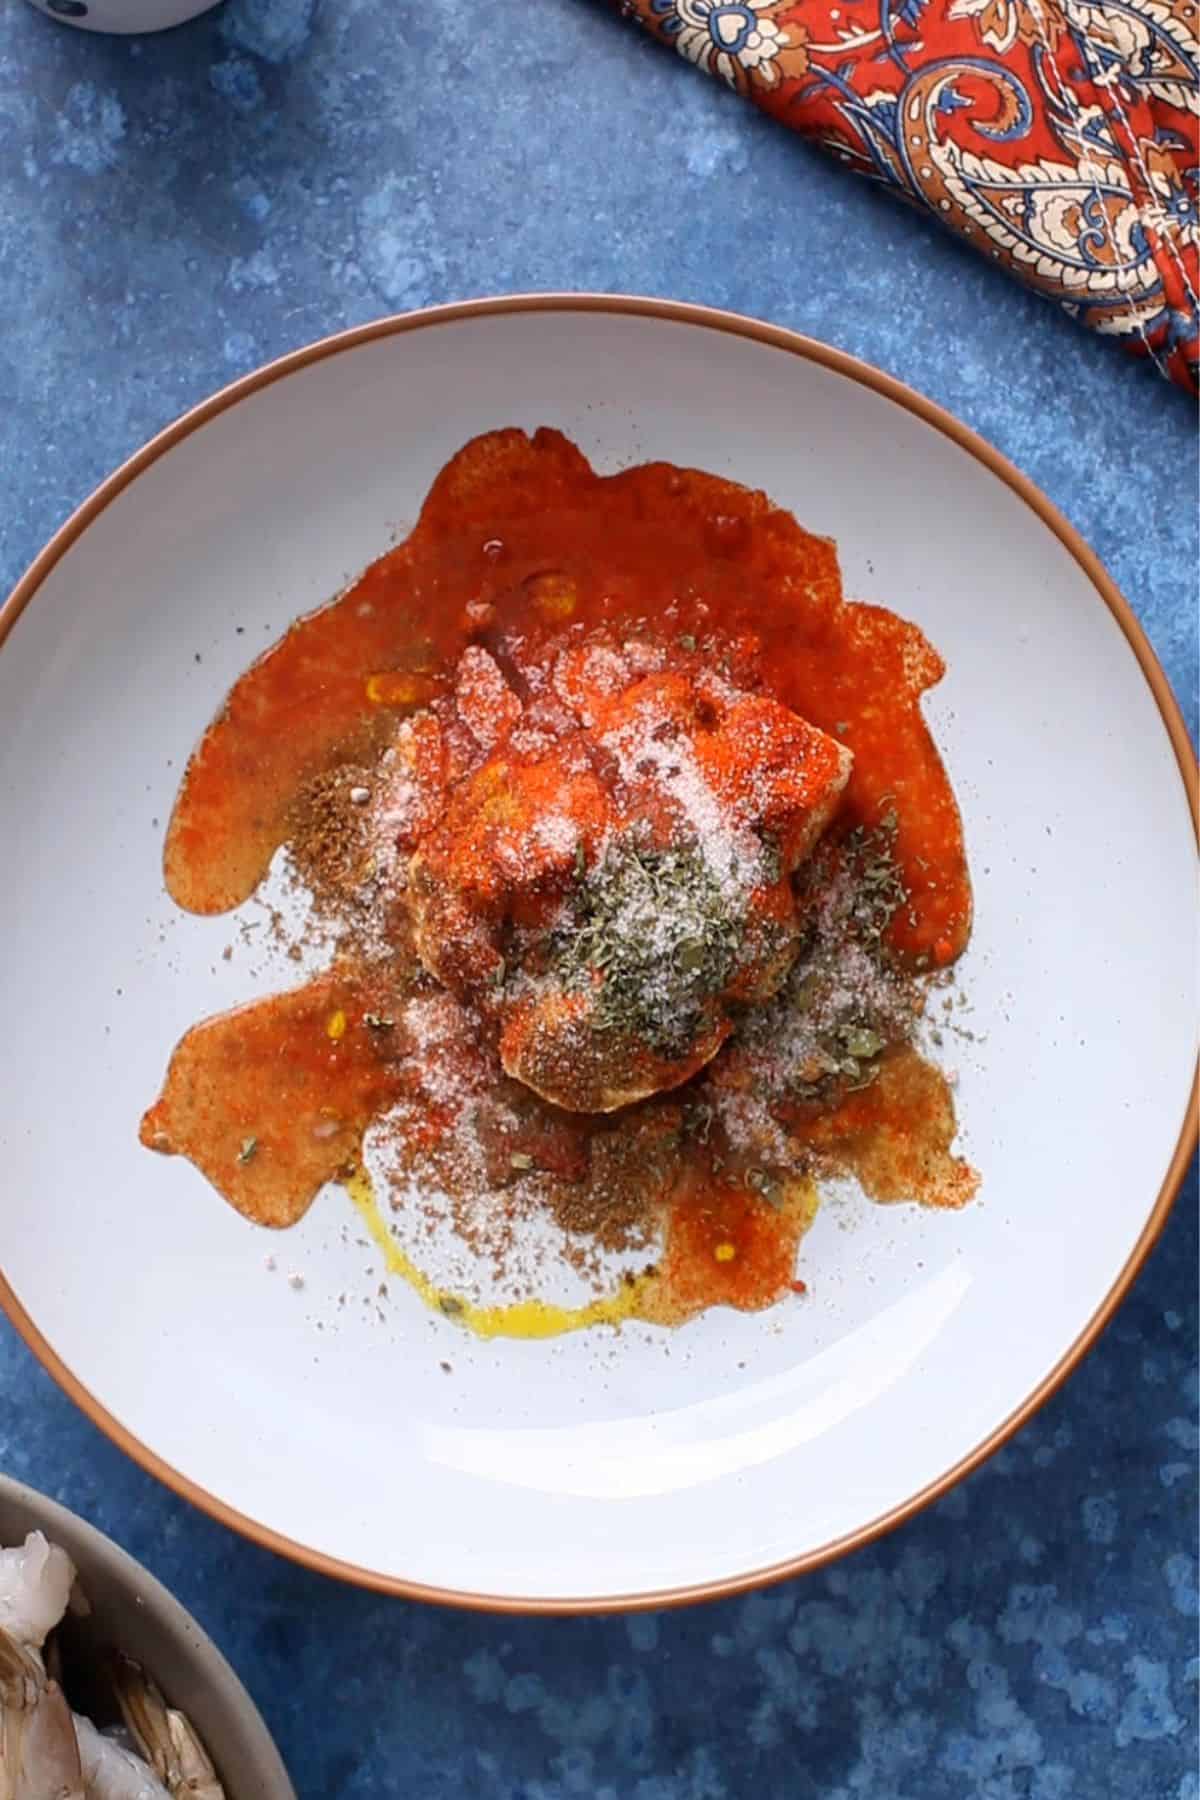
- Step 1: Place all the tandoori marinade ingredients in a large bowl.
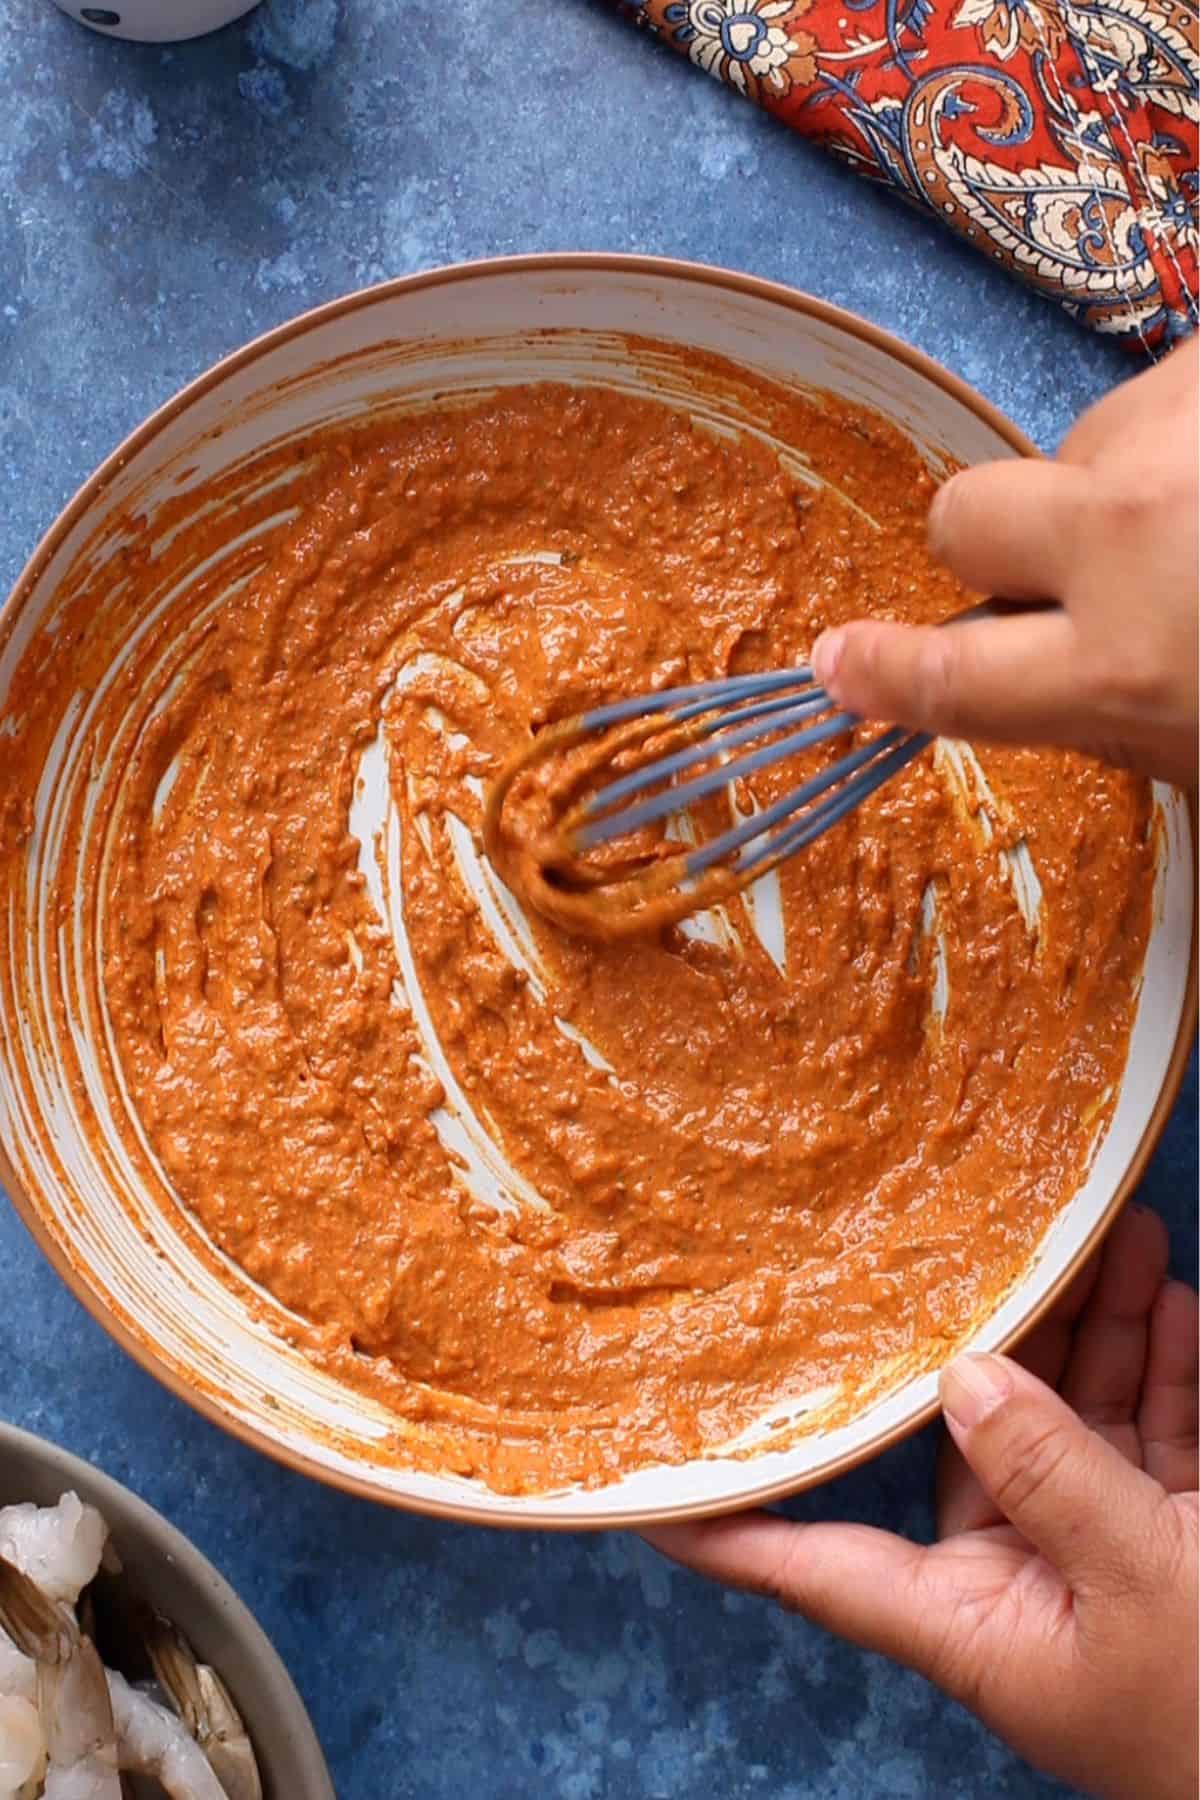
- Step 2: Using a whisk, mix very well to form the marinade. I add the food color(if using) after mixing becasue you first want to see how kashmiri red chilli powder plays after combining.
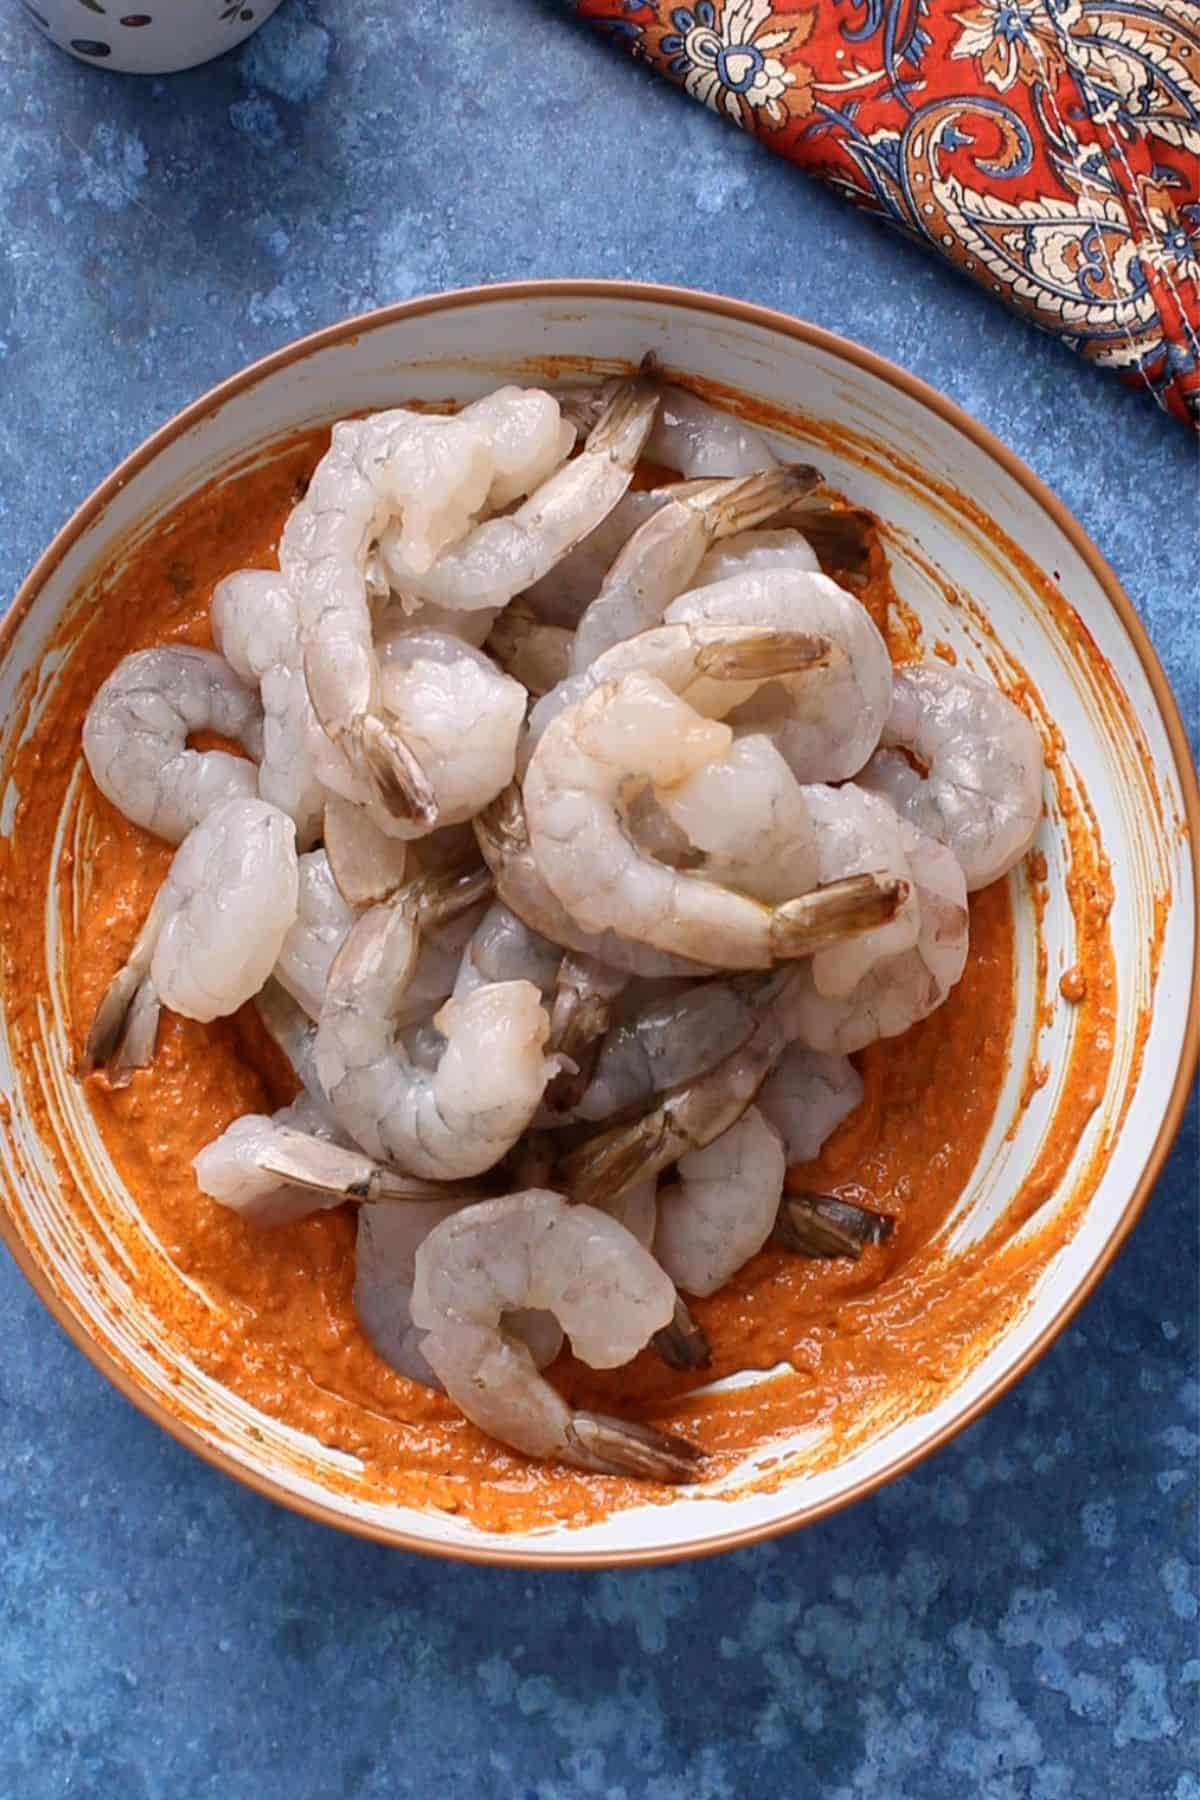
- Step 3: Pat the thawed shrimp dry using paper towels to remove any excess moisture. Add to the tandoori marinade.
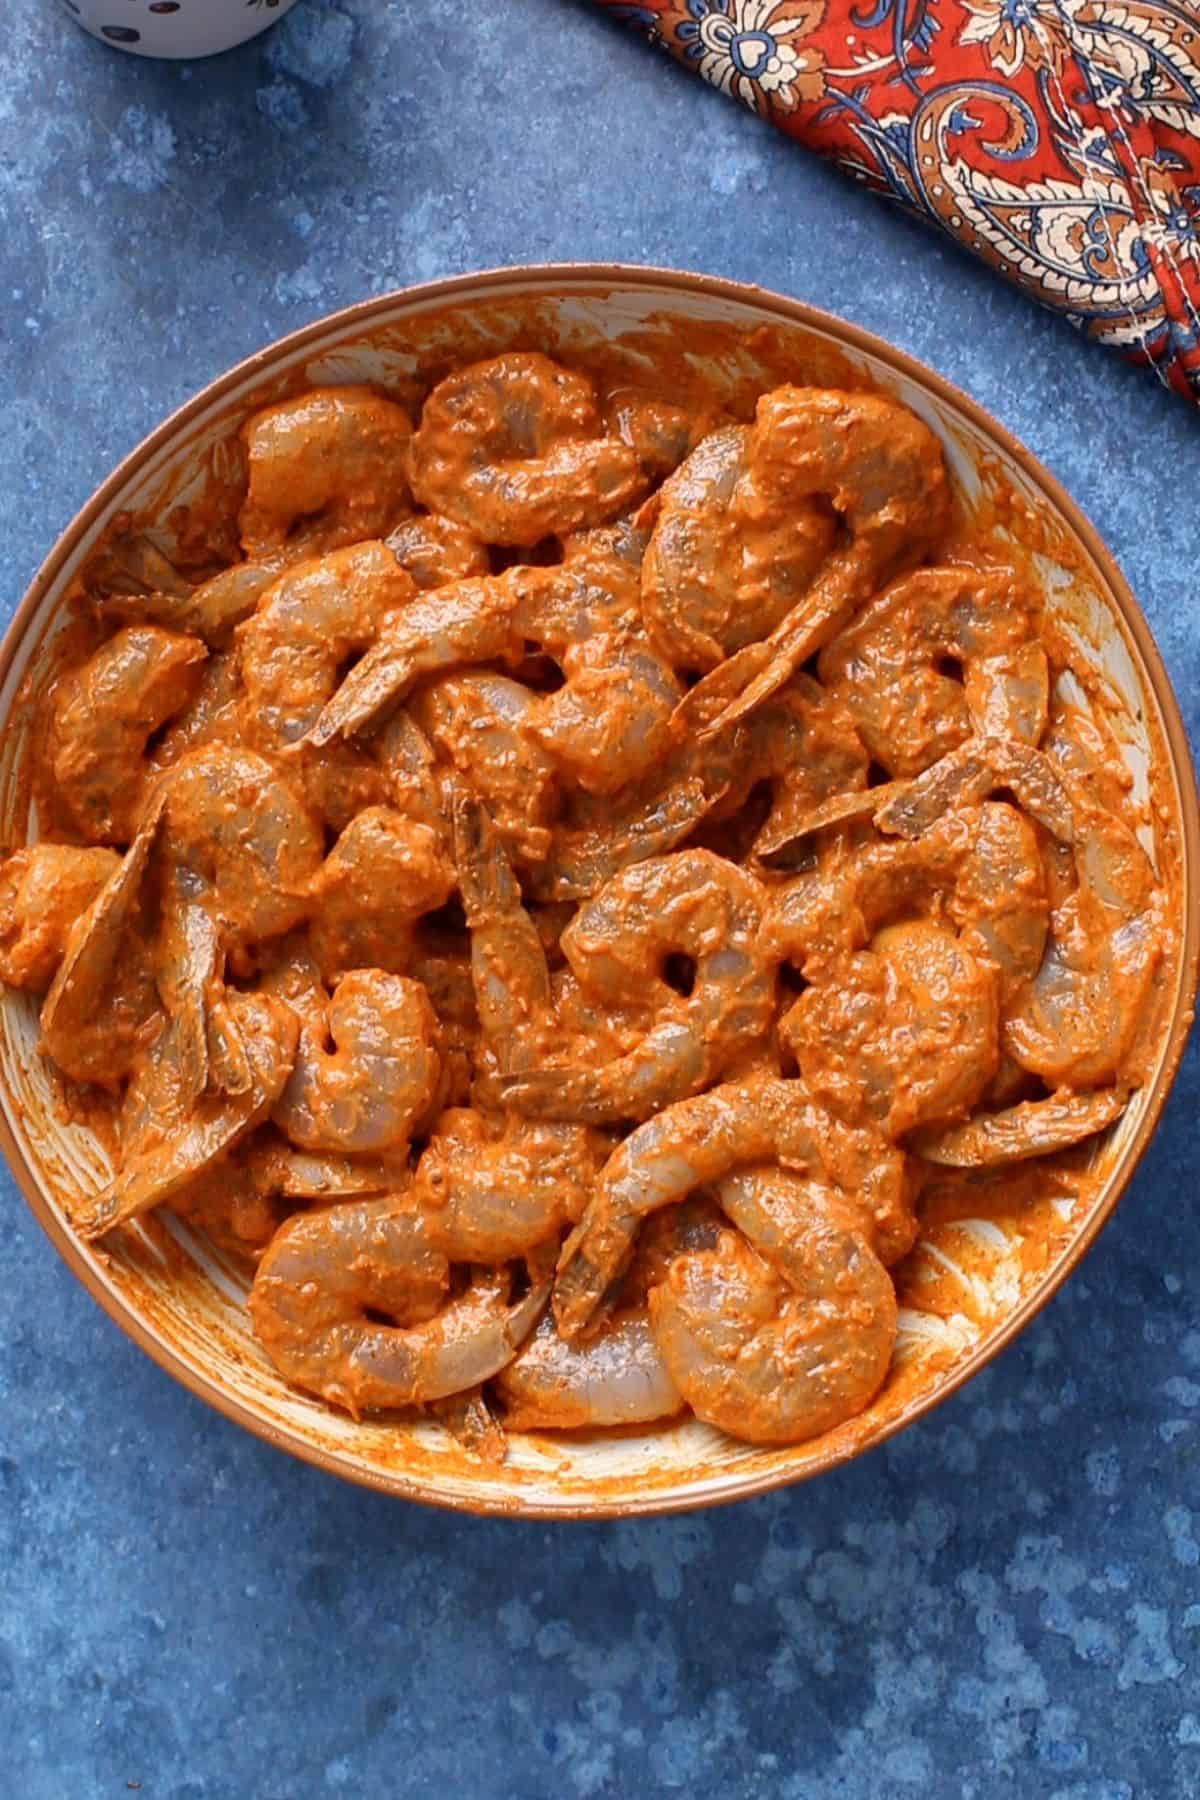
- Step 4: Using a spatula or your hands(best!), thoroughly coat the shrimp in marinade. Cover and let marinate on the kitchen counter for 20-30 minutes.
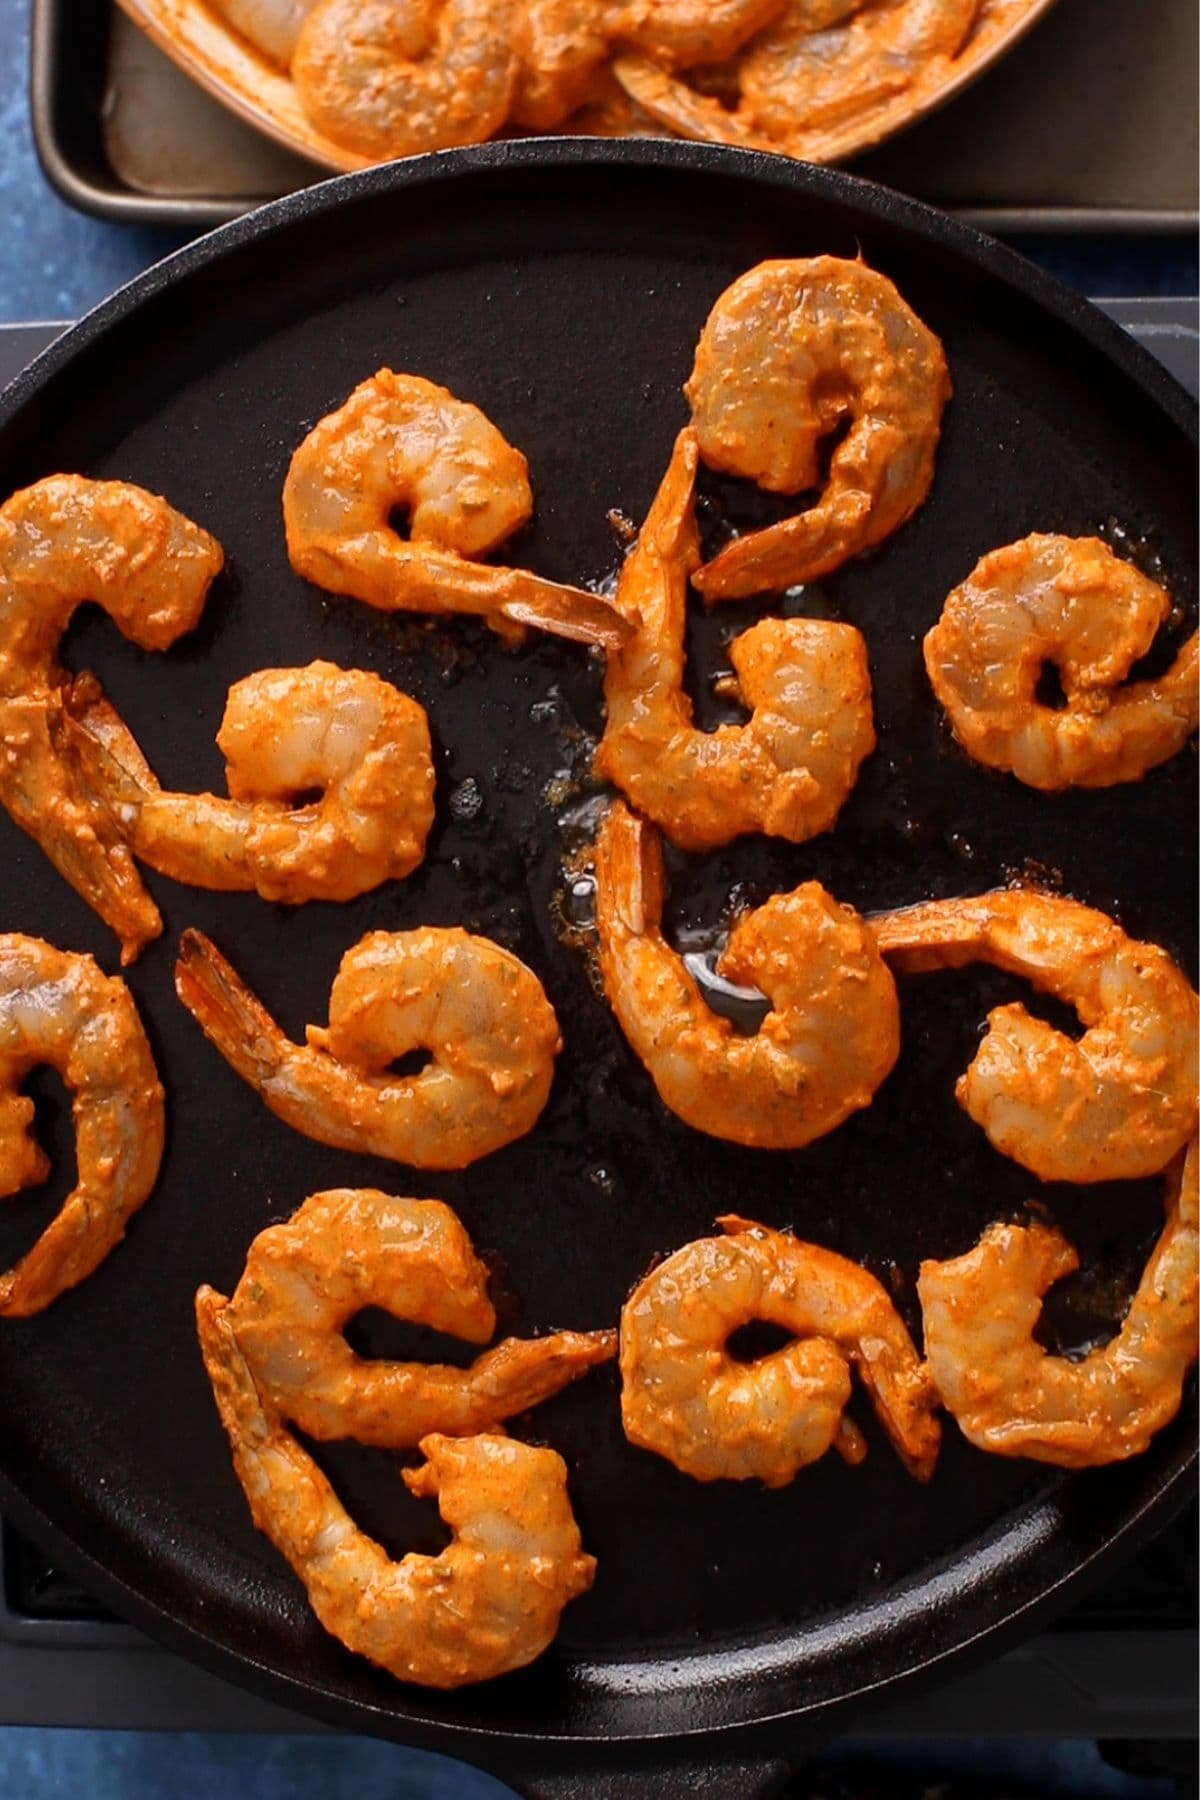
Step 5:Heat a cast iron pan over high heat. Once it's smoking hot, lightly brush it with oil. Arrange the marinated shrimp in a single layer. You should hear a satisfying sizzle as they sear.
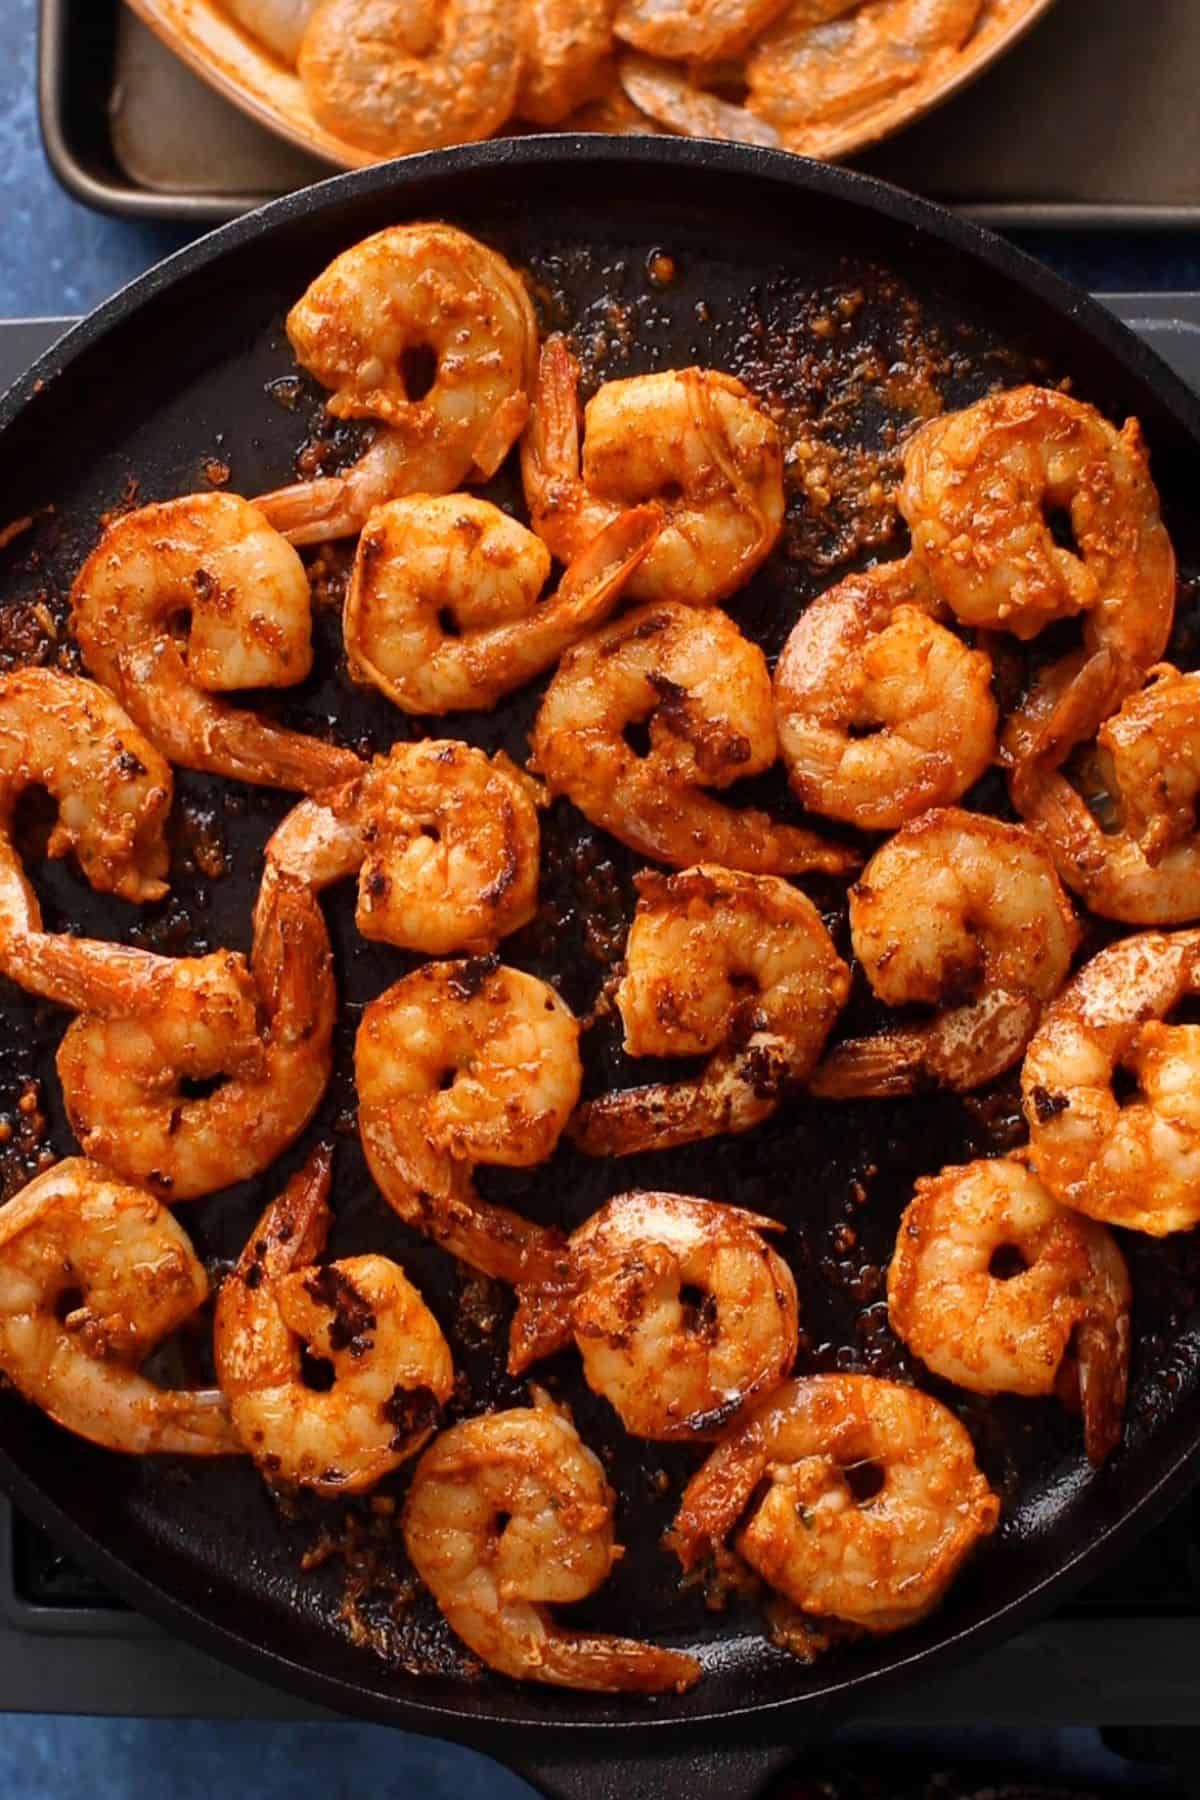
Step 6:- Let them cook undisturbed for 1-3 minutes until a golden crust forms on the bottom. Flip and sear the other side for another 1-3 minutes, or until fully cooked. Once cooked, will have opaque in the center, with a lightly charred exterior and curled tails. Serve hot!
Serving
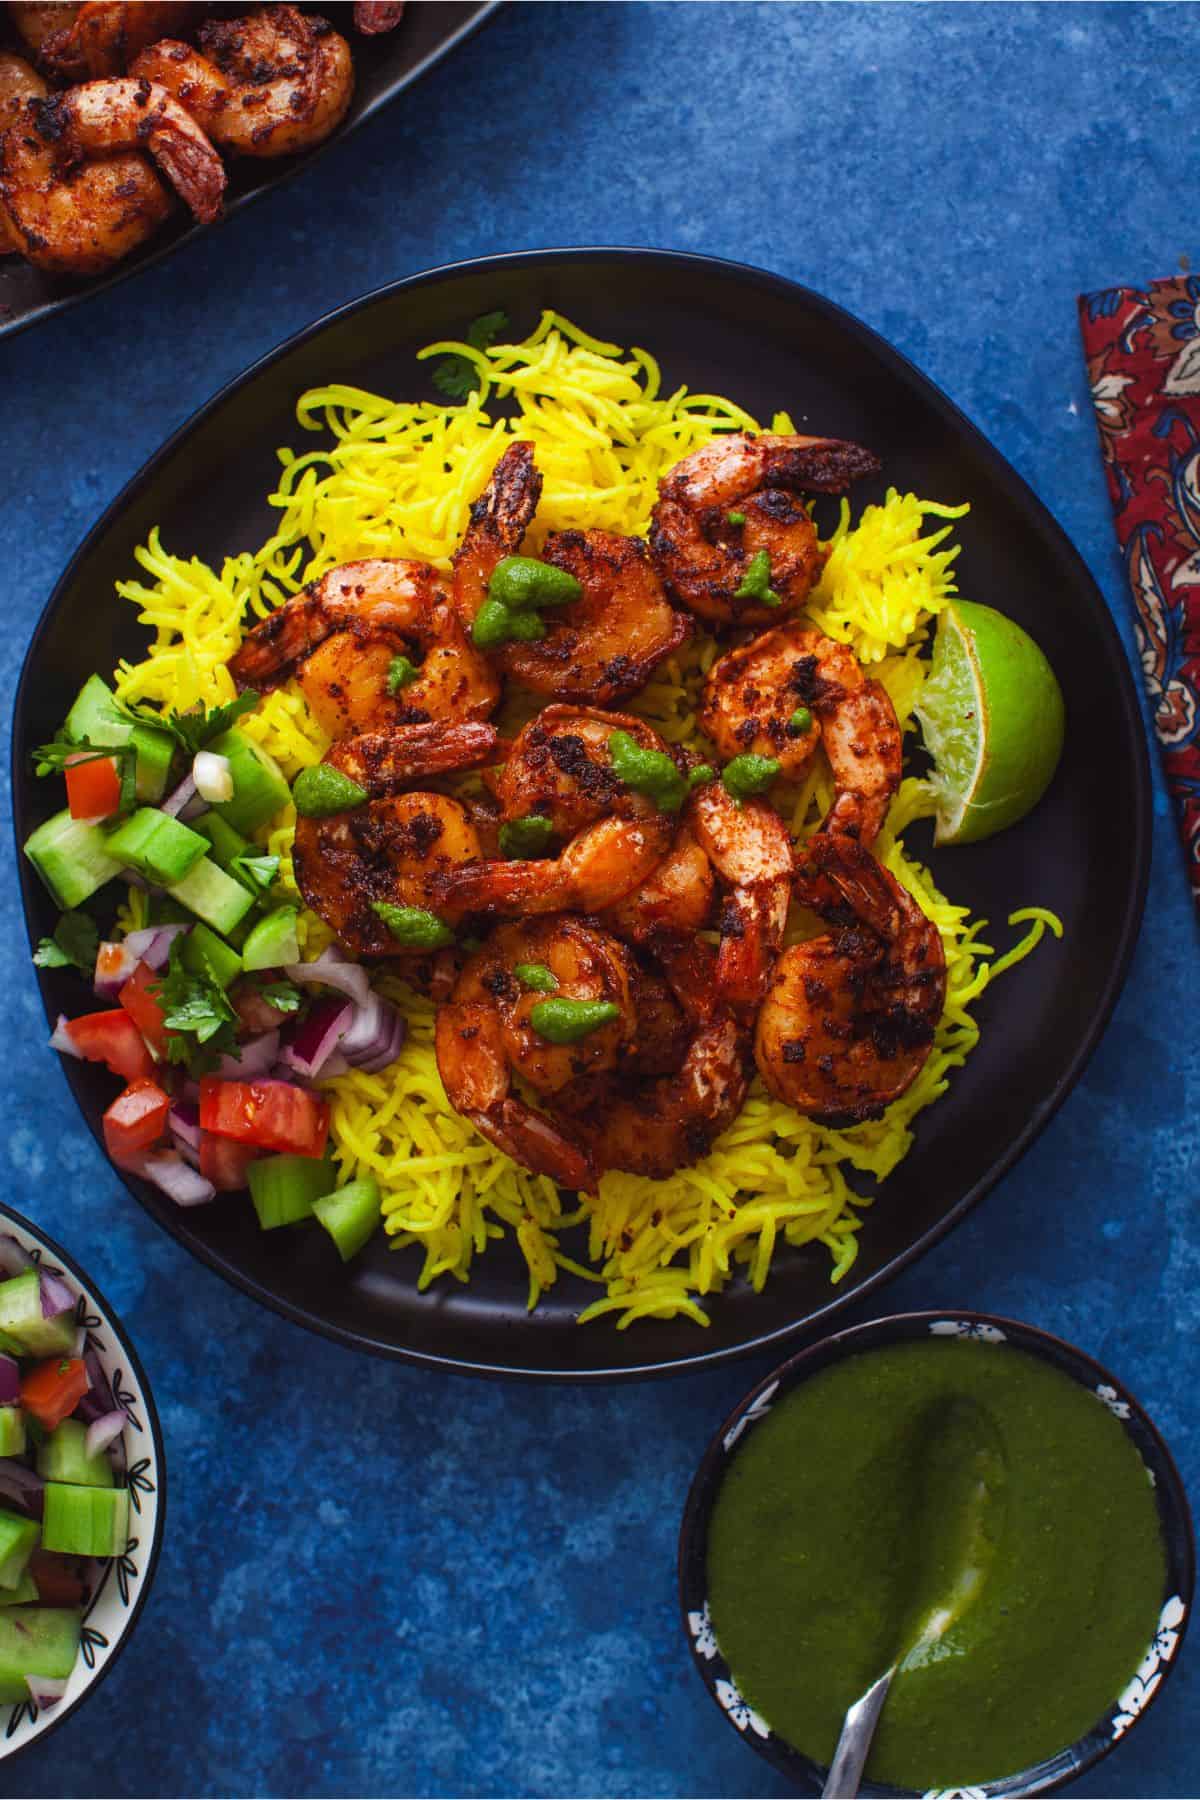
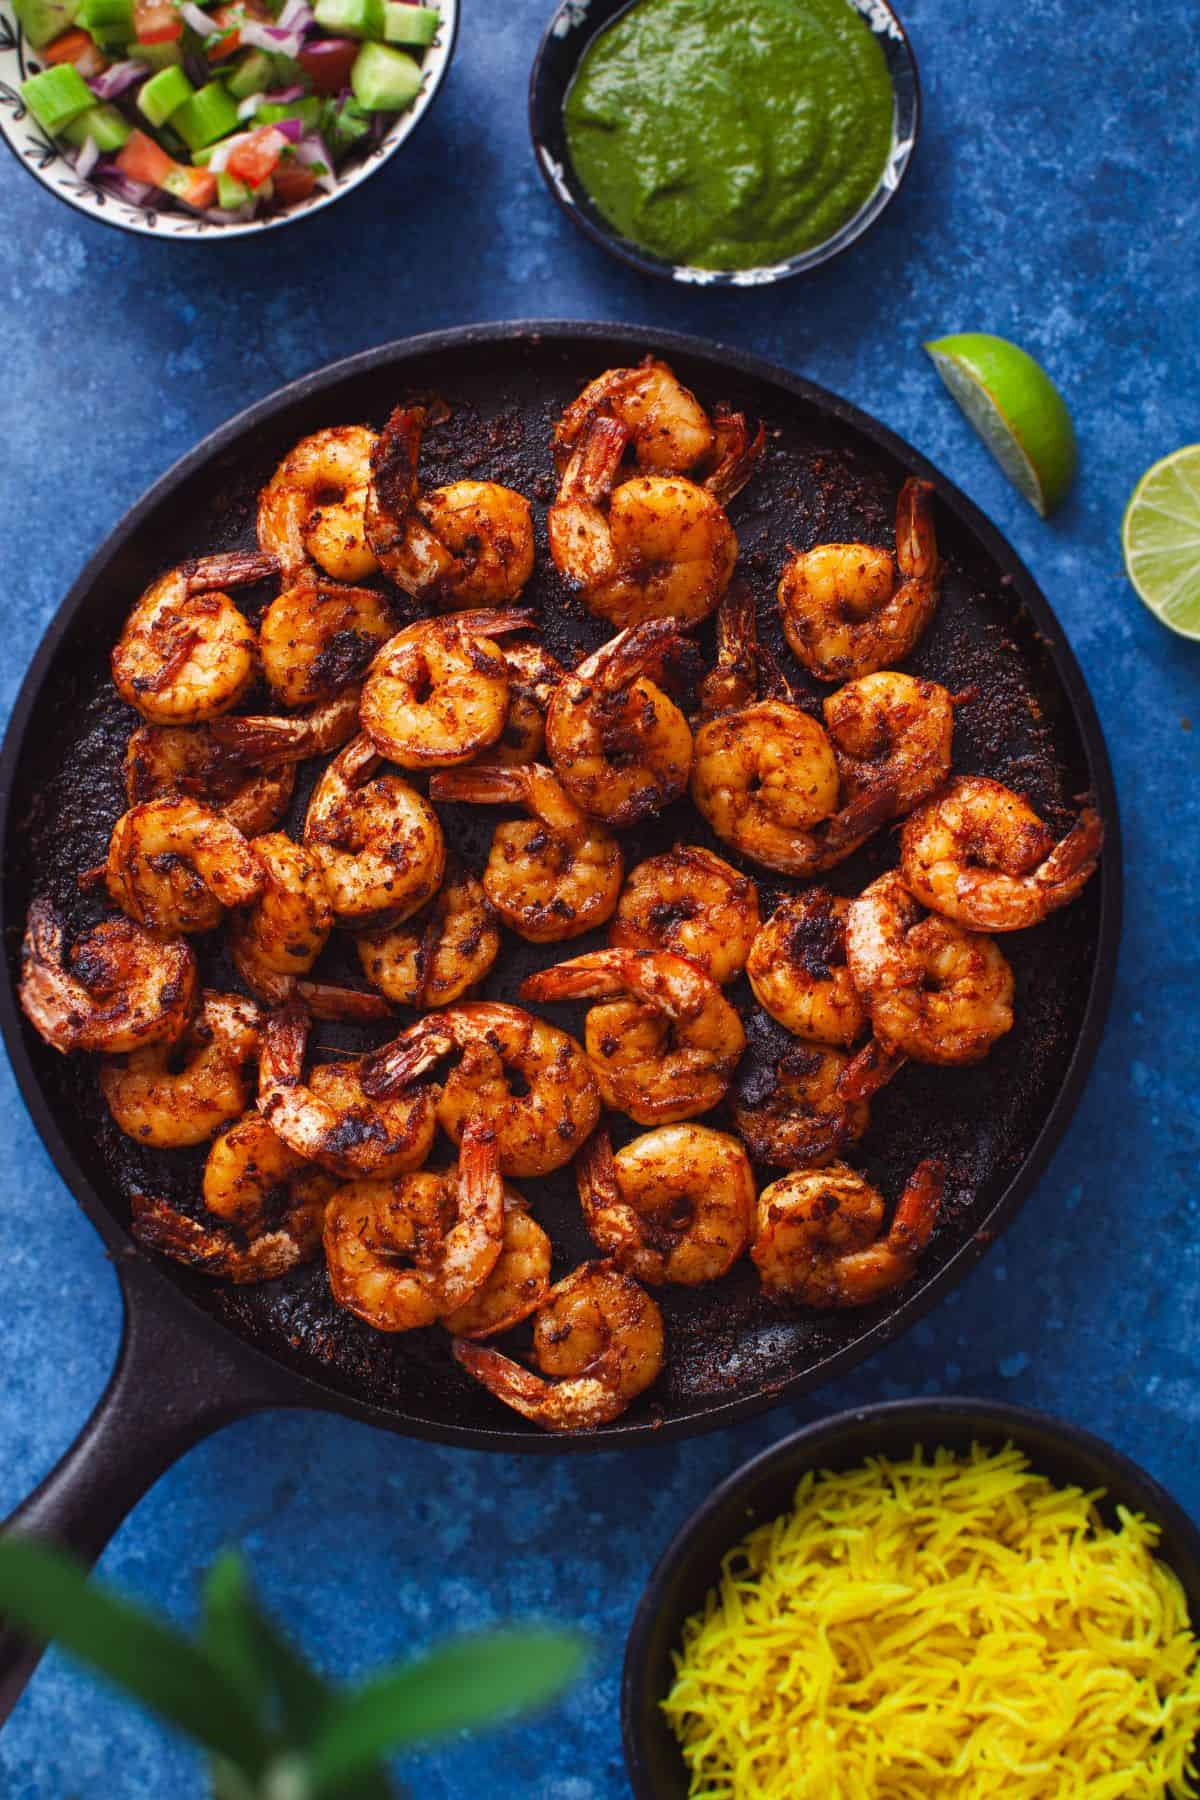
- If I'm serving the shrimp as an appetizer, I like to pair them with a big bowl of kachumber (the fresh, crunchy Indian salad) and a tangy cilantro chutney on the side. If you're into a hint of sweetness, a spoonful of mango chutney works beautifully too. During summers, I pair it mango lemonade all the way!
- Want to turn it into a meal instead? Just serve the shrimp over yellow rice. It's really just simple cumin rice with about ½ teaspoon of turmeric powder added for that gorgeous golden color and a subtle earthy flavor.
Pan fried Tandoori Shrimp Tikka (Air fryer Option)
Equipment
- Cast Iron Griddle
Ingredients
- 500 g raw shrimp I use jumbo size, deveined, tail on
- ¼ cup(~70g) plain greek yogurt or super thick yogurt, I use full fat
- 1 teaspoon ginger paste
- 2 teaspoon garlic paste
- 1 tablespoon lemon juice freshly squeezed
- 1 teaspoon mustard oil or melted ghee
- 1-2 drops red or orange food color optional
- 1.25 teaspoon salt adjust to taste
- 1 teaspoon kasuri methi dry fenugreek leaves
- Oil or melted ghee for cooking, as needed
Ground Spices (Tandoori Seasoning)
- 1.5 teaspoon Kashmiri Red Chilli Powder
- ⅛ teaspoon turmeric powder
- ½ teaspoon garam masala powder (start with ¼ teaspoon)
- ½ teaspoon black salt kala namak(skip if not available)
- ½ teaspoon chaat masala
- ½ teaspoon cumin powder
- 1 teaspoon coriander powder
- ⅛ teaspoon cardamom powder
To Serve
- Green Chutney
- Lemon Wedges
- Kachumber
Instructions
- In a large mixing bowl, add all the tandoori marinade ingredients including greek yogurt, ginger & garlic paste, lemon juice, all the listed ground spices, mustard oil, kasuri methi and salt.
- Using a sturdy whisk, mix everything together until the marinade is smooth, and well combined. See how the color of the marinade turns out. Sometimes it's vibrant enough on its own, especially if you're after a deep, smoky red rather than a bright orange. If desired, add a few drops of red food color(gives it restaurant look!).
- Pat the thawed shrimp dry using paper towels to remove any excess moisture. This helps the marinade cling better and ensures the shrimp sear properly. Add the shrimp to the marinade.
- Using a spatula or, even better, your hands, gently toss and massage the marinade into the shrimp so they're thoroughly coated. Cover the bowl and let it sit on the kitchen counter for 20-30 minutes. This gives the shrimp time to absorb the flavor without getting rubbery (which can happen if they're marinated too long).
- Place a cast iron pan on the stove and heat it over high flame. Let it get really smoking hot. This is key to getting that signature tandoori char and sear. Once the pan is ready, lightly brush the surface with ghee (or oil). Carefully place the marinated shrimp in a single layer, spacing them out so they aren't crowded (work in batches if necessary).
- Let the shrimp cook undisturbed for 1 to 3 minutes. You're looking for a deep golden crust to form on the bottom. Once that's achieved, flip them over and sear the other side for another 1 to 3 minutes, or until they're cooked through. Once cooked, will have opaque in the center, with a lightly charred exterior and curled tails.
- Transfer the hot, sizzling shrimp straight to a platter and serve right away while they're juicy and tender.
Air Fryer Instructions
- Preheat your air fryer to 400°F (200°C) for a few minutes while you prepare the shrimp. Once preheated, brush the basket with some oil. Arrange the marinated shrimp in a single layer in the basket. Don't overcrowd, give them space so they cook evenly and get that nice, slightly crisp edge.
- Air fry at 400°F for 5 to 6 minutes, shaking the basket halfway through the cook time to ensure even browning. The shrimp should turn opaque and lightly charred in spots. Keep an eye on them during the last minute-shrimp cook quickly, and you don't want them to overcook and dry out.Serve them hot!
Notes
- If I'm serving the shrimp as an appetizer, I like to pair them with a big bowl of kachumber (the fresh, crunchy Indian salad) and a tangy cilantro chutney on the side. If you enjoy a hint of sweetness, a spoonful of mango chutney complements the flavors beautifully. During summers, to drink I pair it mango lemonade. It's refreshing and ties everything together.
- Want to turn it into a meal instead? Just serve the shrimp over yellow rice. It's really just simple cumin rice with about ½ teaspoon of turmeric powder added for that gorgeous golden color and a subtle earthy flavor.
Jana says
i created this at home and it turned out so delicious that all my roommates hunted me down for the recipe. 100/10 recommend. my only regret was not making a bigger batch because it vanished in seconds. this is going into my favourite recipes of all time!! thank you so much for sharing, Tanvi. much love!!